Preliminary S/C Prep
 03-03-2008, 07:55 PM
#1
Senior Member
Thread Starter
iTrader: (10)

Join Date: May 2007
Location: Colliers, NL Canada
Posts: 476
Preliminary S/C Prep
Hey guys, thought I'd start a thread here to post some of the preliminary s/c prep work that I've been doing in the past couple of weeks. I'd be very interested in hearing any comments/tips/questions/concerns/etc. that might affect my build. I'll be asking some questions here and there, so it would be good to get some feedback as I proceed.
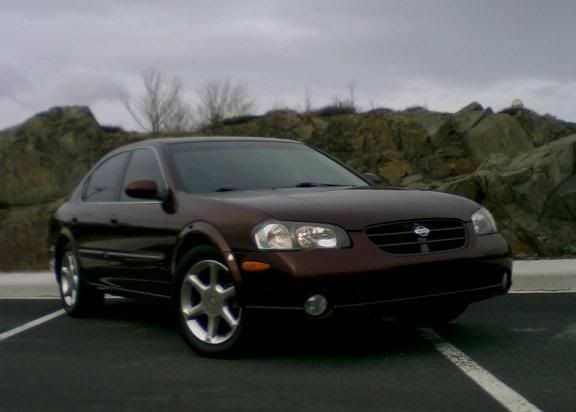
A little background about the car. I have a 2001 SE (20th Anniversary Edition) Auto (VLSD). I bought the car last February with ~87k km's on it (About 55k Miles). The car sat for a few months while I was away on a work term, so I began to drive it in May. I lost the transmission in June.
When I got back in May, I had the "Mechanics class" at the college my father was teaching at do a full fluids change (Oil, Transmission, Coolant, etc.)
I think that they overfilled the transmission fluid, as it was reading above the full mark. Since I knew little about cars at the time, I ignored it, and ended up paying for it. I've heard that running your ATF overfilled causes aeration and other similar bad things, which are horrible for your transmission. Long story short, I sourced an I30 VLSD on the mainland and had it replaced pretty quickly.
Last summer my list of mods include a Warpspeed Y-pipe, CosmoRacing SRI (WAI), ebay grounding kit, aluminum (Carbon-fibre looking) FSTB, Nismo Oil & Rad Caps, Eurodezigns superwhite headlights & fogs, superlumination.com superwhites all around (Sidemarkers, reverse lights, signal lights, interior lights, etc.), Sidemarker re-wire, some interior lighting (under seats, etc.). I did all of these "basic mods" myself, but they were great learning experiences for someone who was just starting-out.
I put about 8k km on my car between July and October, as I was in University and didn't get a whole lot of time to drive the Max. In October, I stored the car for the winter in my fathers garage and bought a beater 95 Civic hatchback for the winter.
Since then I have been busy researching and reading on this forum, and putting together everything that I need for the upcoming summer. I started out with a 2.5" Magnaflow Exhaust including dual tip muffler with polished 2.5" - 3.5" tips, 22" Magnaflow Resonator, and Magnaflow Cat. It looks like I'll be getting a custom-fab done for the piping, as I can't seem to find a decent 2.5" B-pipe and rear section pipe for a price less then what the custom mandrel-bent job will cost me. (WTB Plug.... )
)
After that I began putting together my S/C setup, and was lucky enough to find a complete kit on this forum for a reasonable price. The kit was from a 4th Gen so the charge piping was different, but I found a member willing to trade his idle 5th Gen piping for my 4th Gen piping and Blitz DD BOV.
In the past couple of weeks I've removed the SRI (WAI), Removed the battery and tray, changed the platinum plugs to NGK 1 step colder (Gapped to 0.037") plugs, installed a B&M Supercooler Transmission cooler "stand-alone" from the stock radiator cooler, and began sourcing all of the little things for the build.
In the next week or two, I will be replacing the horribly aged PCV valve with a new one, along with a Home Depot (Canadian Tire) Blowby catch can, I will be installing a WOT Drop Resistor Mod, replacing the in-tank fuel filter (Strainer), then beginning the build.
I have (on the way) an Apexi NEO, an Innovate LM-1, LMA-3 and XD-16 (If the guy ever gets around to taking them off of his truck, as he has promised), An Autometer Cobalt transmission Temperature Gauge, A Progress RSB (I know it is unrelated to the build, but a mod nonetheless), and an A-pillar gauge pod. I am going to be running Prosport Boost & Fuel Pressure Gauges, along with the Innovate XD-16 A/F gauge.
I have a Vortech V2 Blower (Rebuilt once) from a 4th Gen, with the following upgrades to the "stock" Stillen kit. BEGI FMU, AEM FPR, Matty's V1 Plate, 3.125" Pulley. I will be running Castrol Syntec synthetic oil, and "conventional" ATF and coolant.
As stated above, if anyone has any tips/comments/concerns/questions/advise/etc. I would be very pleased to hear it.
I'll post some pics and things as I go forward.
A little background about the car. I have a 2001 SE (20th Anniversary Edition) Auto (VLSD). I bought the car last February with ~87k km's on it (About 55k Miles). The car sat for a few months while I was away on a work term, so I began to drive it in May. I lost the transmission in June.
When I got back in May, I had the "Mechanics class" at the college my father was teaching at do a full fluids change (Oil, Transmission, Coolant, etc.)
I think that they overfilled the transmission fluid, as it was reading above the full mark. Since I knew little about cars at the time, I ignored it, and ended up paying for it. I've heard that running your ATF overfilled causes aeration and other similar bad things, which are horrible for your transmission. Long story short, I sourced an I30 VLSD on the mainland and had it replaced pretty quickly.
Last summer my list of mods include a Warpspeed Y-pipe, CosmoRacing SRI (WAI), ebay grounding kit, aluminum (Carbon-fibre looking) FSTB, Nismo Oil & Rad Caps, Eurodezigns superwhite headlights & fogs, superlumination.com superwhites all around (Sidemarkers, reverse lights, signal lights, interior lights, etc.), Sidemarker re-wire, some interior lighting (under seats, etc.). I did all of these "basic mods" myself, but they were great learning experiences for someone who was just starting-out.
I put about 8k km on my car between July and October, as I was in University and didn't get a whole lot of time to drive the Max. In October, I stored the car for the winter in my fathers garage and bought a beater 95 Civic hatchback for the winter.
Since then I have been busy researching and reading on this forum, and putting together everything that I need for the upcoming summer. I started out with a 2.5" Magnaflow Exhaust including dual tip muffler with polished 2.5" - 3.5" tips, 22" Magnaflow Resonator, and Magnaflow Cat. It looks like I'll be getting a custom-fab done for the piping, as I can't seem to find a decent 2.5" B-pipe and rear section pipe for a price less then what the custom mandrel-bent job will cost me. (WTB Plug....
)After that I began putting together my S/C setup, and was lucky enough to find a complete kit on this forum for a reasonable price. The kit was from a 4th Gen so the charge piping was different, but I found a member willing to trade his idle 5th Gen piping for my 4th Gen piping and Blitz DD BOV.
In the past couple of weeks I've removed the SRI (WAI), Removed the battery and tray, changed the platinum plugs to NGK 1 step colder (Gapped to 0.037") plugs, installed a B&M Supercooler Transmission cooler "stand-alone" from the stock radiator cooler, and began sourcing all of the little things for the build.
In the next week or two, I will be replacing the horribly aged PCV valve with a new one, along with a Home Depot (Canadian Tire) Blowby catch can, I will be installing a WOT Drop Resistor Mod, replacing the in-tank fuel filter (Strainer), then beginning the build.
I have (on the way) an Apexi NEO, an Innovate LM-1, LMA-3 and XD-16 (If the guy ever gets around to taking them off of his truck, as he has promised), An Autometer Cobalt transmission Temperature Gauge, A Progress RSB (I know it is unrelated to the build, but a mod nonetheless), and an A-pillar gauge pod. I am going to be running Prosport Boost & Fuel Pressure Gauges, along with the Innovate XD-16 A/F gauge.
I have a Vortech V2 Blower (Rebuilt once) from a 4th Gen, with the following upgrades to the "stock" Stillen kit. BEGI FMU, AEM FPR, Matty's V1 Plate, 3.125" Pulley. I will be running Castrol Syntec synthetic oil, and "conventional" ATF and coolant.
As stated above, if anyone has any tips/comments/concerns/questions/advise/etc. I would be very pleased to hear it.
I'll post some pics and things as I go forward.
Last edited by NewfoundlandDud; 03-03-2008 at 08:45 PM.
 03-03-2008, 08:03 PM
#2
Senior Member
Thread Starter
iTrader: (10)
Join Date: May 2007
Location: Colliers, NL Canada
Posts: 476
I have a few comments and questions from the work I have done this past weekend. To start, I want an opinion on which of the following gasket makers that I should use:
Permatex Blue (Good to 450^F)
Permatex Black (Good to 450^F)
Permatex Ultra Copper (Good to 700^F Intermittent)

2) On the 4th Gen Stillen Instructions Pg 2/14 - under needed equipment #11 - it states that you need "pipe thread sealant paste (not teflon tape)".
Should the image below suffice?
3)Also, what have you guys used for the "6) Anti seize paste"

I also picked up some blue & red Lok-tite and some high temperature silicone sealant.


Permatex Blue (Good to 450^F)
Permatex Black (Good to 450^F)
Permatex Ultra Copper (Good to 700^F Intermittent)
2) On the 4th Gen Stillen Instructions Pg 2/14 - under needed equipment #11 - it states that you need "pipe thread sealant paste (not teflon tape)".
Should the image below suffice?
3)Also, what have you guys used for the "6) Anti seize paste"
I also picked up some blue & red Lok-tite and some high temperature silicone sealant.
Last edited by NewfoundlandDud; 03-03-2008 at 08:47 PM.
03-03-2008, 08:26 PM
#3
Senior Member
Thread Starter
iTrader: (10)
Join Date: May 2007
Location: Colliers, NL Canada
Posts: 476
I removed my stock (Platinum) plugs this weekend. Getting at the rear coils is a PITA as advertised, but with the right tools & some finesse, it's not really all that bad. A little history of what these plugs have been through.
They've been in the car for ~95K km (~60K miles), and I would imagine that they have been subjected to 87 Octane for the majority of their life. I wasn't told what the original owner ran for octane, but the used car dealer made no mention of running premium gasoline when I bought it, so I assume that it had never seen the correct octane.
I actually unknowingly ran 87 for a few months when I bought the car, before I began reading up on things on this forum and Nicoclub (The original forum that I had been a part of last summer). Last July-August I ran a can of seafoam through the IM and dumped a can into the gas tank (I had fantastic mileage while the can was in the tank, probably due to the increased octane maybe?) then switched to Premium (Which is 91 from Esso here in Newfoundland).
Just to note, my mileage was typically around 16MPG city driving, and was about 20MPG with the Seafoam in the tank. I've been running Premium ever since.
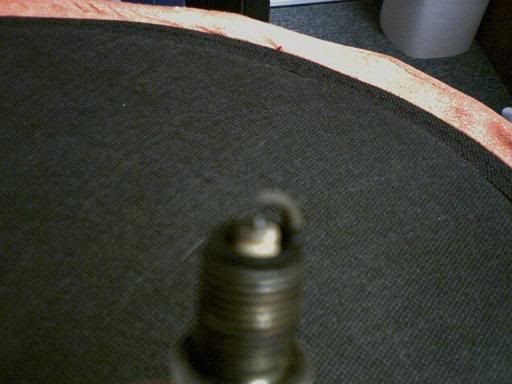
The spark plugs looked good when I removed them, and all 6 looked very similar in appearance. I have some pictures below, but they aren't the best quality, so I would say that it is closest to #16 on this webpage:
http://www.dansmc.com/Spark_Plugs/Sp...s_catalog.html
The plug has black (carbon) deposits on the threaded area (the shell), and the extended metal part that makes the spark with the electrode appears to be slightly brown. The electrode looks excellent, and there is a bit of browning on the white (insulator) part of the electrode.
Judging by the images on the above website, the plug is in the "best" range, so I am very happy with it.
Here are pictures of plugs 1-6 (Identified by firing order):

Plug 1

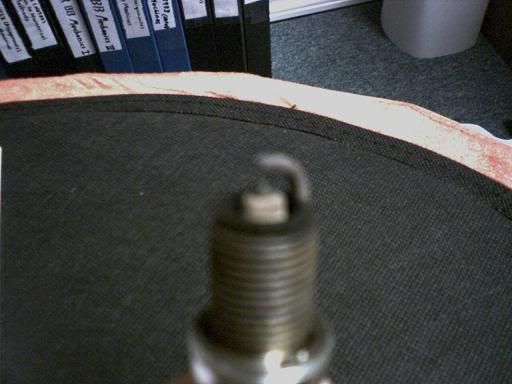
Plug 2
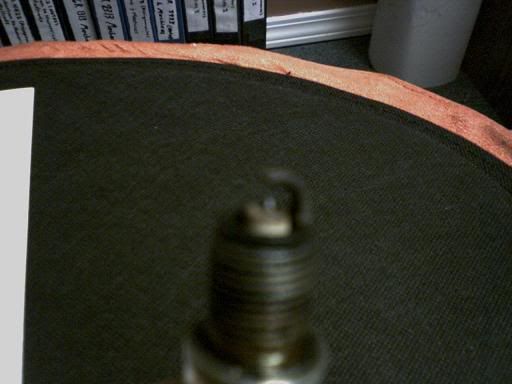
Plug 3
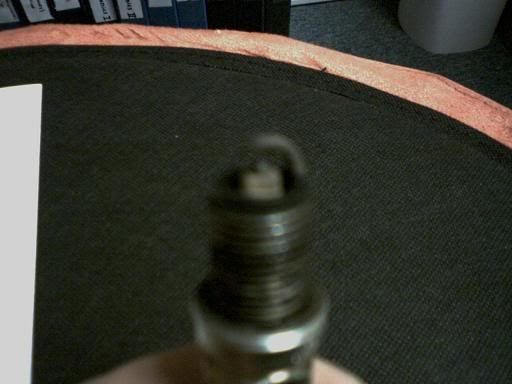
Plug 4
They've been in the car for ~95K km (~60K miles), and I would imagine that they have been subjected to 87 Octane for the majority of their life. I wasn't told what the original owner ran for octane, but the used car dealer made no mention of running premium gasoline when I bought it, so I assume that it had never seen the correct octane.
I actually unknowingly ran 87 for a few months when I bought the car, before I began reading up on things on this forum and Nicoclub (The original forum that I had been a part of last summer). Last July-August I ran a can of seafoam through the IM and dumped a can into the gas tank (I had fantastic mileage while the can was in the tank, probably due to the increased octane maybe?) then switched to Premium (Which is 91 from Esso here in Newfoundland).
Just to note, my mileage was typically around 16MPG city driving, and was about 20MPG with the Seafoam in the tank. I've been running Premium ever since.
The spark plugs looked good when I removed them, and all 6 looked very similar in appearance. I have some pictures below, but they aren't the best quality, so I would say that it is closest to #16 on this webpage:
http://www.dansmc.com/Spark_Plugs/Sp...s_catalog.html
The plug has black (carbon) deposits on the threaded area (the shell), and the extended metal part that makes the spark with the electrode appears to be slightly brown. The electrode looks excellent, and there is a bit of browning on the white (insulator) part of the electrode.
Judging by the images on the above website, the plug is in the "best" range, so I am very happy with it.
Here are pictures of plugs 1-6 (Identified by firing order):
Plug 1
Plug 2
Plug 3
Plug 4
Last edited by NewfoundlandDud; 03-03-2008 at 08:49 PM.
03-03-2008, 08:30 PM
#4
Senior Member
Thread Starter
iTrader: (10)
Join Date: May 2007
Location: Colliers, NL Canada
Posts: 476
Plug 5
Plug 6

They all look fantastic......:_)
Next I removed my PCV valve to install the Home Depot (Canadian Tire) Blow-by catch can. This is how it looked (Horrible):
Note: It did not "click" at all when shaken, and appeared to be completely blocked.

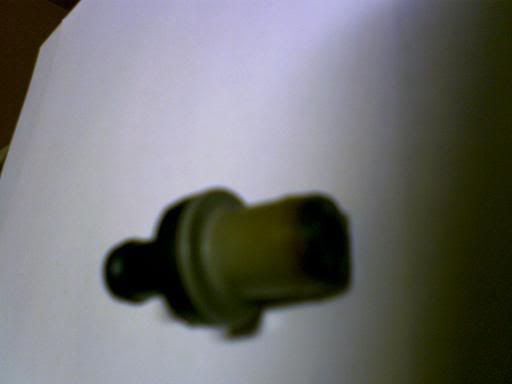
Notice the discoloration where the valve was inserted into the engine, obviously from all of the oil blow-by.
Plug 6
They all look fantastic......:_)
Next I removed my PCV valve to install the Home Depot (Canadian Tire) Blow-by catch can. This is how it looked (Horrible):
Note: It did not "click" at all when shaken, and appeared to be completely blocked.
Notice the discoloration where the valve was inserted into the engine, obviously from all of the oil blow-by.
03-03-2008, 08:35 PM
#5
Senior Member
Thread Starter
iTrader: (10)
Join Date: May 2007
Location: Colliers, NL Canada
Posts: 476
I know that a lot of guys have had trouble sourcing "micro-switches" for the WOT Drop Resistor Mod. I personally went to "The Source" (Formerly Radio Shack) to look for one. All I found was 5A switches that were apparently melting in service.
I went to a generic "Electronics parts store" and found a 15A-125/250V AC micro-switch that has NC, NO, and Common connectors. The Drop Resistor Mod requires that the Common and NC connectors are connected, effectively breaking the circuit when at WOT.

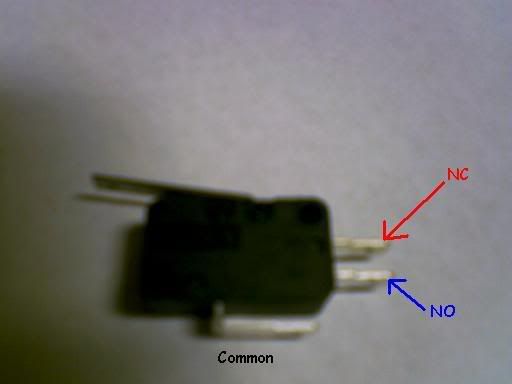
I went to a generic "Electronics parts store" and found a 15A-125/250V AC micro-switch that has NC, NO, and Common connectors. The Drop Resistor Mod requires that the Common and NC connectors are connected, effectively breaking the circuit when at WOT.


 03-03-2008, 11:33 PM
#9

I have a few comments and questions from the work I have done this past weekend. To start, I want an opinion on which of the following gasket makers that I should use:
Permatex Blue (Good to 450^F)
Permatex Black (Good to 450^F)
Permatex Ultra Copper (Good to 700^F Intermittent)
2) On the 4th Gen Stillen Instructions Pg 2/14 - under needed equipment #11 - it states that you need "pipe thread sealant paste (not teflon tape)".
Should the image below suffice?
3)Also, what have you guys used for the "6) Anti seize paste"
 Go with Permatex Gray.
 2) Never used it. Used good ol' Gray.
3) Never used. Not sure where or why Stillen recommends it.
Also, threadlocker Blue is needed, as you stated.
 03-04-2008, 07:21 AM
#11
Senior Member
Thread Starter
iTrader: (10)
Join Date: May 2007
Location: Colliers, NL Canada
Posts: 476
I sure hope so.....
So I found the Permatex Grey. Funny how the Blue & Black at Princess Auto were $4.99 while the Grey at NAPA was $10.99......

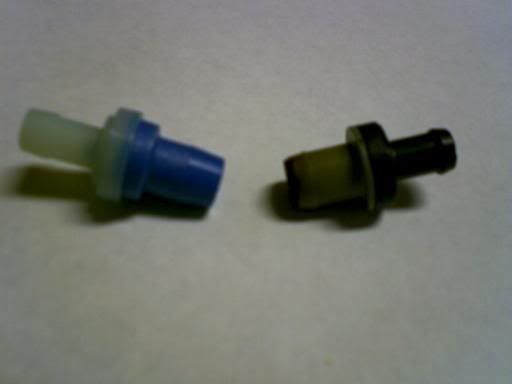
I also picked up a PCV Valve from NAPA while I was there. I had to get it shipped in overnight-air, as the stealership & another automotive store had a 1-2 week wait. Luckily another guy was getting a water pump shipped in overnight, so I got the valve thrown in with it to save the ~$20.
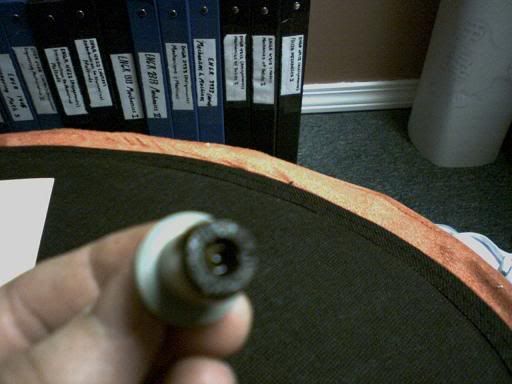
The NAPA Valve is longer than the OEM on both ends, here is a comparison:
So just to Clarify, before I return all of the excess gasket makers etc.
The Prematex Grey is used as both a gasket maker AND as a Thread Sealant. I can return the 3 other gasket makers, as well as the thread sealant. I probably don't need the Red Hi-temp silicone, and don't need to find an anti-galling compound, correct?
So I found the Permatex Grey. Funny how the Blue & Black at Princess Auto were $4.99 while the Grey at NAPA was $10.99......
I also picked up a PCV Valve from NAPA while I was there. I had to get it shipped in overnight-air, as the stealership & another automotive store had a 1-2 week wait. Luckily another guy was getting a water pump shipped in overnight, so I got the valve thrown in with it to save the ~$20.
The NAPA Valve is longer than the OEM on both ends, here is a comparison:
So just to Clarify, before I return all of the excess gasket makers etc.
The Prematex Grey is used as both a gasket maker AND as a Thread Sealant. I can return the 3 other gasket makers, as well as the thread sealant. I probably don't need the Red Hi-temp silicone, and don't need to find an anti-galling compound, correct?
03-04-2008, 08:31 AM
#12
Yeah, no anti-sieze is needed. Just some threadlocker Blue.
03-04-2008, 12:05 PM
#13
Senior Member
Thread Starter
iTrader: (10)
Join Date: May 2007
Location: Colliers, NL Canada
Posts: 476
Alright, so I just called the only Dyno that I know of in the province, and they quoted me $100 for 3 runs as a flat fee. They told me that the other option that I have is an $150/hr option.
I was considering doing a before/after dyno as a comparison. I have a couple of questions before I commit to this:
1) Should I run my stock air-box and stock plugs on the dyno (I've already replaced the plugs with .037" gapped, 1 step colder coppers). I have a Cosmoracing SRI (WAI) that I can run, as my MAF is already attached, as well as all of the vacuum lines, etc.
2) I have an Apexi NEO & WBO2 that is arriving this week hopefully, should I install and tune with this before I go to the dyno, or would this just be a waste of time since I'll have to re-tune after the s/c install anyway.
3) Does anyone else have Any comments here, I would really like some feedback so that I can get the Most out of this, if I do commit to it.
If I do this, then I have to re-install everything that I have removed from the car in prep for the s/c install (Very Minor Set-back), I have to get new stickers (Registration) for the car, as the plates expired in February (The car is stored right now), and I have to get insurance put back on the car so that I can drive to/from the dyno shop and tune with the Neo & WBO2 if applicable. I would like to change my oil before I take the car out again, but I will be doing this again during the s/c install (Unless I can plug the tapped hole in the oil pan, and tap this sometime this weekend before the install).
On that note, what size/type of fitting do I need to tap the oil pan, and connect the drain-back hose? I don't think that this was included in my kit, so I think that I am going to have to source the parts.
I'd like some discussion here, since I do have to do a bit of work in order to make this happen. I would like a before/after dyno, both to compare, and also to detect any fixes that I may have to perform such as the "VIAS Fix" if it turns out that this isn't performing the way that it should.
I don't really want to take my car out in the weather (Plus Road Salt) that we've been having, but I would do it if the benefits outweigh the setbacks in this situation.
I know that data is a great tool to have, and submitting the graphs here will only increase the community knowledge that it constantly growing on here.
Like I said, any discussion is very welcome.
Thanks for your time.
03-05-2008, 02:22 PM
#15
Alright, so I just called the only Dyno that I know of in the province, and they quoted me $100 for 3 runs as a flat fee. They told me that the other option that I have is an $150/hr option.
I was considering doing a before/after dyno as a comparison. I have a couple of questions before I commit to this:
1) Should I run my stock air-box and stock plugs on the dyno (I've already replaced the plugs with .037" gapped, 1 step colder coppers). I have a Cosmoracing SRI (WAI) that I can run, as my MAF is already attached, as well as all of the vacuum lines, etc.
2) I have an Apexi NEO & WBO2 that is arriving this week hopefully, should I install and tune with this before I go to the dyno, or would this just be a waste of time since I'll have to re-tune after the s/c install anyway.
3) Does anyone else have Any comments here, I would really like some feedback so that I can get the Most out of this, if I do commit to it.
If I do this, then I have to re-install everything ....................
1) If you want a true baseline, then return it stock. Spark plugs and everything......
2)No. Waste of time, $, and energy. Just wait until you're boosted. BTW, with your mod list, you don't have to tune to drive and enjoy the car. Tuning will of course add some additional power that was left on the table and ensure your A/F levels are really safe.
3) Based on everything else you would have to deal with...ie registration, insurance etc, I wouldn't bother doing a baseline dyno. Just do a compression check and make sure everything is ok. Then, a FULL tune-up.
But, do what your gut tells you. You'll never have another chance to do a baseline dyno....
For your oil questions, I've know the perfect threads with pics. I'll find them and post them up.
03-05-2008, 03:07 PM
#16
This is what should have been included in your kit. You don't "tap" the oil pan per se, you undo the existing oil pressure sender,and install this contraption.

And for the oil drain back plate, this is what you should have received. Do you have this stuff?

And for the oil drain back plate, this is what you should have received. Do you have this stuff?
03-05-2008, 03:31 PM
#17
Senior Member
Thread Starter
iTrader: (10)
Join Date: May 2007
Location: Colliers, NL Canada
Posts: 476
Yeah, that was my bad.
I was reading up on what I guess was a turbo build a little while ago and it had details about tapping the oil-pan then draining the oil to make sure that no metal shavings got into the pan.
I guess that I wasn't thinking right when I posed that, and should have thought about it a bit more before asking a dumb question.
I've got it all straight now.
Thanks.
03-15-2008, 07:51 PM
#18
Senior Member
Thread Starter
iTrader: (10)
Join Date: May 2007
Location: Colliers, NL Canada
Posts: 476
Some More Progress......
So I got a few hours out at the parents house (Where the car is being stored - an hour out of town) tonight, so I figured that I would continue with some of the prep/maintenance.
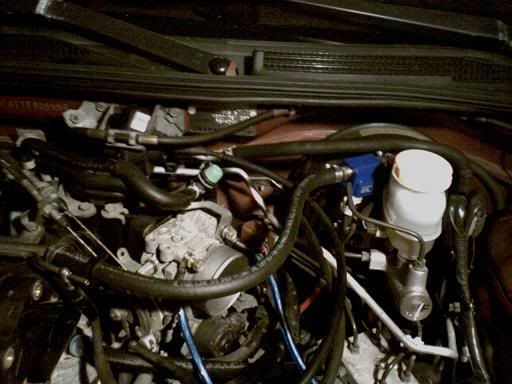
First of all I replaced the (Seized Solid) PCV valve with a new one, and installed a "Home Depot" (Canadian Tire) Ghetto Catch Can while I was at it.
I ran the lines down under the TB and under the Brake Booster, then back up to the catch can, then back to the IM. Made for a real clean install with all of the lines tucked away, and the catch can back behind everything.
Here is a picture of it installed:
While I had some time, I figured that I would dig into the VIAS actuator assembly and check to see if I needed the "VIAS Fix". I took everything apart, and it turns out that my VIAS was fine (~96K km). I filled the bottom of the cup with JB Weld and stuck the spring back in as a preventative measure, so that my chances of running into the problem in the future would be that much lower.
For those of you that are interested, there is a "key" in the bottom of the cup that tends to wear away at the key-hole in the bottom of the cup over time, and the VIAS assembly either stops working completely, or only opens part of the way due to the "free play" between the cup and the shaft (key).
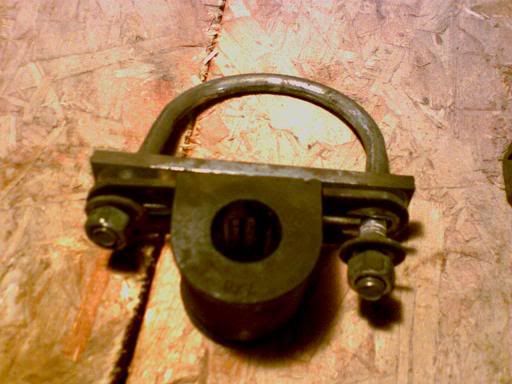
The VIAS Fix is on VQPower.com, and is well documented on this site. The pictures below show the orientation of the cup in the "Closed Position", and the Actuator assembly that can be used to test the play in the cup.
The slot in the cup that the plastic VIAS shaft sits into should face almost straight up in the first picture here (As you can see), this is the closed position.
The second picture shows the linkage that can be rotated to test the free play of the cup with respect to the key. This linkage is attached to the key, and if you rotate it, the cup should rotate with it as well with No Free Play
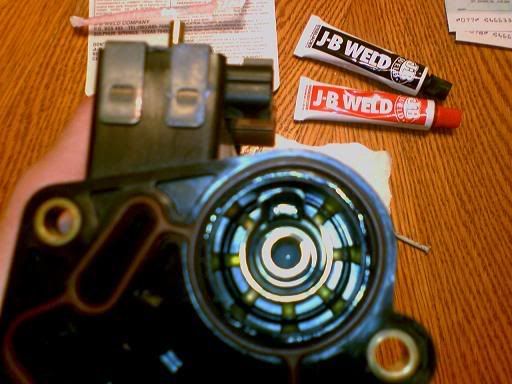

I hope that this helps a few of you guys, and I'd be glad to answer any additional questions.
First of all I replaced the (Seized Solid) PCV valve with a new one, and installed a "Home Depot" (Canadian Tire) Ghetto Catch Can while I was at it.
I ran the lines down under the TB and under the Brake Booster, then back up to the catch can, then back to the IM. Made for a real clean install with all of the lines tucked away, and the catch can back behind everything.
Here is a picture of it installed:
While I had some time, I figured that I would dig into the VIAS actuator assembly and check to see if I needed the "VIAS Fix". I took everything apart, and it turns out that my VIAS was fine (~96K km). I filled the bottom of the cup with JB Weld and stuck the spring back in as a preventative measure, so that my chances of running into the problem in the future would be that much lower.
For those of you that are interested, there is a "key" in the bottom of the cup that tends to wear away at the key-hole in the bottom of the cup over time, and the VIAS assembly either stops working completely, or only opens part of the way due to the "free play" between the cup and the shaft (key).
The VIAS Fix is on VQPower.com, and is well documented on this site. The pictures below show the orientation of the cup in the "Closed Position", and the Actuator assembly that can be used to test the play in the cup.
The slot in the cup that the plastic VIAS shaft sits into should face almost straight up in the first picture here (As you can see), this is the closed position.
The second picture shows the linkage that can be rotated to test the free play of the cup with respect to the key. This linkage is attached to the key, and if you rotate it, the cup should rotate with it as well with No Free Play
I hope that this helps a few of you guys, and I'd be glad to answer any additional questions.
03-15-2008, 08:08 PM
#19
Senior Member
Thread Starter
iTrader: (10)
Join Date: May 2007
Location: Colliers, NL Canada
Posts: 476
RSB Install
Next came the RSB install. I purchased this RSB from a member on this site, and it just showed up yesterday, so I figured that I would get it on there.
Of course everything didn't go smoothly, and I hope that some one can step in here and answer my question.
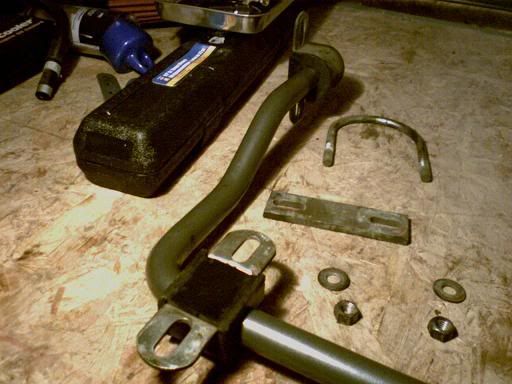
Below I have some pictures of the hardware that was included with bar. There are two U-bolt assemblies that bolt the bar to the rear axle, as well as two plate-assemblies that bolt the bar to the rear trailing arms.
I read Audatious' write-up on VQPower, and apparently the 5th Gen hardware differs from the 4th Gen hardware. The 5th Gen's have U-bolt assemblies for the rear trailing arms instead of the flat-plate assemblies.
Here is the link:
http://www.vqpower.com/v2/readarticl...article_id=116
It's right in Step 2 there.
From what I understand, this RSB came from a 2000 Maxima (I have a 2001), so the hardware should have been the same. However, when I tried to install it tonight, I found that the brake lines on the rear trailing arms were in the way of the flat brackets, and I couldn't get the brackets to fit with the lines there.
My question is, Do I have to replace the flat-brackets with U-bolts, or is there another way to make this fit? (I haven't received an answer about the actual year of the Maxima that this came from yet)
If I do have to replace them, what size is the u-bolt for the 5th Gen's (I am assuming that I will have to thread the u-bolt further toward the bend, since the rear trailing arm is not very thick compared to the unthreaded depth of most u-bolts).
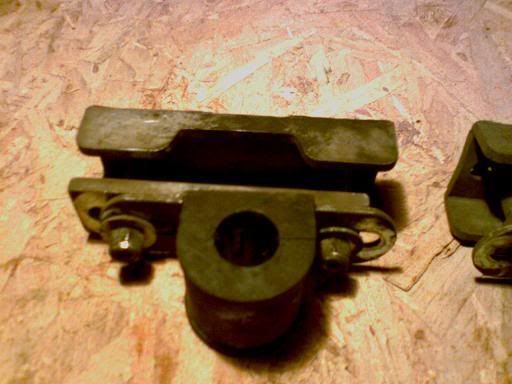
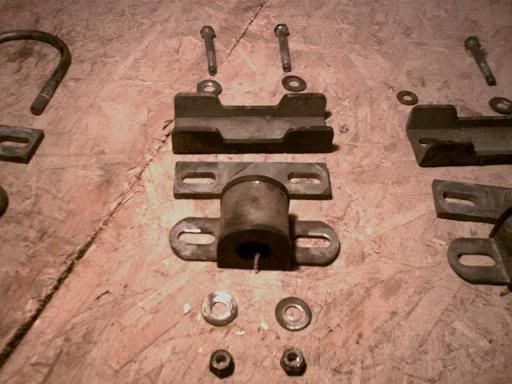
Anyway, here are the pictures of the hardware that I have:

Of course everything didn't go smoothly, and I hope that some one can step in here and answer my question.
Below I have some pictures of the hardware that was included with bar. There are two U-bolt assemblies that bolt the bar to the rear axle, as well as two plate-assemblies that bolt the bar to the rear trailing arms.
I read Audatious' write-up on VQPower, and apparently the 5th Gen hardware differs from the 4th Gen hardware. The 5th Gen's have U-bolt assemblies for the rear trailing arms instead of the flat-plate assemblies.
Here is the link:
http://www.vqpower.com/v2/readarticl...article_id=116
It's right in Step 2 there.
From what I understand, this RSB came from a 2000 Maxima (I have a 2001), so the hardware should have been the same. However, when I tried to install it tonight, I found that the brake lines on the rear trailing arms were in the way of the flat brackets, and I couldn't get the brackets to fit with the lines there.
My question is, Do I have to replace the flat-brackets with U-bolts, or is there another way to make this fit? (I haven't received an answer about the actual year of the Maxima that this came from yet)
If I do have to replace them, what size is the u-bolt for the 5th Gen's (I am assuming that I will have to thread the u-bolt further toward the bend, since the rear trailing arm is not very thick compared to the unthreaded depth of most u-bolts).
Anyway, here are the pictures of the hardware that I have:
03-15-2008, 08:12 PM
#20
Senior Member
Thread Starter
iTrader: (10)
Join Date: May 2007
Location: Colliers, NL Canada
Posts: 476
On a positive note, I installed the bushings before I tried to mount the bar, and here are the pics of the pre-assembled bushings. They can slide along the bar, so it is pretty easy to stick them on the bar, get the bar mounted, then adjust the placement of the bushings to get a good fit.
My car is currently still up on ramps with the sway-bar hanging right now, since I haven't mounted the bar to the rear trailing arms due to the above hardware issues:
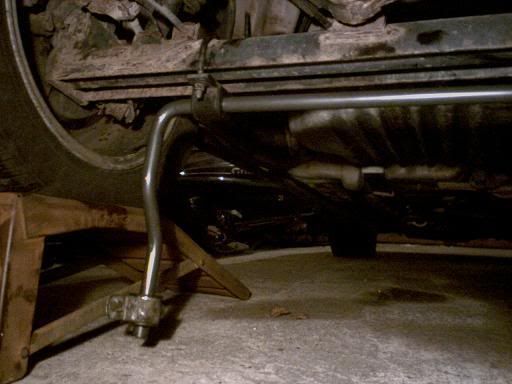
My car is currently still up on ramps with the sway-bar hanging right now, since I haven't mounted the bar to the rear trailing arms due to the above hardware issues:
03-15-2008, 08:26 PM
#21
Senior Member
Thread Starter
iTrader: (10)
Join Date: May 2007
Location: Colliers, NL Canada
Posts: 476
One final question for the night.
Is it possible that something in the rear end of my car (Brake lines possibly) could have pressure built-up on them that is leaking or releasing pressure from time to time while in storage there?
I have my battery removed and the car hasn't been started since October, so it's not possible that any pressure has been built-up since then.
While I'm out working in the garage, I hear something from time to time that can roughly be described as when a suspension system is slowly decompressed. That might be a bad description, but if you imagine the sound of a damper going back to an uncompressed position (The sound of air slowly being released through a restriction), but it sounds as though something metal is being moved, or actuated, or something.
I know that the above description is very vague, but all that I know is that something in the rear of the car makes a strange noise every hour or so. I figured that it is due to some pressure being released or transferred, since it sounds partly like the damper that I described above, or when a truck with air brakes comes to a stop (You can hear the air transfer, but there is also the sound of the brakes squeaking or whatever).
This is what made me think that it might be something hydraulic.
Strange I know, but if anyone has experienced this or has any idea what it might be, please let me know.
Thanks.
- Is it possible that my strut could need replacing, and it is leaking etc.?
I say this because when I jacked up the car from the rear axle tonight, one wheel lifted pretty far off the ground before the other one did. I know that this could be due to the jack being off-center, but even when off of the ground one wheel sat noticably higher than the other as if the suspension was weaker on that side. I am pretty sure that it wasn't due to the jack just being off-center, because it was a pretty distinctive difference right away, and as the car was lifted.
Last edited by NewfoundlandDud; 03-15-2008 at 08:31 PM.
03-16-2008, 04:57 PM
#22

So I got a few hours out at the parents house (Where the car is being stored - an hour out of town) tonight, so I figured that I would continue with some of the prep/maintenance.
First of all I replaced the (Seized Solid) PCV valve with a new one, and installed a "Home Depot" (Canadian Tire) Ghetto Catch Can while I was at it.
I ran the lines down under the TB and under the Brake Booster, then back up to the catch can, then back to the IM. Made for a real clean install with all of the lines tucked away, and the catch can back behind everything.
Here is a picture of it installed:
While I had some time, I figured that I would dig into the VIAS actuator assembly and check to see if I needed the "VIAS Fix". I took everything apart, and it turns out that my VIAS was fine (~96K km). I filled the bottom of the cup with JB Weld and stuck the spring back in as a preventative measure, so that my chances of running into the problem in the future would be that much lower.
For those of you that are interested, there is a "key" in the bottom of the cup that tends to wear away at the key-hole in the bottom of the cup over time, and the VIAS assembly either stops working completely, or only opens part of the way due to the "free play" between the cup and the shaft (key).
The VIAS Fix is on VQPower.com, and is well documented on this site. The pictures below show the orientation of the cup in the "Closed Position", and the Actuator assembly that can be used to test the play in the cup.
The slot in the cup that the plastic VIAS shaft sits into should face almost straight up in the first picture here (As you can see), this is the closed position.
The second picture shows the linkage that can be rotated to test the free play of the cup with respect to the key. This linkage is attached to the key, and if you rotate it, the cup should rotate with it as well with No Free Play
I hope that this helps a few of you guys, and I'd be glad to answer any additional questions.
Thanks and good luck...
03-16-2008, 05:20 PM
#23
Senior Member
Thread Starter
iTrader: (10)
Join Date: May 2007
Location: Colliers, NL Canada
Posts: 476
Well first of all, I'm very glad to see that someone is benefiting from this. I had hoped that posting my progress would help some people with their prep as well.
When running your engine with forced induction, you want to have the highest octane possible (within reason) to help avoid detonation, and so that the car will generally run as it was intended.
When the PCV valve opens, it blows "crap" (Vapors, Oil, & such) into the IM, effectively decreasing the octane of the air/fuel mixture. The catch can catches all of this "crap" before it reaches the IM, and can be emptied from time to time.
Just to note, the catch can is not a forced induction thing, it will do the same thing for NA cars. The guys who actually started doing this weren't boosted IIRC. Also, the PCV valve only opens during vacuum, so it won't be open during boost.
This also keeps all of that crap from dirtying up your IM.
03-16-2008, 05:39 PM
#24
Senior Member
Thread Starter
iTrader: (10)
Join Date: May 2007
Location: Colliers, NL Canada
Posts: 476
Just an update on the RSB issue.
I was determined to get it installed before I left there today, so I decided to unbolt the brake lines from the rear trailing arms and install the brackets anyway. I had planned to re-connect the brake lines after, but I didn't have anything with me to make brackets from, and the zip-ties that I had were shattering due to the cold. And because they were crappy zip-ties.
So the brake lines are now about an inch closer to the rear tires, which isn't that bad for now, but I was beginning to think that it could cause problems down the road if I were to go with wider tires on the rear.
All in all, it was a pretty clean install in the end. In addition to unbolting the brake lines, there was a sensor wire that ran along there as well. I had to remove the wire from its grommet, but was able to re-insert it after I was done tightening up the RSB brackets.
Here are some pics of the final install:
On the top of this picture you see the RSB bushing and the end of the RSB (Grey/brass). In the middle you can see the rear trailing arm, with the other side of the RSB bracket bolted around it (as well as the bolt). You can then see the brake line, and my back tire. Originally the brake line was bolted directly to the trailing arm, and well away from the tire, but now it sits considerably closer. I guess that I can't do anything about that for now.
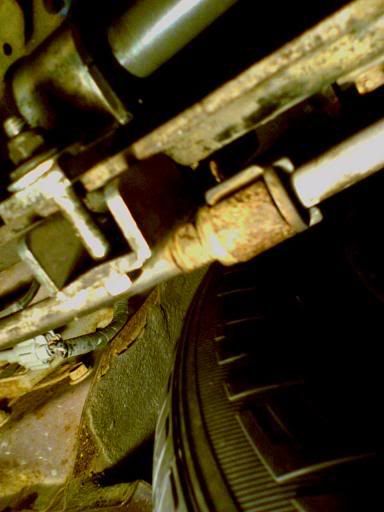
Here is the setup from a different angle. Again, notice the offset of the brake line.
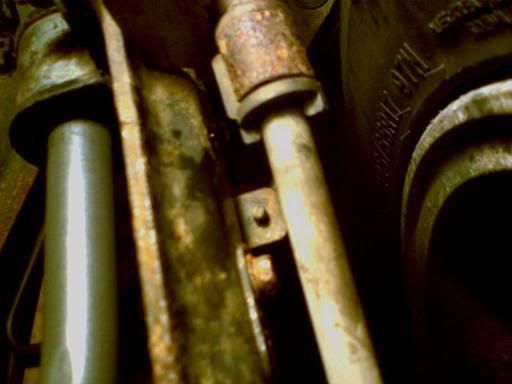
And finally, the RSB bracket from the outside with the brake line and sensor wire bending around it. Looks clean from this angle....

I was determined to get it installed before I left there today, so I decided to unbolt the brake lines from the rear trailing arms and install the brackets anyway. I had planned to re-connect the brake lines after, but I didn't have anything with me to make brackets from, and the zip-ties that I had were shattering due to the cold. And because they were crappy zip-ties.
So the brake lines are now about an inch closer to the rear tires, which isn't that bad for now, but I was beginning to think that it could cause problems down the road if I were to go with wider tires on the rear.
All in all, it was a pretty clean install in the end. In addition to unbolting the brake lines, there was a sensor wire that ran along there as well. I had to remove the wire from its grommet, but was able to re-insert it after I was done tightening up the RSB brackets.
Here are some pics of the final install:
On the top of this picture you see the RSB bushing and the end of the RSB (Grey/brass). In the middle you can see the rear trailing arm, with the other side of the RSB bracket bolted around it (as well as the bolt). You can then see the brake line, and my back tire. Originally the brake line was bolted directly to the trailing arm, and well away from the tire, but now it sits considerably closer. I guess that I can't do anything about that for now.
Here is the setup from a different angle. Again, notice the offset of the brake line.
And finally, the RSB bracket from the outside with the brake line and sensor wire bending around it. Looks clean from this angle....
03-16-2008, 05:47 PM
#25
Well first of all, I'm very glad to see that someone is benefiting from this. I had hoped that posting my progress would help some people with their prep as well.
When running your engine with forced induction, you want to have the highest octane possible (within reason) to help avoid detonation, and so that the car will generally run as it was intended.
When the PCV valve opens, it blows "crap" (Vapors, Oil, & such) into the IM, effectively decreasing the octane of the air/fuel mixture. The catch can catches all of this "crap" before it reaches the IM, and can be emptied from time to time.
Just to note, the catch can is not a forced induction thing, it will do the same thing for NA cars. The guys who actually started doing this weren't boosted IIRC. Also, the PCV valve only opens during vacuum, so it won't be open during boost.
This also keeps all of that crap from dirtying up your IM.
When running your engine with forced induction, you want to have the highest octane possible (within reason) to help avoid detonation, and so that the car will generally run as it was intended.
When the PCV valve opens, it blows "crap" (Vapors, Oil, & such) into the IM, effectively decreasing the octane of the air/fuel mixture. The catch can catches all of this "crap" before it reaches the IM, and can be emptied from time to time.
Just to note, the catch can is not a forced induction thing, it will do the same thing for NA cars. The guys who actually started doing this weren't boosted IIRC. Also, the PCV valve only opens during vacuum, so it won't be open during boost.
This also keeps all of that crap from dirtying up your IM.
I found this thread very amusing actually because I am pretty much going the same exact route as you only slightly different though. I am a 4th gen auto with 00VI and I have tranny cooler on the car now and I am planning on doing a sc kit as well, so we are pretty much in the same boat.
I got a question about the spark plugs I understand everyone says to go one step colder spark plugs for being boosted but I never fully understood why, do you know by any chance? Right now I am at NGK iridium so what would I go to Platnium?
Thanks, and I am glad to hear you got the RSB on.
03-16-2008, 05:50 PM
#26
Senior Member
Thread Starter
iTrader: (10)
Join Date: May 2007
Location: Colliers, NL Canada
Posts: 476
With respect to the strange intermittent sound that I had asked about last night, I think that I have figured out what it might be.
While under the car today, I heard it again. It again sounded like it was coming from the rear suspension somewhere, so I basically bench-pressed the car a few times to try and see if I could hear anything. I wasn't really that focussed on finding where the sound was coming from, since I was pressed for time to get the RSB installed and get home, but it definitely sounded like it was the shock/strut (I know nothing about suspension components, so forgive me, which do we have?).
What would be the problem with the shock/strut (I really need to Google these and get them sorted out) that would be causing it to make a strange sound when they are cycled? Is it an indication that they need to be replaced, or could the actuating arms just be dirty or something, causing the noise? Again, remember that I have never read/talked/though about suspension in detail.
Thanks.
While under the car today, I heard it again. It again sounded like it was coming from the rear suspension somewhere, so I basically bench-pressed the car a few times
to try and see if I could hear anything. I wasn't really that focussed on finding where the sound was coming from, since I was pressed for time to get the RSB installed and get home, but it definitely sounded like it was the shock/strut (I know nothing about suspension components, so forgive me, which do we have?).What would be the problem with the shock/strut (I really need to Google these and get them sorted out) that would be causing it to make a strange sound when they are cycled? Is it an indication that they need to be replaced, or could the actuating arms just be dirty or something, causing the noise? Again, remember that I have never read/talked/though about suspension in detail.
Thanks.
Last edited by NewfoundlandDud; 03-16-2008 at 05:53 PM.
03-16-2008, 06:07 PM
#27
Senior Member
Thread Starter
iTrader: (10)
Join Date: May 2007
Location: Colliers, NL Canada
Posts: 476
Here is the link to the Catch Can How-to. Credit Irish.
http://forums.maxima.org/showthread.php?t=312377
You basically remove the stock line that went from your PCV valve to the IM, then run new lines from the PCV Valve to the "Catch Can", then back to the IM. I tucked mine away back near the brake booster as seen in the pic (Blue-Topped Catch Can):
There are many mixed opinions about the spark plugs, and I can only tell you to do a search about them on the forum here. There are a lot of threads on the subject, and I actually took a full day one weekend to read up on the subject. Another important part about spark plugs are the gaps. Again, there are a lot of opinions and threads about this, so read up......It's good to know as much as you an about this stuff.
I ended up going with one-step colder copper plugs gapped to 0.037". I had to replace my stockers anyway, and I'm going to be running ~10 lbs of boost or more, so I judged accordingly. My only other real piece of advise besides reading as much as you can about the plugs, is to stick with the NGK plugs. Our engines were designed to use NGK plugs, and you should stick with them. They are good quality plugs. Note: You'll find a lot of threads about these as well.
I'll definitely be happy to answer any questions that you may have about the plugs after you do a little research, but to get into that right now would make for a long night.
Have you sourced your kit yet? I have some extra stuff that I won't be using if you need anything. I'll be making a FS thread here pretty quickly......
O alright thanks for the explanation, seems pretty funky...So where do the lines get hooked up to in order to collect all of the crap before it hits the intake manifold? Any pictures?
I found this thread very amusing actually because I am pretty much going the same exact route as you only slightly different though. I am a 4th gen auto with 00VI and I have tranny cooler on the car now and I am planning on doing a sc kit as well, so we are pretty much in the same boat.
I got a question about the spark plugs I understand everyone says to go one step colder spark plugs for being boosted but I never fully understood why, do you know by any chance? Right now I am at NGK iridium so what would I go to Platnium?
Thanks, and I am glad to hear you got the RSB on.
03-16-2008, 09:39 PM
#28
Senior Member
Thread Starter
iTrader: (10)
Join Date: May 2007
Location: Colliers, NL Canada
Posts: 476
Hey Guys,
Just a heads-up, I have a lot of S/C stuff and other mods for sale in the classifieds section, here:
http://forums.maxima.org/showthread.php?t=556690
Just a heads-up, I have a lot of S/C stuff and other mods for sale in the classifieds section, here:
http://forums.maxima.org/showthread.php?t=556690
04-15-2008, 07:22 PM
#29
Senior Member
Thread Starter
iTrader: (10)
Join Date: May 2007
Location: Colliers, NL Canada
Posts: 476
Bringing this thread back to life before I start-in.
As some of you know already, I've been putting-off the install of my Supercharger this month due to exams, etc.
Well now I am done, and have 10 days off before going back to work.
So tomorrow the install will begin.
For those of you who aren't aware, I have a V2 kit from a 99 Maxima that I have prepared for my 2001. I have a "Matty's Plate" conversion, along with a BEGI FMU, AEM FPR, and enough tuning equipment to get started.
This includes an Apexi NEO, Innovate LM-1, and 3 Gauges (Boost, Fuel Pressure and transmission Temperature). The guy who I was supposed to buy my Innovate XD-16 A/F Ratio gauge decided to go MIA, so it looks like I won't have an A/F ratio gauge right away. That's ok, because the LM-1 data logs ~45 mins, so that will be good enough to get started.
On the way, I have some Altima SE-R wheels, a Tsudo 2.5" Mandrel-bent exhaust (Which will be chopped to incorporate my MagnaFlow Full Exhaust (From Warpspeed Y-pipe Back), Some Tokico Illumina's, Progress Springs, 13" Brembo Cobra Rotors (To complete my BBK), along with a list of "maintenance Items" such as knock sensors to go with the prep-work that I've been doing.
I already have a B&M transmission cooler installed, along with a Progress RSB, New 1-step cooler Copper NGK Plugs, VIAS Fix, "Home Depot Catch Can", and some other stuff that I've been doing during the winter months. (My car has been parked since October).
I figured that I would keep this thread going to host any Suggestions, Tips, Comments, etc. that anyone might have. I've never attempted a project of this caliber before, but I'm confident that I can handle it. I've spent at least a month researching everything that I will be doing, so now it's time to follow-through.
I will be attempting this myself (With a buddy or two) in my parents garage about an hour out of town. So if anyone can think of things that I may need to pick up before the install (Aside from the gasket makers, Loktite, etc.) please post them, as it will be a huge Pain to have to drive back into town to pick things up after we get started.
I am very open to whatever advise that you OG's have, since many of you have done this before. My mechanical experience is limited to the mods that I have done on my car to date, but I've never been one to back down from a challenge. I'm sure that I'll be boosting on the highway by next week
(Knock on wood)
So here is the thread that I will use to post whatever questions that I may have. It will also host whatever comments/concerns/advise/etc. that anyone has. I have Josh's (ptatoehed's) Instructions, so hopefully all will go well. I'll probably spend most of tomorrow getting everything together, and taking care of whatever I need to before I go out of town for the week. Hopefully I won't be posting anything on this thread until I'm done (Crosses-fingers....)
Wish Me Luck!!!
04-15-2008, 07:34 PM
#30
Supporting Maxima.org Member

iTrader: (54)
Join Date: Feb 2001
Location: Northern Jersey
Posts: 10,166
Before the install you might wanna just pick up some misc nuts and bolts for mounting all the fuel managment units and just misc connectors, some extra fuel line if something has to be changed, maybe some extra Vaccum hose, some Coolant overflow hose. Just to have misc stuff there to use when stuff either breaks or you run out of it.
Good Luck and report back ASAP !!
-matt
Good Luck and report back ASAP !!
-matt
04-16-2008, 05:45 AM
#31

nice dude, good luck with the install.
I will have my kit installed mid May, by TJ_Max.
I wish i had the confidence to tackle this myself, but i cant afford any downtime, i need to start on friday after work and my car MUST be 100% running by monday, to get to work.
let me know if you run in to any problems, as we both have AE 5th gens.
I will have my kit installed mid May, by TJ_Max.
I wish i had the confidence to tackle this myself, but i cant afford any downtime, i need to start on friday after work and my car MUST be 100% running by monday, to get to work.
let me know if you run in to any problems, as we both have AE 5th gens.
 04-16-2008, 07:54 AM
#33
Senior Member
Thread Starter
iTrader: (10)
Join Date: May 2007
Location: Colliers, NL Canada
Posts: 476
Hey Matt,
On another forum someone suggested that I "Shave the Alternator" before I start the install, then someone else commented that the V1 guys don't have to do this.
Does your V1 plate eliminate the need to do this, as I have one. (Included when I bought the kit).
On another forum someone suggested that I "Shave the Alternator" before I start the install, then someone else commented that the V1 guys don't have to do this.
Does your V1 plate eliminate the need to do this, as I have one. (Included when I bought the kit).
Before the install you might wanna just pick up some misc nuts and bolts for mounting all the fuel managment units and just misc connectors, some extra fuel line if something has to be changed, maybe some extra Vaccum hose, some Coolant overflow hose. Just to have misc stuff there to use when stuff either breaks or you run out of it.
Good Luck and report back ASAP !!
-matt
Good Luck and report back ASAP !!
-matt
04-16-2008, 04:51 PM
#34

Hey Matt,
On another forum someone suggested that I "Shave the Alternator" before I start the install, then someone else commented that the V1 guys don't have to do this.
Does your V1 plate eliminate the need to do this, as I have one. (Included when I bought the kit).
On another forum someone suggested that I "Shave the Alternator" before I start the install, then someone else commented that the V1 guys don't have to do this.
Does your V1 plate eliminate the need to do this, as I have one. (Included when I bought the kit).
Correction, the V2 Guys dont have to do this.

Thread
Thread Starter
Forum
Replies
Last Post
impossible2stop
4th Generation Maxima (1995-1999)
6
10-28-2000 11:31 AM