How To: Replacing Seals on Vortech V2 Blower
 09-12-2011, 09:15 PM
#1
Senior Member

Thread Starter
iTrader: (85)

Join Date: Jan 2007
Location: Wrentham,MA/Smithfield,RI
Posts: 4,517
How To: Replacing Seals on Vortech V2 Blower
Hey guys,
Thought I'd do a small write-up to hopefully help save some people time and money, as I'll give credit to Mad-MAX_SE (George) for convincing me to do it myself.
So upon installation of the kit, my car developed a small oil leak that turned worse as time passed. It started after installing the supercharger, so I tried everything possible. I replaced sandwich plate & fittings, feed line fitting and eventually after pulling the blower, I saw that it was not coming from the drainback tube or seal on the drainback nipple. The drainback tube was not kinked either.
So this is about 2 months of driving with the leaking seal...
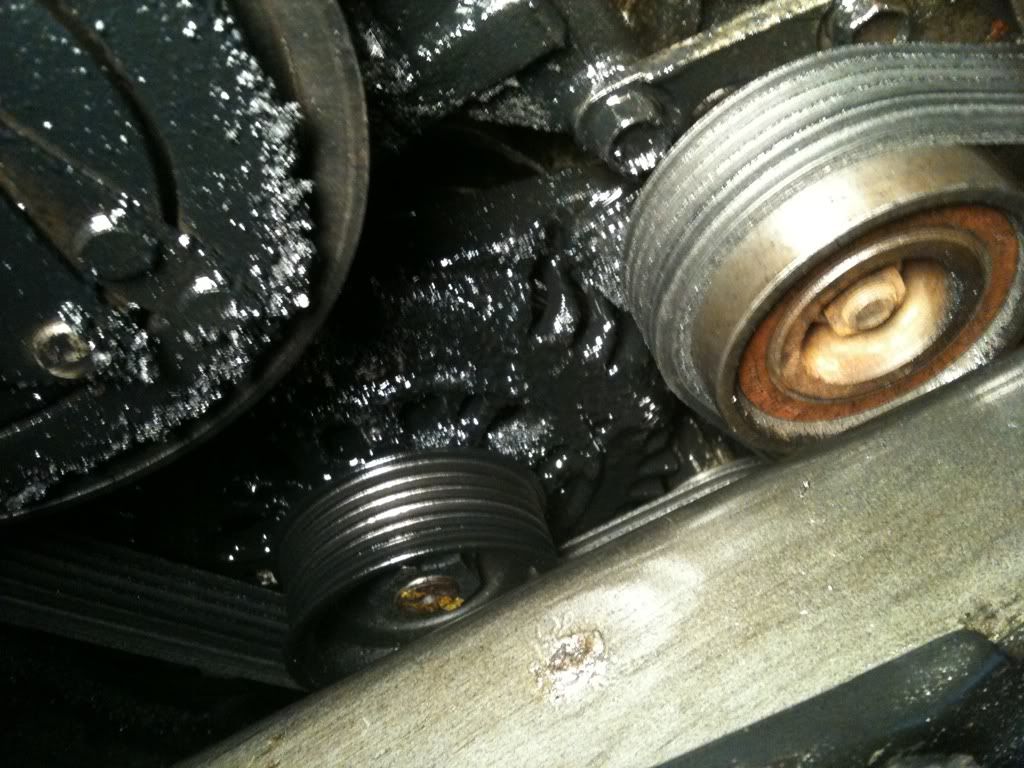
The cleanup process was possibly the most tedious task of this whole process
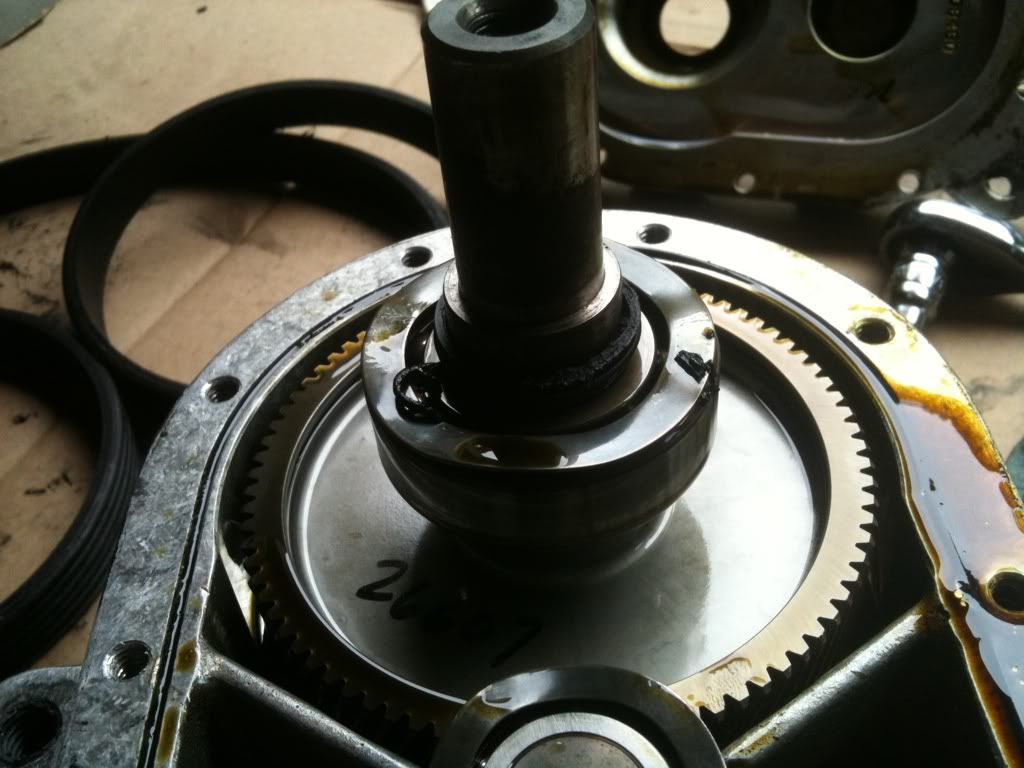
First step is to take the blower off the plate, then remove the pulley. Here is the blower with the pulley off, as you can see there is a whole lot of oil around the input shaft.
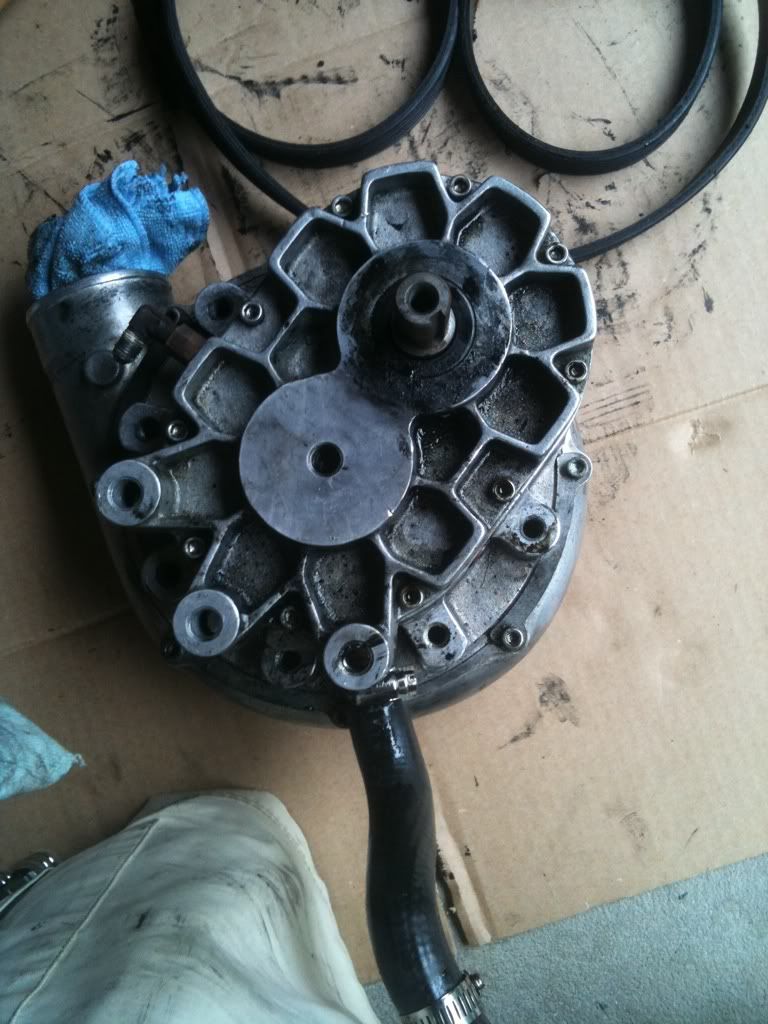
In order to take the front cover off, you need a standard allen set (I can't remember the exact size, but I got a variety pack at Lowe's for $20 that you'll need anyways to take the blower off the plate).
Remove the 10 allen bolts. Next, use a small flathead screwdriver to pry the front cover off the two pegs that keep the cover aligned.
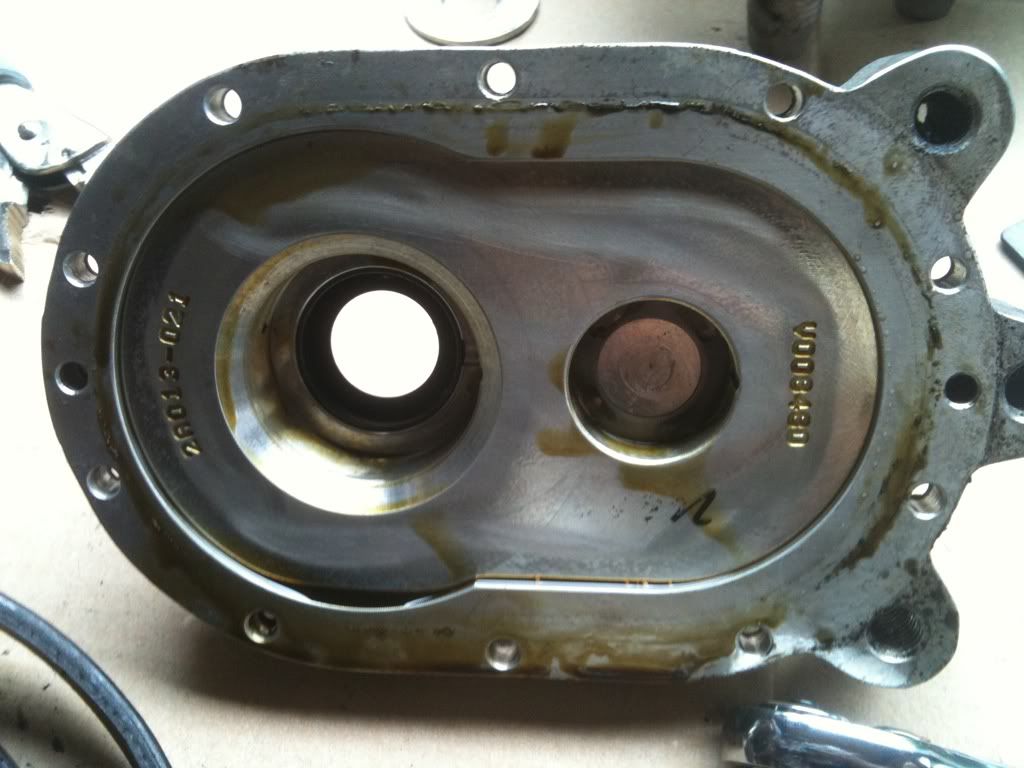
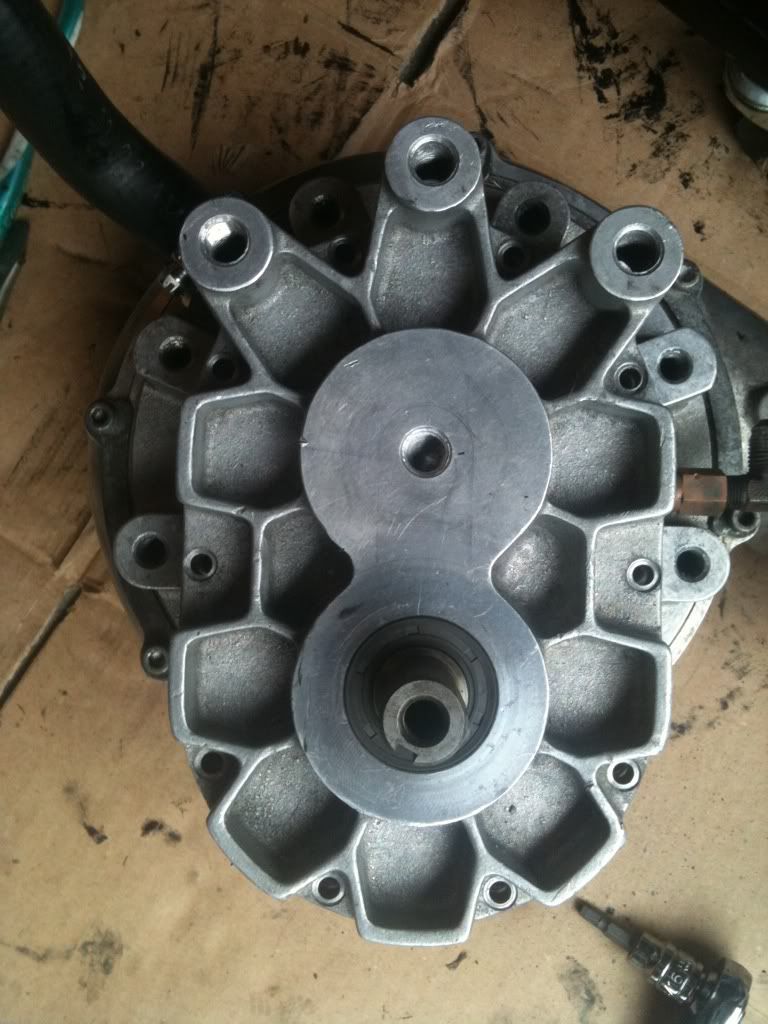
Front Cover:
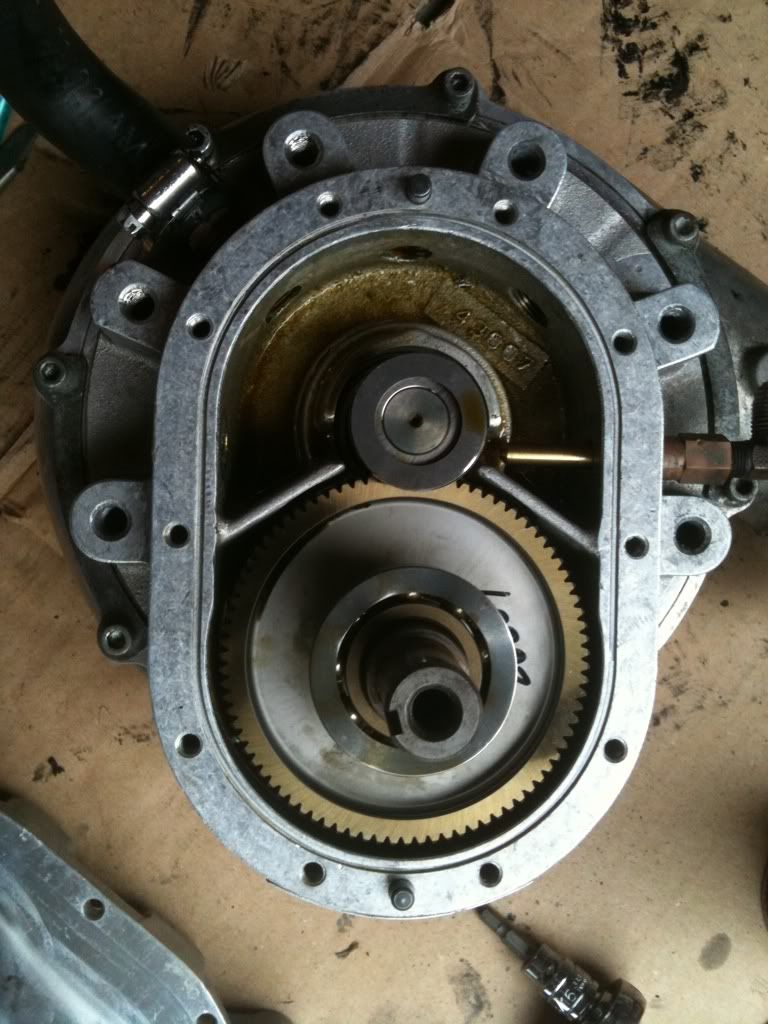
Supercharger internals:
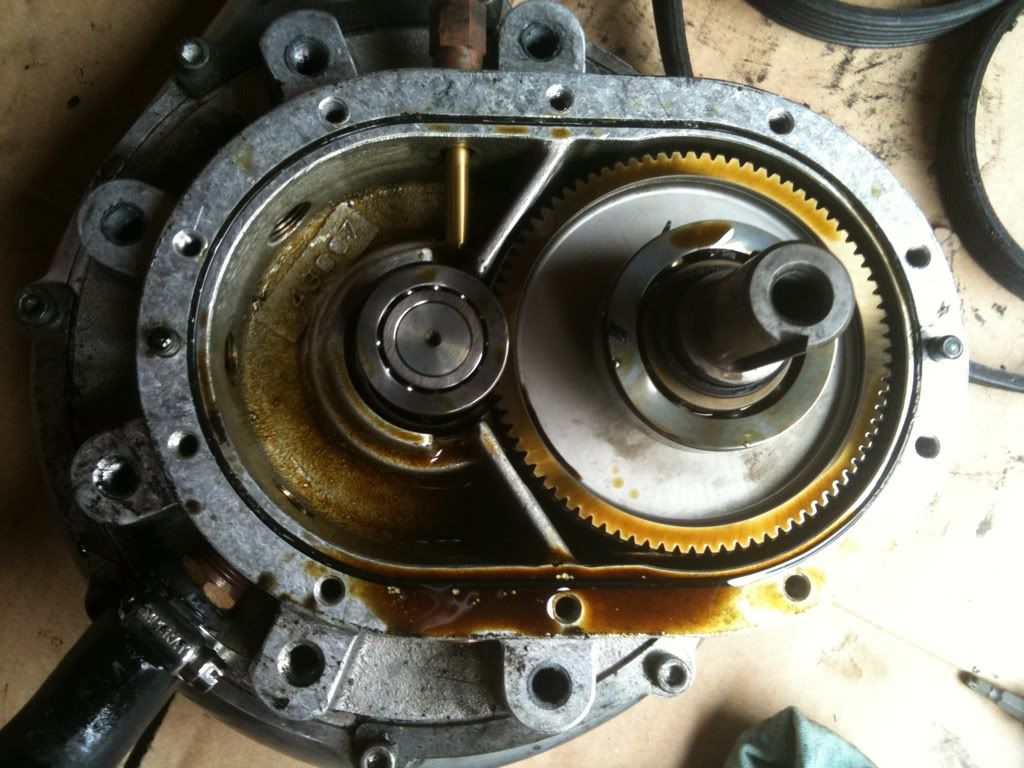
Note: You can see the two "pegs" in the last picture that are at the two oval ends. The input shaft/gear is on the right and the impeller gear is on the left. There are 2 sets of bearings, one for each shaft.
You can see in this picture how destroyed the seal actually is...
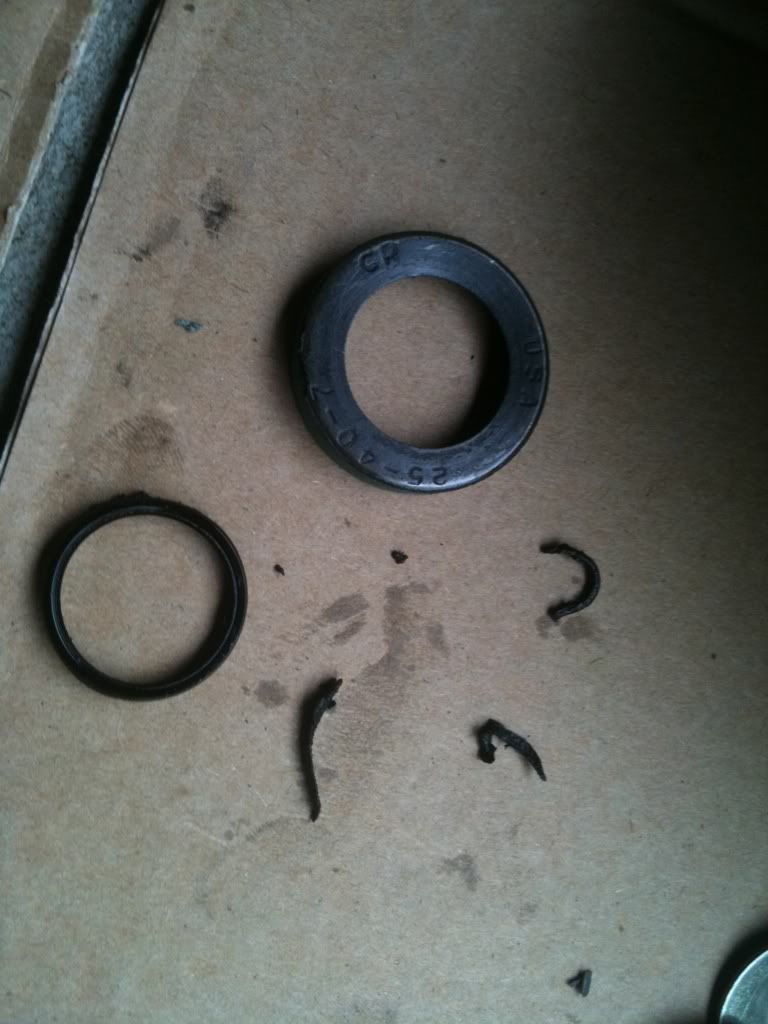
Next, take a large socket (I used a 27mm) and press out the old seal and tap the new one in. Here's the remains of my old seal...
And here is the front cover with the new seal installed and all cleaned up
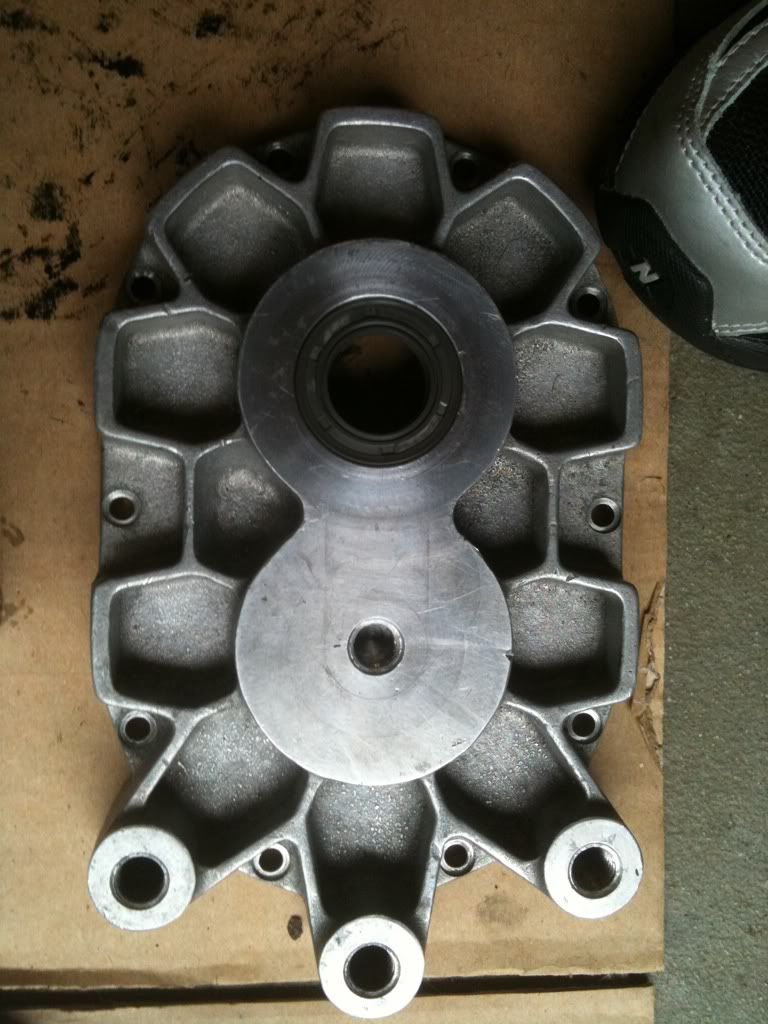
Back side:
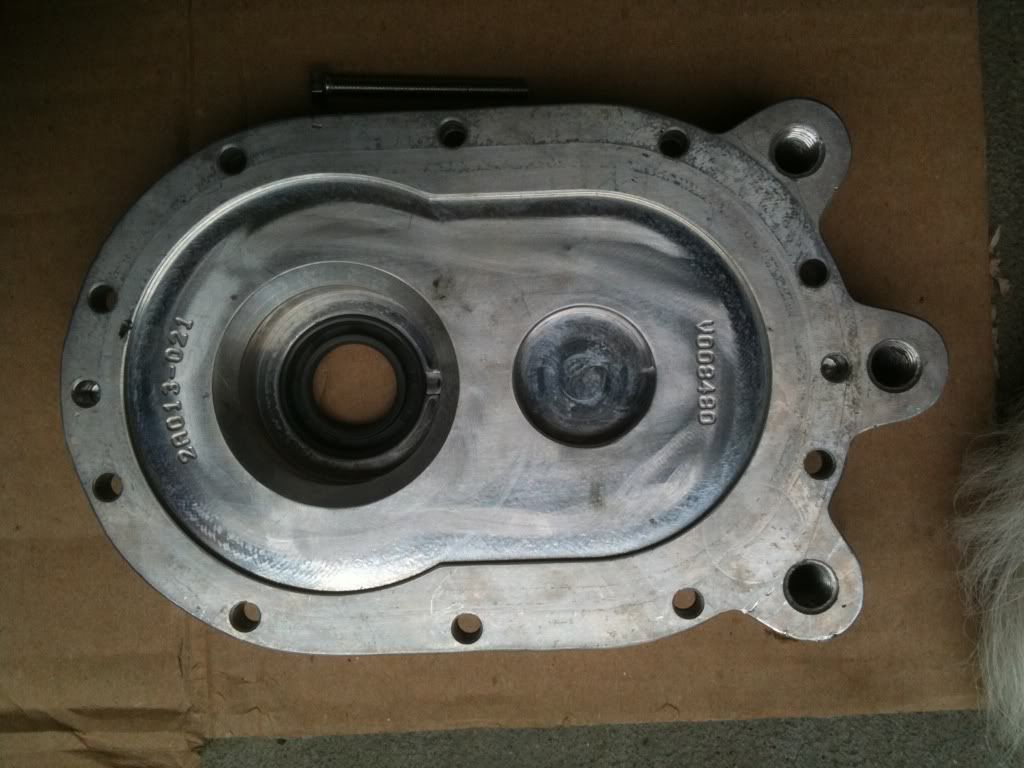
S/C internals with the old seal removed and double checked to see there was no remains in the input shaft bearings. Also make sure you clean up the entire front surface where the front o-ring seal is seated.
Finally, you need to replace the large front cover o-ring seal, as they are a one time use seal. Also make sure that both metal gaskets that go over the bearings are in their original place, the flat one directly on the bearings, and the wavy one on the outermost part of the cover.
Finish by tapping the front cover on softly with your hands or with a rubber mallet, making sure that the o-ring stays placed (sorta a pita, it took a couple tries but finally got it).
Finally put the 10 allen bolts back on to seal the front cover to the blower. I torqued them relatively tight (hand tightened) and did not use any thread locker/sealant, as there was none previously on the threads.
Put the pulley back on, and throw the plate back together and you're good to reinstall on the car.
Here is the link for the website that I bought the seals. You need (1) V-series Input shaft seal - $20 and (1) Front cover O-ring - $20.
http://www.superchargerrebuild.com/?page_id=6
So when all said and done, I spent $45 dollars and about an hour of my time that would have cost me $380 plus shipping and 3-8 weeks down time of sending the blower into Vortech for a rebuild. Granted they would have replaced the remaining seals and bearings, but there was no need for them to be done. Also props to s1mplyV for moral support while I undertook this relatively simple task. And thanks again George for talking me into doing it myself.
-Matt
Thought I'd do a small write-up to hopefully help save some people time and money, as I'll give credit to Mad-MAX_SE (George) for convincing me to do it myself.
So upon installation of the kit, my car developed a small oil leak that turned worse as time passed. It started after installing the supercharger, so I tried everything possible. I replaced sandwich plate & fittings, feed line fitting and eventually after pulling the blower, I saw that it was not coming from the drainback tube or seal on the drainback nipple. The drainback tube was not kinked either.
So this is about 2 months of driving with the leaking seal...
The cleanup process was possibly the most tedious task of this whole process
First step is to take the blower off the plate, then remove the pulley. Here is the blower with the pulley off, as you can see there is a whole lot of oil around the input shaft.
In order to take the front cover off, you need a standard allen set (I can't remember the exact size, but I got a variety pack at Lowe's for $20 that you'll need anyways to take the blower off the plate).
Remove the 10 allen bolts. Next, use a small flathead screwdriver to pry the front cover off the two pegs that keep the cover aligned.
Front Cover:
Supercharger internals:
Note: You can see the two "pegs" in the last picture that are at the two oval ends. The input shaft/gear is on the right and the impeller gear is on the left. There are 2 sets of bearings, one for each shaft.
You can see in this picture how destroyed the seal actually is...
Next, take a large socket (I used a 27mm) and press out the old seal and tap the new one in. Here's the remains of my old seal...
And here is the front cover with the new seal installed and all cleaned up
Back side:
S/C internals with the old seal removed and double checked to see there was no remains in the input shaft bearings. Also make sure you clean up the entire front surface where the front o-ring seal is seated.
Finally, you need to replace the large front cover o-ring seal, as they are a one time use seal. Also make sure that both metal gaskets that go over the bearings are in their original place, the flat one directly on the bearings, and the wavy one on the outermost part of the cover.
Finish by tapping the front cover on softly with your hands or with a rubber mallet, making sure that the o-ring stays placed (sorta a pita, it took a couple tries but finally got it).
Finally put the 10 allen bolts back on to seal the front cover to the blower. I torqued them relatively tight (hand tightened) and did not use any thread locker/sealant, as there was none previously on the threads.
Put the pulley back on, and throw the plate back together and you're good to reinstall on the car.
Here is the link for the website that I bought the seals. You need (1) V-series Input shaft seal - $20 and (1) Front cover O-ring - $20.
http://www.superchargerrebuild.com/?page_id=6
So when all said and done, I spent $45 dollars and about an hour of my time that would have cost me $380 plus shipping and 3-8 weeks down time of sending the blower into Vortech for a rebuild. Granted they would have replaced the remaining seals and bearings, but there was no need for them to be done. Also props to s1mplyV for moral support while I undertook this relatively simple task. And thanks again George for talking me into doing it myself.
-Matt


 lol
lol


 Good info.
 10-13-2011, 09:49 AM
#10

I think we should sticky this thread.
Here is a in detail PDF on how to rebuild a unit.
http://www.starrland.com/Supercharge...%202-22-08.pdf
Here is a in detail PDF on how to rebuild a unit.
http://www.starrland.com/Supercharge...%202-22-08.pdf
10-13-2011, 03:08 PM
#11

I think we should sticky this thread.
Here is a in detail PDF on how to rebuild a unit.
http://www.starrland.com/Supercharge...%202-22-08.pdf
Here is a in detail PDF on how to rebuild a unit.
http://www.starrland.com/Supercharge...%202-22-08.pdf

Thread
Thread Starter
Forum
Replies
Last Post
lowpost99
1st & 2nd Generation Maxima (1981-1984 and 1985-1988)
7
05-16-2021 11:18 AM
Dennis Twohy
1st & 2nd Generation Maxima (1981-1984 and 1985-1988)
0
10-01-2015 06:01 PM