Front Strut/Spring Removal Part 1
 05-09-2007, 03:30 PM
#1

Front Strut/Spring Removal Part 1
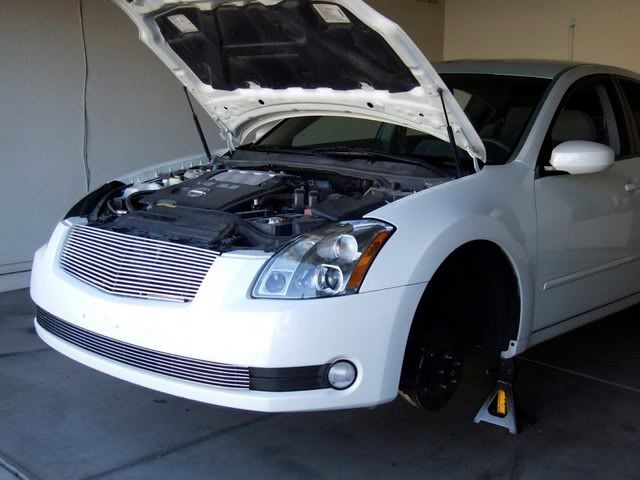
For all of you who want definitive instructions on removal of front struts & springs. This is a relatively easy process. Don't be intimadated. Save yourself some bucks! You can do the whole car (fronts & backs)in about 4 hours.
The fronts took me 2 hours and 45 minutes. The rears can be done in about 45 minutes.
First the tools:
14mm socket
17mm socket
19mm deep socket
Liquid Wrench
Spring Compressor
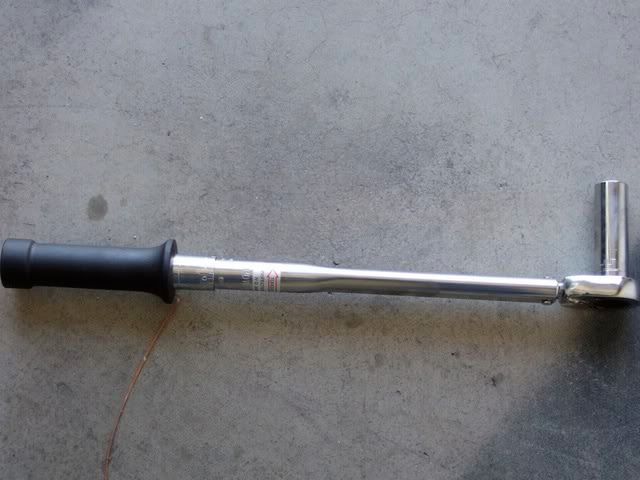
Long rachet for leverage
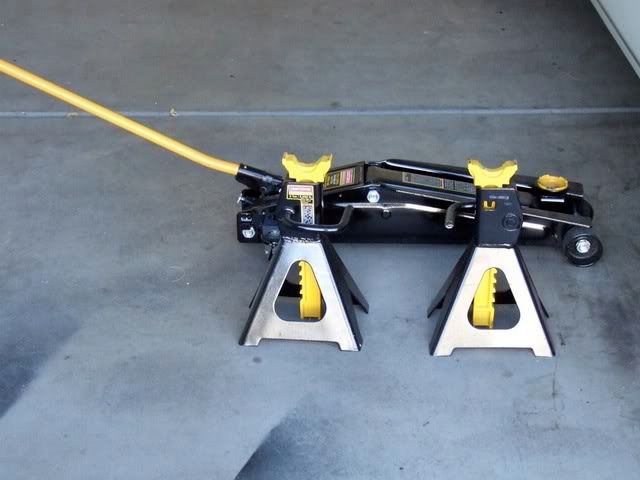
Hydraulic lift & two jackstands
Beer (Most important)
Start Time:

Start Height with H&R Springs (1 inch lower than stock):
Stay tuned for part 2
The fronts took me 2 hours and 45 minutes. The rears can be done in about 45 minutes.
First the tools:
14mm socket
17mm socket
19mm deep socket
Liquid Wrench
Spring Compressor
Long rachet for leverage
Hydraulic lift & two jackstands
Beer (Most important)
Start Time:
Start Height with H&R Springs (1 inch lower than stock):
Stay tuned for part 2

 ........
05-09-2007, 03:43 PM
........
05-09-2007, 03:43 PM
#3
Part 2
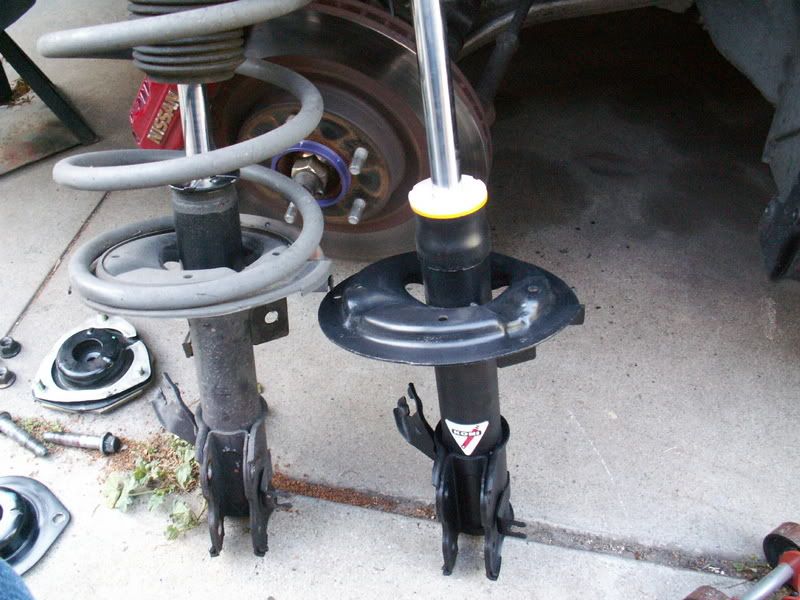
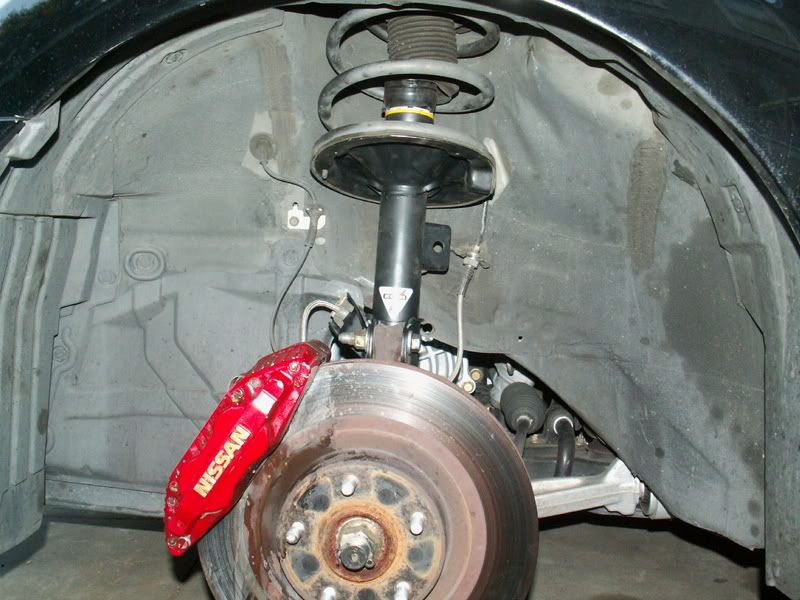
Put front end of car on jackstands and remove wheels/tires. spray liquid wrench on all screws/bolts to be removed.
Loosen (a little like 1/2 turn) screw on top of strut. It is located in the middle of the three
screws holding the top of the strut to the vehicle (14mm).

Place hydraluc jack underneath front suspension.
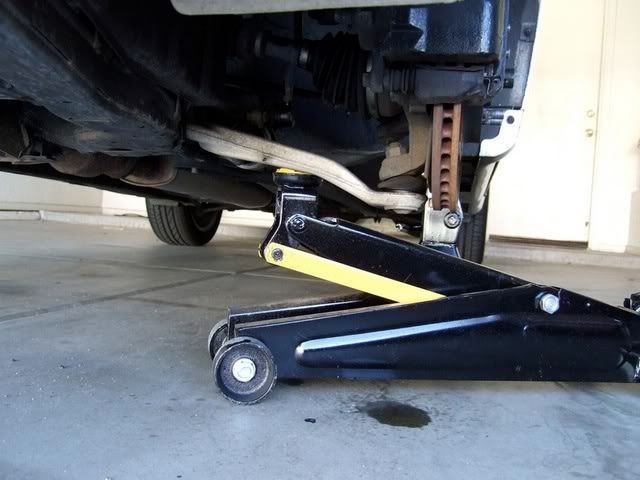
Remove nut holding sway bar linkage to strut (17mm).
It is in the middle of the picture.
Loosen (a little like 1/2 turn) screw on top of strut. It is located in the middle of the three
screws holding the top of the strut to the vehicle (14mm).
Place hydraluc jack underneath front suspension.
Remove nut holding sway bar linkage to strut (17mm).
It is in the middle of the picture.
05-09-2007, 03:52 PM
#4
Part 3
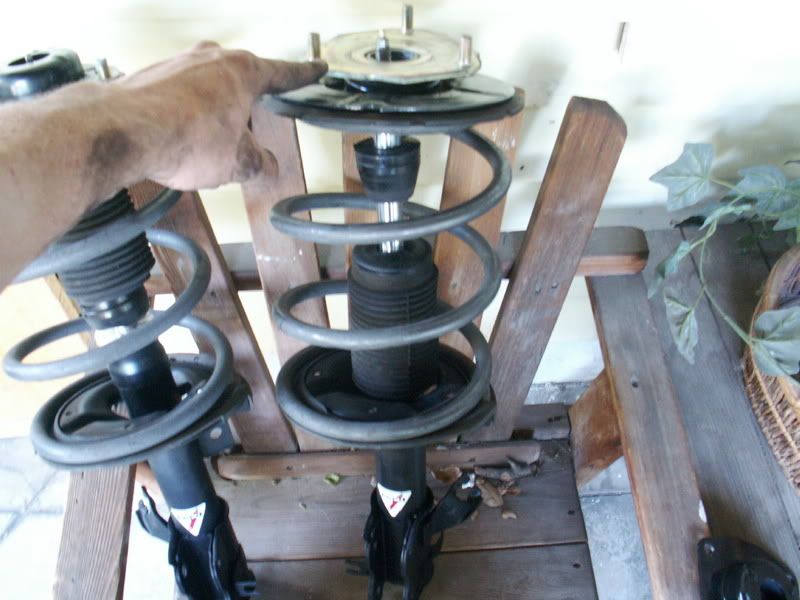
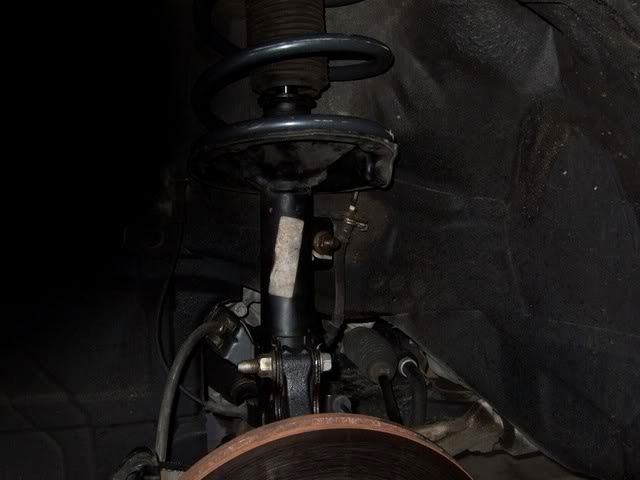
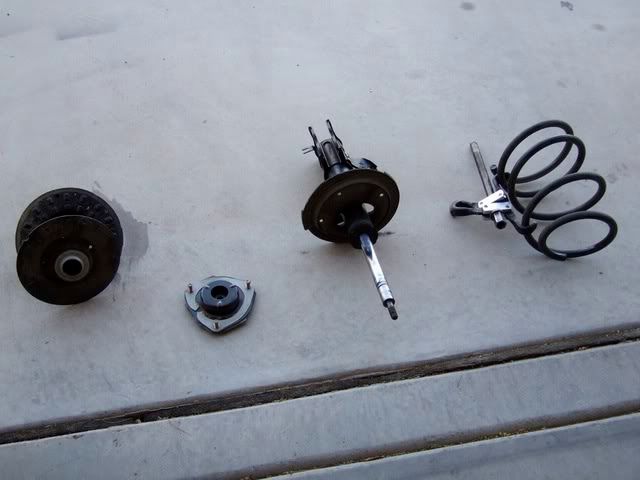
Remove two screws/bolts holding the strut to the control arm (17mm & 19mm). Disconnect brake lines ect... connected to strut.

Remove three top screws holding the strut to the vehicle (14mm).
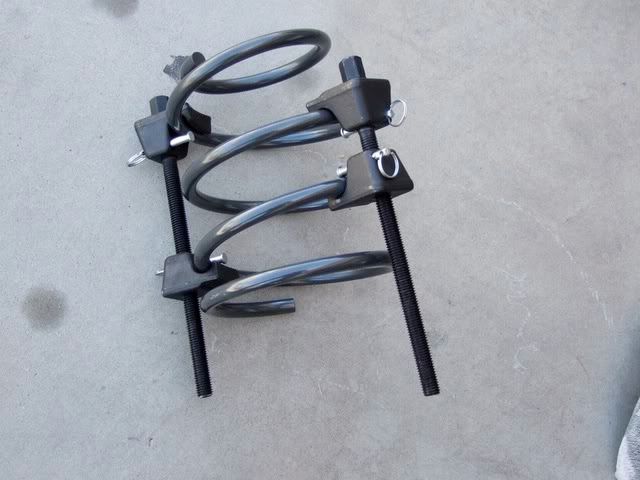
Remove strut assembly from vehicle and attach spring compressor to springs.
Tighten/compress it pretty good to avoid injury.
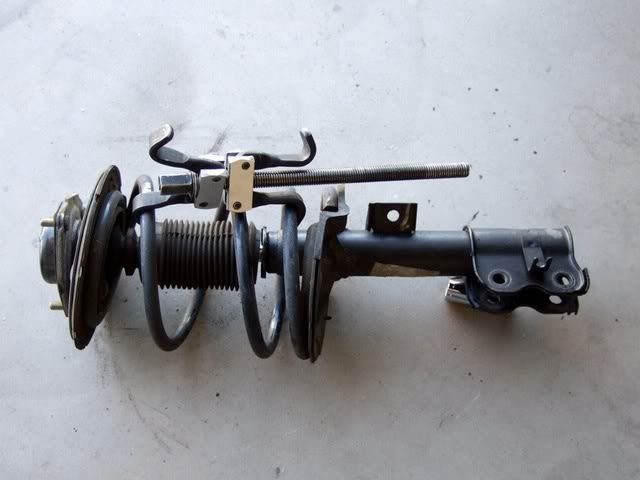
Remove top screw from strut. Should look like this now.
Remove three top screws holding the strut to the vehicle (14mm).
Remove strut assembly from vehicle and attach spring compressor to springs.
Tighten/compress it pretty good to avoid injury.
Remove top screw from strut. Should look like this now.
05-09-2007, 04:01 PM
#5
Part 4
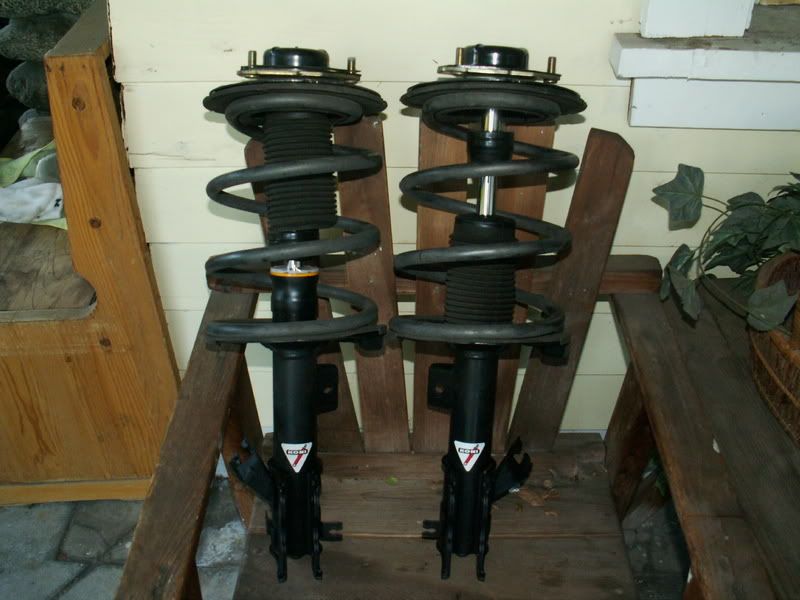
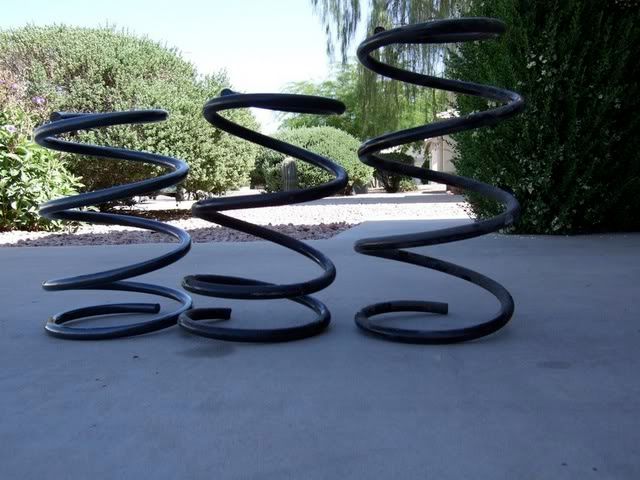
Here is a picture of Progress, H&R, & OEM side by side from left to right.
Attach spring compressor to new spring and install in reverse order onto the strut.
It is now 9:15

Do the other side. Toss the wheels back on and take a picture or two.
It is now 10:15
Attach spring compressor to new spring and install in reverse order onto the strut.
It is now 9:15
Do the other side. Toss the wheels back on and take a picture or two.
It is now 10:15
05-09-2007, 04:04 PM
#6
part 5
The pics...
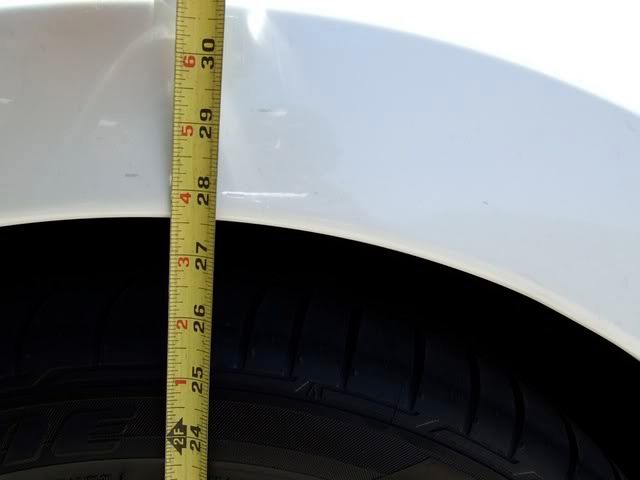
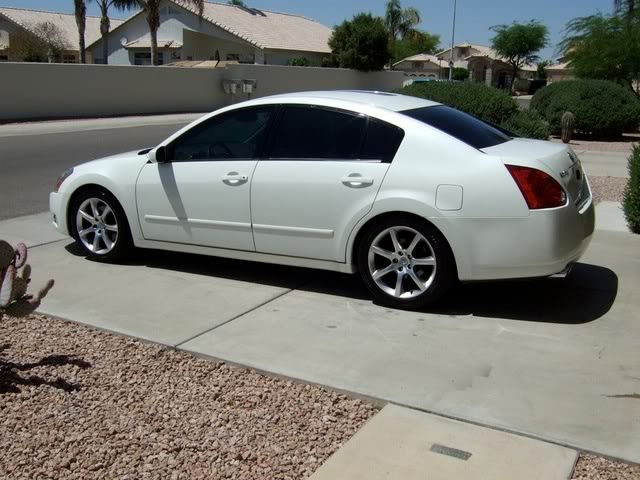
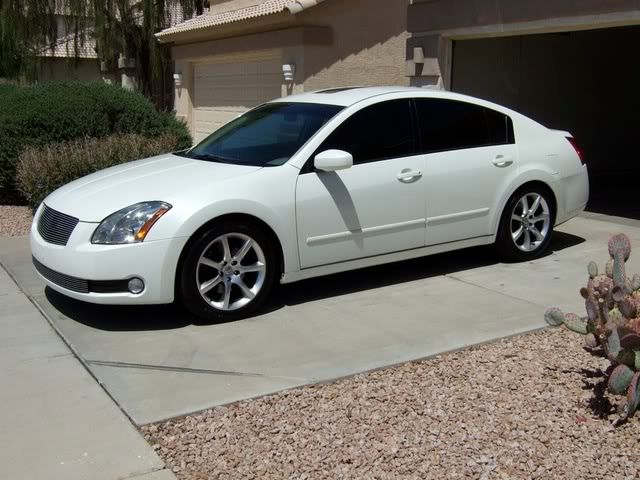
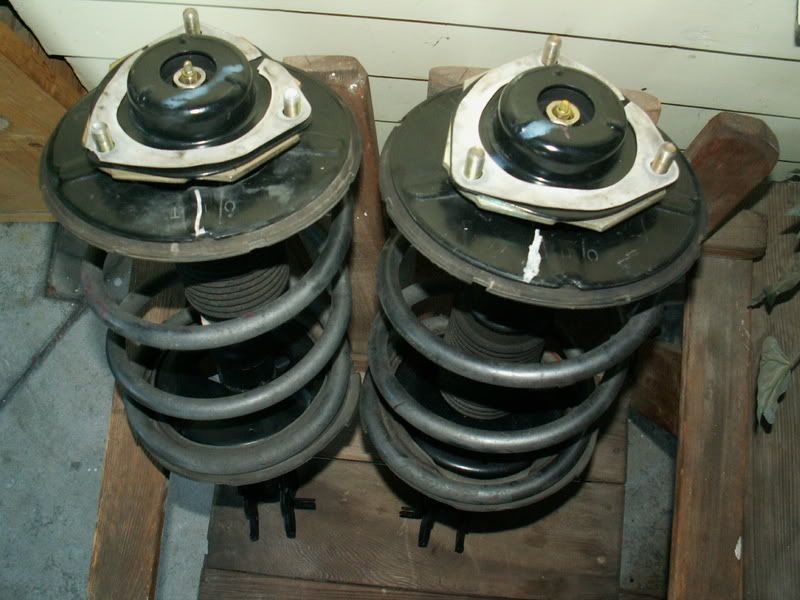
This is right after the install. Hopefully she will drop a little more. As you can see, front Progress springs are almost 3/4 inches lower than the H&R springs. Ride quality is a little rougher and handling is a little better.
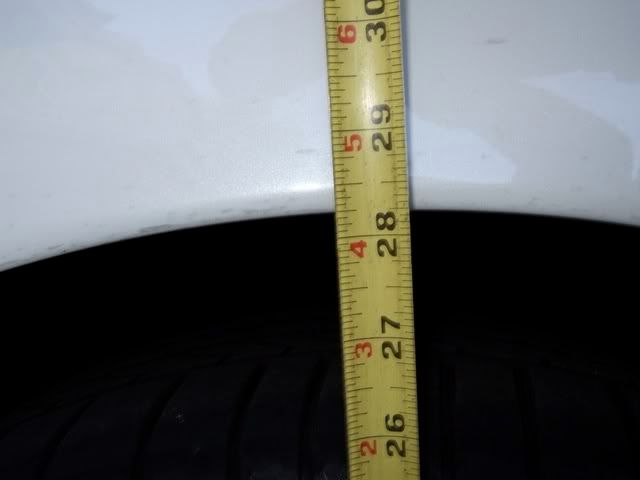
From the ground to the rear wheelwell measures 27 inches (about 1/2 inches lower than the front).
Here is how it looked with the H&R springs (without spacer in the rear).

This is right after the install. Hopefully she will drop a little more. As you can see, front Progress springs are almost 3/4 inches lower than the H&R springs. Ride quality is a little rougher and handling is a little better.
From the ground to the rear wheelwell measures 27 inches (about 1/2 inches lower than the front).
Here is how it looked with the H&R springs (without spacer in the rear).


 05-09-2007, 05:16 PM
#11

GREAT WRITE UP!!!!! Car looks awesome.
Question: You said the ride is rougher, please elaborate. What did you find worse as compared to stock, what did you find to be better? (other than the obvious good looks of the Max when lowered. Thanks.
Question: You said the ride is rougher, please elaborate. What did you find worse as compared to stock, what did you find to be better? (other than the obvious good looks of the Max when lowered. Thanks.
 05-09-2007, 06:13 PM
#13
Supporting Maxima.org Member


Join Date: Aug 2000
Posts: 464
Nice! I will be doing my struts this summer so this is good stuff.
You did all that without air tools?
Can anyone recommend a good set of spring compressor? Place to order
and price.
Also add to the list...strut boots if your old ones are torn.
Can someone do the same instructions for replacing front brake pads.
You did all that without air tools?
Can anyone recommend a good set of spring compressor? Place to order
and price.
Also add to the list...strut boots if your old ones are torn.
Can someone do the same instructions for replacing front brake pads.


 05-09-2007, 06:32 PM
#17

just get a set of spring compressors from advance auto or auto zone.. like $35.. and if you're cheap, you can return em after "renting" them... heh .... I kept mine. I'll be using them again and again.
no air tools required unless you have some REALLY stuck bolts.. but I'd like to think our cars are new enough that shouldn't happen.
ride is rougher, meaning, if you drive down bumpy, cracked, potholed roads, you'll feel it more... it's not that bad though.. handling is noticeably better, as well as traction. don't forget to get an alignment!
and for the record, our stock setup's springs won't shoot off that far.. there's not much pressure on it.. I'd still recommend a spring compressor for it, but there's little to worry about... if you're worried, just lay the assembly on the ground pointing at something safe, and break it loose.. also, with some help, you can put the progress springs on and assemble it without the compressors... just takes a little muscle/body weight.
ok, I think that answers it all
05-09-2007, 06:40 PM
#19
Compressing the springs to remove them seems more dangerous to me than the way we did it. Compressing them makes them more potent than just removing them. As Ritz said, they aren't under terrible pressure. We did just as Ritz suggested (Learned from him, blackmaxx96, NCSUmax) how to do this very thing. It is fun to hear the loud pop when the spring releases.
05-09-2007, 07:05 PM
#20
Originally Posted by 4MySwee
Nice write up. We didn't use spring compressors for my car.
I have a white one also. It took about three days for the drop to completely finish. Don't forget your alignment!
I have a white one also. It took about three days for the drop to completely finish. Don't forget your alignment!
The ride quality is still good. Keep in mind I also installed Progress RSB and rear GR2's as well. If you go stock rear shocks it will soften up quite a bit. To tell you the truth, the KYB GR2's caused the most ride degradation. But they also improved the handling a lot.
I really don't see how you guys got the new spring installed without compressing it with a spring compressor (I can bench 325 lbs). Personally, I think you need it more for the install rather than taking it off.
Leet, I'll install your springs for $95 (to help pay for the tools and equipment) and provide the beer plus dancing girls. Ok the girls will be on video but it beats looking at my pathetic butt.
Albert-Loosen screw a little while it's on the car to make it way easier to deal with after it's off the car (keep it from spinning). No it won't hurt a bit loosening the screw by 1/2 turn before compressing the spring.
Any questions can be PMed to yours truly.
 05-09-2007, 10:11 PM
#23

deus, its not hard at all. when my friend and i did my drop, we aimed it at the brick wall, and the sturt shot only like 6 inches. to put the springs back on, i pressed down and he put the nut on, gave it a few turns and air'd it on afterwards.
05-10-2007, 05:00 AM
#25
Originally Posted by eK9aT10pSi
deus, its not hard at all. when my friend and i did my drop, we aimed it at the brick wall, and the sturt shot only like 6 inches. to put the springs back on, i pressed down and he put the nut on, gave it a few turns and air'd it on afterwards.
BlackMaxx96 (Mike) set the spring back on the assembly, Ritz and I put the top on and while Mike was pressing down with his weight, we turned the top screw, just to start it.
You can also use a jack to hold it in place while on the car as your tightening your strut mounts under the hood, which will draw it in. Just a bit of creativity. Oh yeah and some great friends that have done this before.
05-10-2007, 05:08 AM
#26
Originally Posted by DeusExMaxima
swee: I dont know how you can remove springs AND install them without a compressor. Im pretty strong myself, but not sure I would be able to do this. Please enlighten me.
 05-10-2007, 05:46 AM
#27
Originally Posted by DizzyVin
Hi im new to this, and need help. I cant post any new threads, can someone help me?


 05-10-2007, 05:28 PM
#31
I agree with Chern! You did a great write up along with lots of photos. You weren't shy with before and after shots. Your car looks stunning!
Sticky This!!!! Great Job CoolMax, and thanks for all of your documentation.
Sticky This!!!! Great Job CoolMax, and thanks for all of your documentation.
05-10-2007, 06:14 PM
#32
Originally Posted by 4MySwee
I have two kids (like you) and can benchpress many grocery bags and school backpack. I have biceps that would make Arnold Scwartneggar cringe.....j/k
05-10-2007, 06:17 PM
#33
NC?! No kidding? Whereabouts? I have family in Raleigh and New Bern. I didn't know you had three.
Struts and shocks aren't something I have experience with, just the springs/rsb/intake/oil changes and other basic maintenence...
Struts and shocks aren't something I have experience with, just the springs/rsb/intake/oil changes and other basic maintenence...
05-10-2007, 08:31 PM
#35
Ok struts are in. I test drove over the nastiest bumps in town. Results? DAYUM!!! THESE ARE FANTSTIC!!!! Soooooooooo much better than stock and cost about the same. I wasted $300 on OEM struts to replace my blown ones, and they werent any better. These Konis are $375 and are fabulous. Anyone who doesnt get them is cheating themselves out of a great handling car. Pictures coming shortly
05-10-2007, 08:40 PM
#36
Originally Posted by DeusExMaxima
Ok struts are in. I test drove over the nastiest bumps in town. Results? DAYUM!!! THESE ARE FANTSTIC!!!! Soooooooooo much better than stock and cost about the same. I wasted $300 on OEM struts to replace my blown ones, and they werent any better. These Konis are $375 and are fabulous. Anyone who doesnt get them is cheating themselves out of a great handling car. Pictures coming shortly
I'm glad you're happy, but my wallets probably going to have to pay for it!
I just feel it in my bones. After my latest suspension Mods, my front struts are NOW the weakest link.