Black/Body Color Headlight Assembly
 03-20-2005, 07:21 PM
#1
Supporting Maxima.org Member

Thread Starter
iTrader: (1)
Join Date: Nov 2004
Location: Upland CA
Posts: 7,353
Black/Body Color Headlight Assembly
Here is the chrome piece removed:
Here is the chrome piece painted gloss black with 2 coats of clear coat:
Much more details to follow, but these are preliminary to give u an idea.
Here is the chrome piece painted gloss black with 2 coats of clear coat:
Much more details to follow, but these are preliminary to give u an idea.
 03-21-2005, 09:19 AM
#2
Supporting Maxima.org Member
Thread Starter
iTrader: (1)
Join Date: Nov 2004
Location: Upland CA
Posts: 7,353
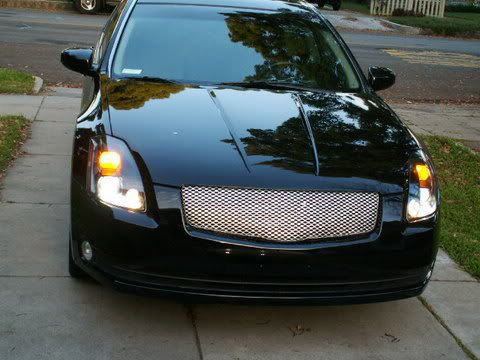
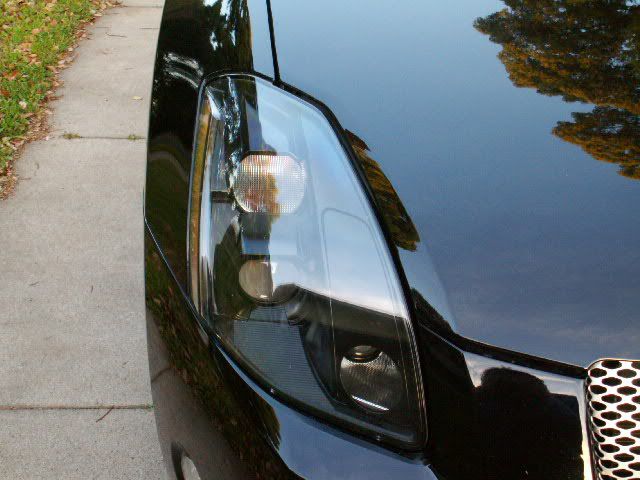
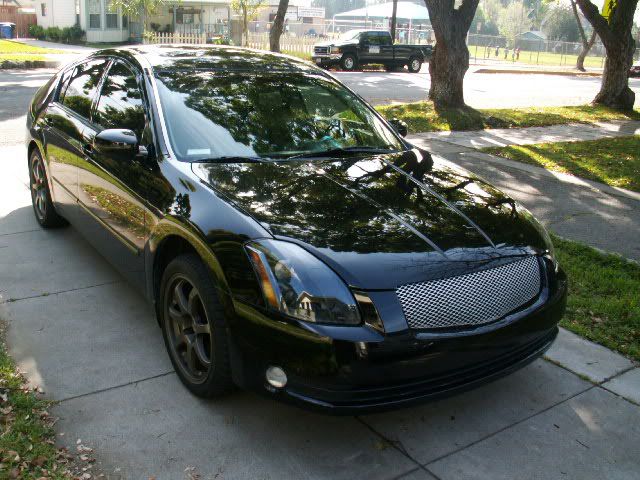
Here are daytime pics. The glare from the headlight cover makes the headlight appear bright, but in reality, you see the black trim MUCH better than in pics. I tried to get the best angle. Maybe I need to wait for cloudy day. Anyway, here they are:

Still like em? I love em. Very distinctive.
Still like em? I love em. Very distinctive.

 03-27-2005, 11:24 PM
#4
Supporting Maxima.org Member
Thread Starter
iTrader: (1)
Join Date: Nov 2004
Location: Upland CA
Posts: 7,353
Ok, here is the procedure for painting the chrome insert for 6th generation Maxima headlights.
BEFORE pictures of headlights.
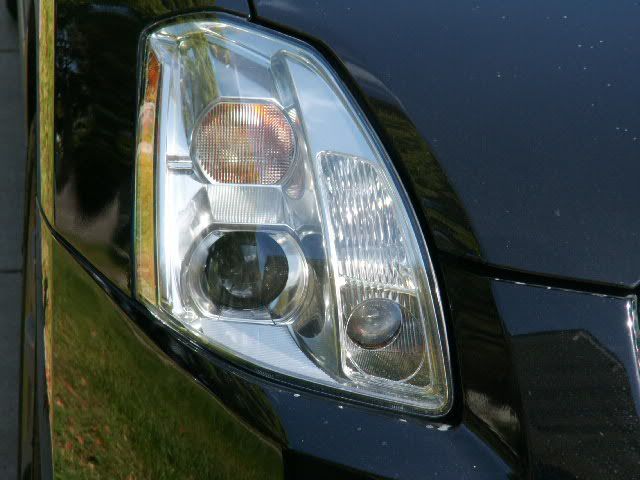
The first step is to remove the grill. The plastic fasteners are easy to remove. If you have two small flat blade screwdrivers, like I didnt have, you put each one on one side of the center part and pull it up. Then grab it and pull the whole fastener out. Put the grill aside somewhere where you won't step on it.
Now its time to remove the whole front bumper cover. You will need a phillips screwdriver and ur small flat blades. Start on either side of the cover. First you need to have access to some of the fasteners and screws. These are hidden behind the fenderwell plastic covers. Remove the fasteners that hold the fenderwell plastic. Remove enough of them that you can pry it open to get ur arm in the TIGHT space to remove the screws.
Once you get the fenderwell trim open, there are two screws that hold the cover on. They are hard to get at, but try. Unscrew the two screws. Then go underneath and see many fasteners that hold the underside pastic tray to the bumper cover. These were harder for me to remove. But I got them undone. Now do the other side.
BEFORE pictures of headlights.
The first step is to remove the grill. The plastic fasteners are easy to remove. If you have two small flat blade screwdrivers, like I didnt have, you put each one on one side of the center part and pull it up. Then grab it and pull the whole fastener out. Put the grill aside somewhere where you won't step on it.
Now its time to remove the whole front bumper cover. You will need a phillips screwdriver and ur small flat blades. Start on either side of the cover. First you need to have access to some of the fasteners and screws. These are hidden behind the fenderwell plastic covers. Remove the fasteners that hold the fenderwell plastic. Remove enough of them that you can pry it open to get ur arm in the TIGHT space to remove the screws.
Once you get the fenderwell trim open, there are two screws that hold the cover on. They are hard to get at, but try. Unscrew the two screws. Then go underneath and see many fasteners that hold the underside pastic tray to the bumper cover. These were harder for me to remove. But I got them undone. Now do the other side.
03-27-2005, 11:36 PM
#5
Supporting Maxima.org Member
Thread Starter
iTrader: (1)
Join Date: Nov 2004
Location: Upland CA
Posts: 7,353
The front cover drops down exposing the lights. These are held on by 10 mm screws. Find them and remove them. Here is a pic of the car with cover removed and one headlight out:
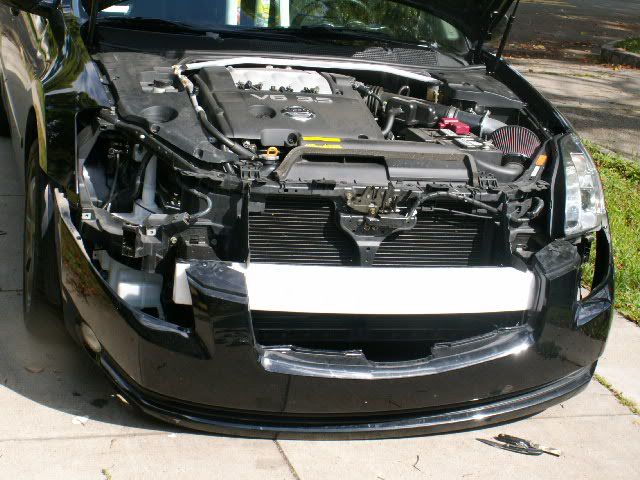
Scary, but its ok. The headlights are HEAVY so be careful. I pre-heated the oven to 225 degrees. Also, the area I was working in I wanted dry. So I cranked up the floor heater to 75 and really dried out the air.
Unscrew and remove the turn signal light. This is the easy part. Next, remove the metal box from the assembly. There is a bag of dessicant under the box inside. Remove it too. Unscrew the headlight cover and remove the wires from the cover. Unscrew the 4 screws that hold the headlight in place. Magnetize ur screwdriver to help you. There are two other screws that hold a metal plate in. Loosen those and remove the headlight. Here is a pic of the headlight:
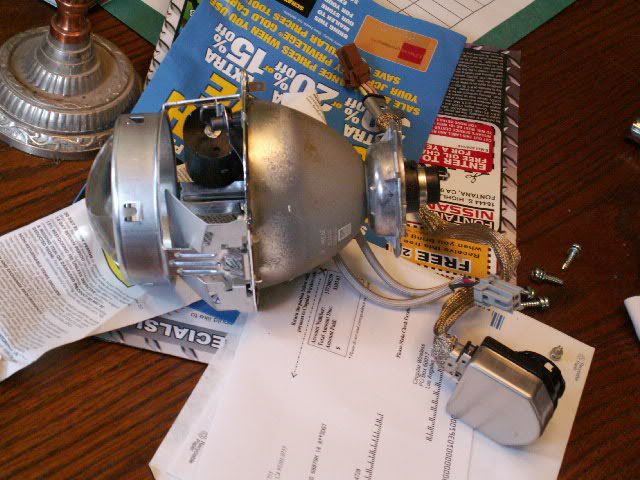
Put it in a plastic bag and seal it. Do NOT touch the bulb. Hangle this as little as you can.
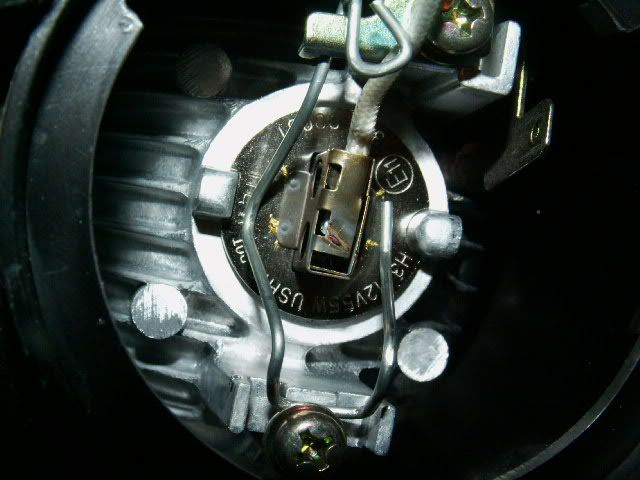
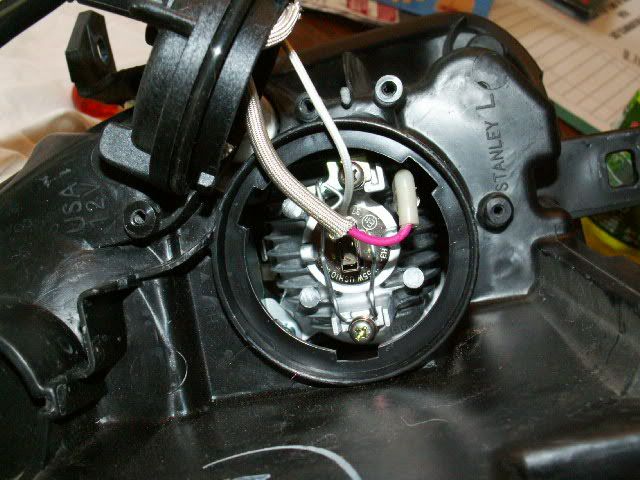
The foglight is difficult to remove. Unscrew one of the screws holding this spring wire in place. Carefully remove the spring and remove the bulb. Here are pics of the foglight:
Scary, but its ok. The headlights are HEAVY so be careful. I pre-heated the oven to 225 degrees. Also, the area I was working in I wanted dry. So I cranked up the floor heater to 75 and really dried out the air.
Unscrew and remove the turn signal light. This is the easy part. Next, remove the metal box from the assembly. There is a bag of dessicant under the box inside. Remove it too. Unscrew the headlight cover and remove the wires from the cover. Unscrew the 4 screws that hold the headlight in place. Magnetize ur screwdriver to help you. There are two other screws that hold a metal plate in. Loosen those and remove the headlight. Here is a pic of the headlight:
Put it in a plastic bag and seal it. Do NOT touch the bulb. Hangle this as little as you can.
The foglight is difficult to remove. Unscrew one of the screws holding this spring wire in place. Carefully remove the spring and remove the bulb. Here are pics of the foglight:
03-27-2005, 11:43 PM
#6
Supporting Maxima.org Member
Thread Starter
iTrader: (1)
Join Date: Nov 2004
Location: Upland CA
Posts: 7,353
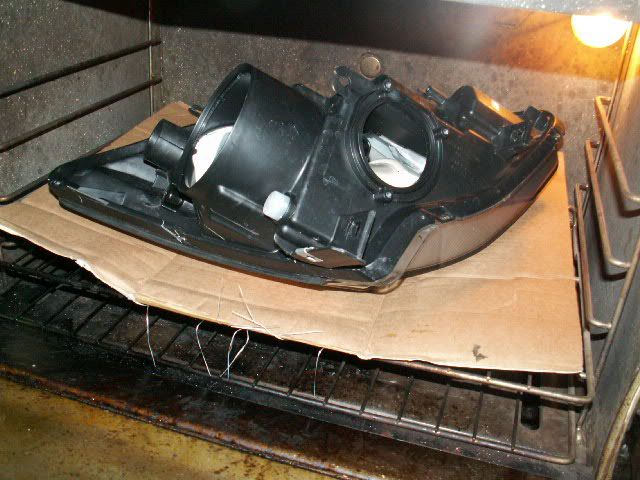
Remove all brackets and anything with a screw. Do not touch the headlight adjustors. Now its time to bake it - 225 degrees for 15-20 minutes. Here is a pic of the light in the oven:
Remove light assembly with glove and use a putty knife to CAREFULLY pry apart the cover from the assembly. Do it cleanly and keep the sealant intact if u can.
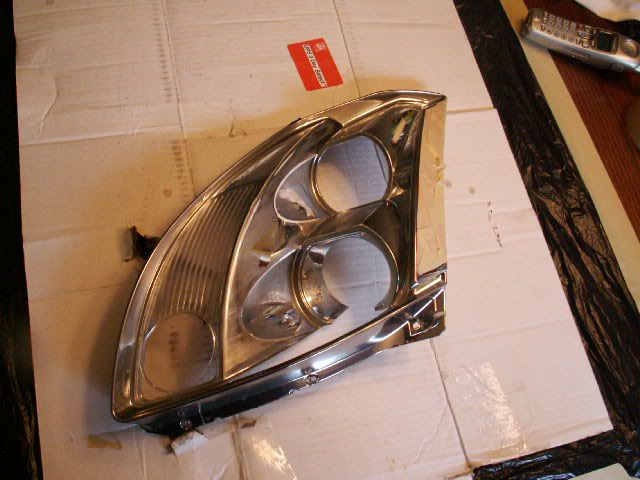
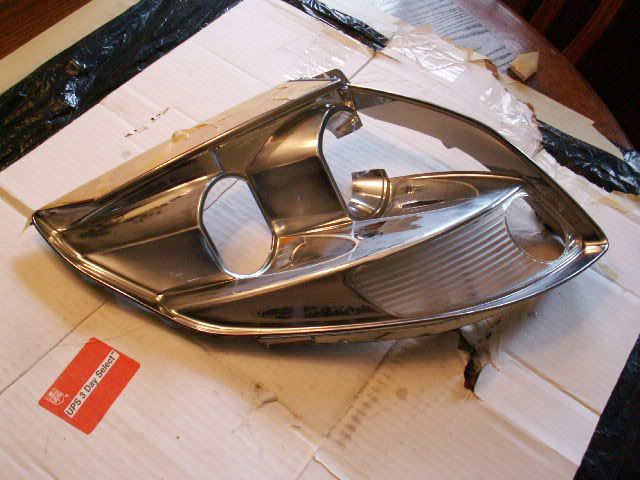
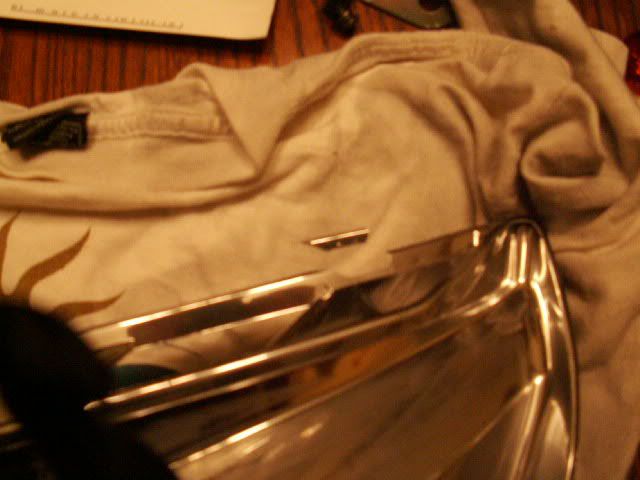
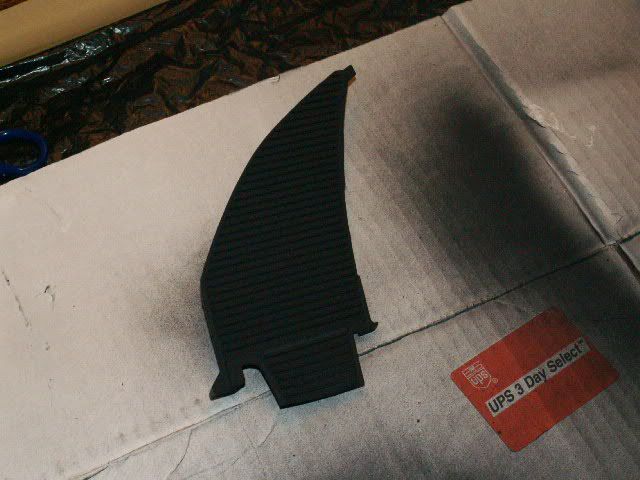
Remove the chrome trim from the clear cover by unscrewing two screws. Here is a pic of the chrome trim:
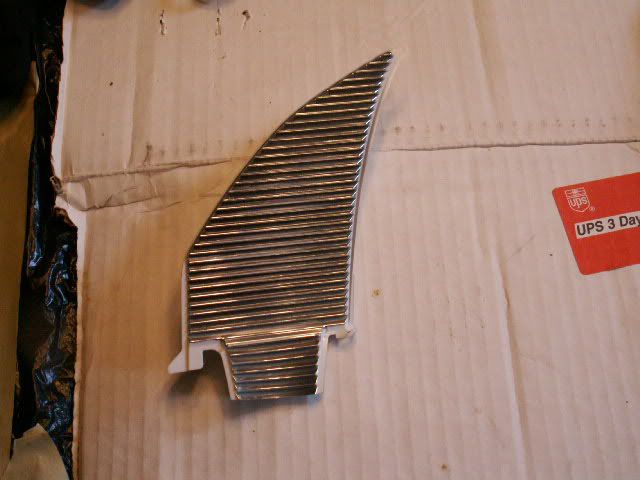
Sand it with 1000 grit wetsand sand paper under running water until the chrome is scuffed. Tape the orange reflector. I tried to remove it and BROKE the chrome trim. Here is a pic of that disaster:
Remove light assembly with glove and use a putty knife to CAREFULLY pry apart the cover from the assembly. Do it cleanly and keep the sealant intact if u can.
Remove the chrome trim from the clear cover by unscrewing two screws. Here is a pic of the chrome trim:
Sand it with 1000 grit wetsand sand paper under running water until the chrome is scuffed. Tape the orange reflector. I tried to remove it and BROKE the chrome trim. Here is a pic of that disaster:
03-27-2005, 11:48 PM
#7
Supporting Maxima.org Member
Thread Starter
iTrader: (1)
Join Date: Nov 2004
Location: Upland CA
Posts: 7,353
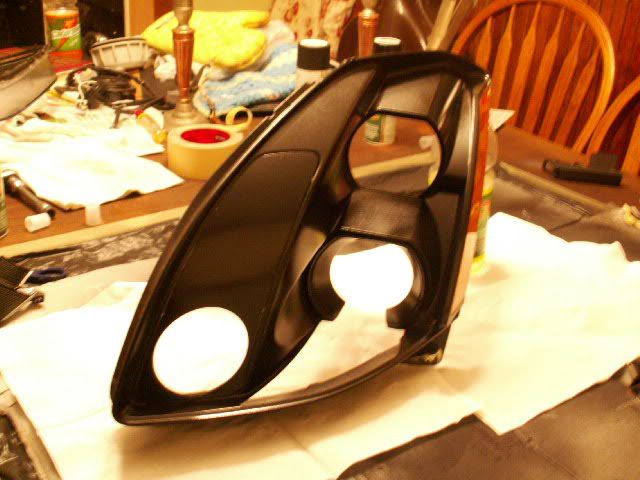
Next, prime the trim. I used black Plasticote from Pep Boys. I primed the DRL lense becuase I was not going to use it. Its up to you if you want to or not. Here is a picture of it primed:
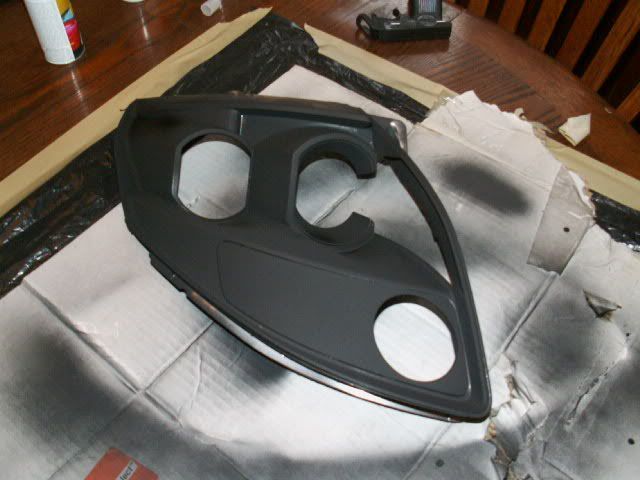
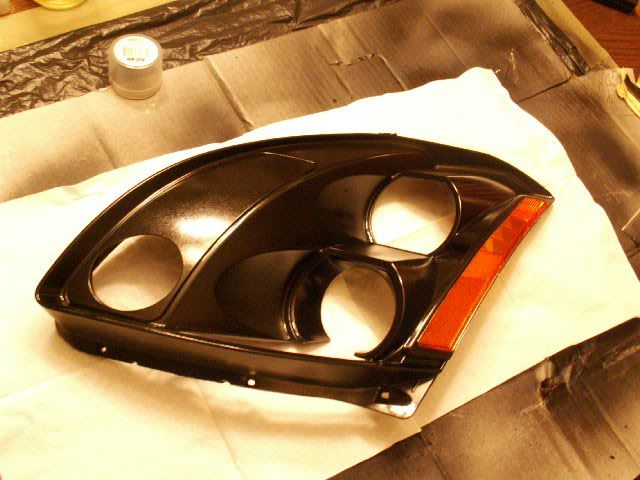
Then I painted it with gloss black paint using the Plasticote paint. I clearcoated it also, I waited about 15 minutes for each coat to dry. Here is the trim after clearcoat:
Now assemble the trim in the cover. Bake the assembly again for 15 minutes and put the cover back on. I used a damp towel to clamp the cover back on the light. I waited until the light assembly was totally cooled down before I put the headlights back in. Use the other light to help you to put back the lights and wiring.
03-27-2005, 11:59 PM
#8
Supporting Maxima.org Member
Thread Starter
iTrader: (1)
Join Date: Nov 2004
Location: Upland CA
Posts: 7,353
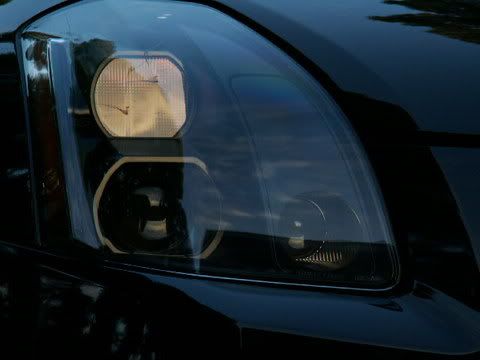
Here is a picture of one light completed next to the other one:
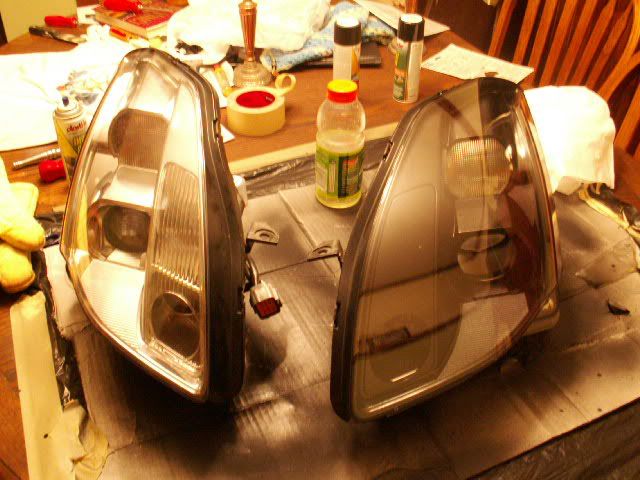
Big difference, especially in person. The glare from the camera doesnt show how nice the darkened light looks.
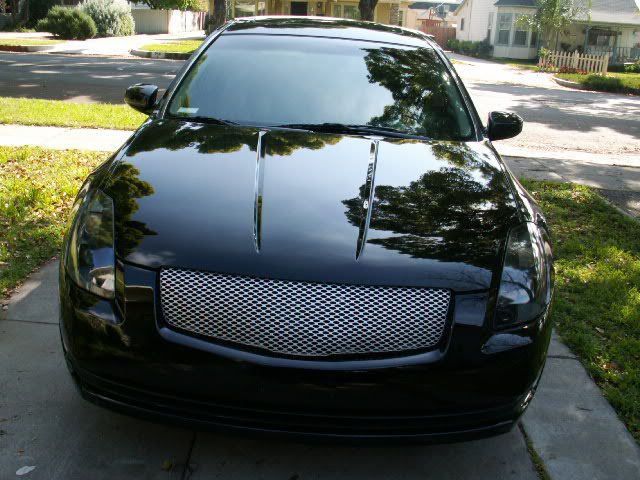
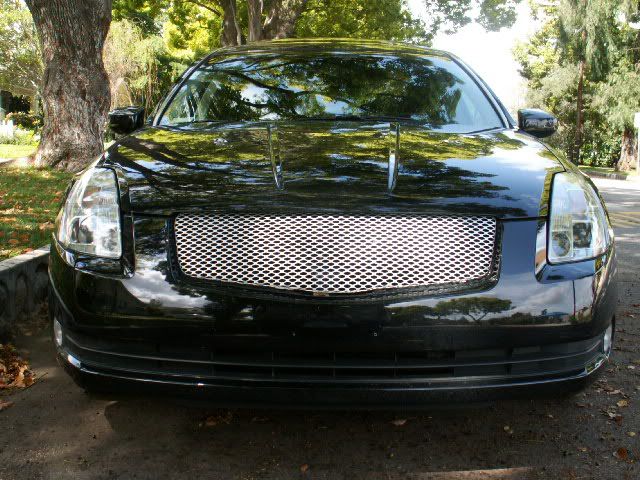
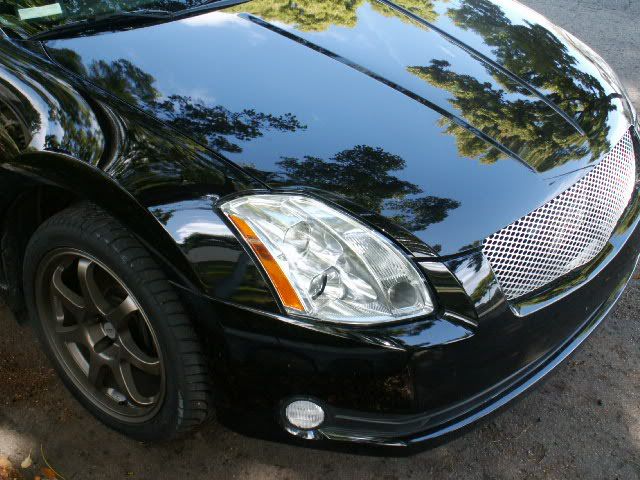
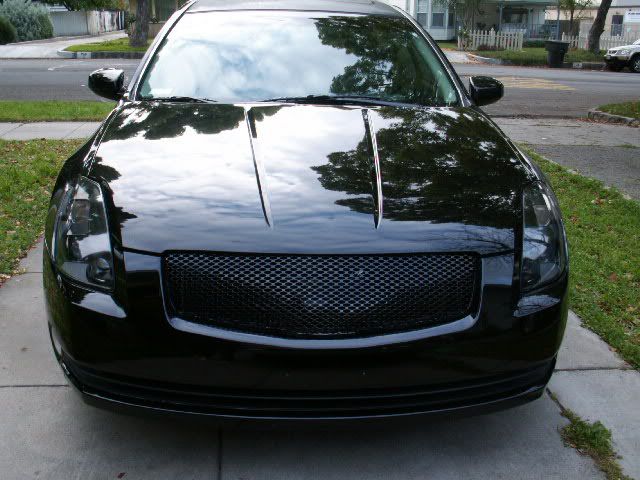
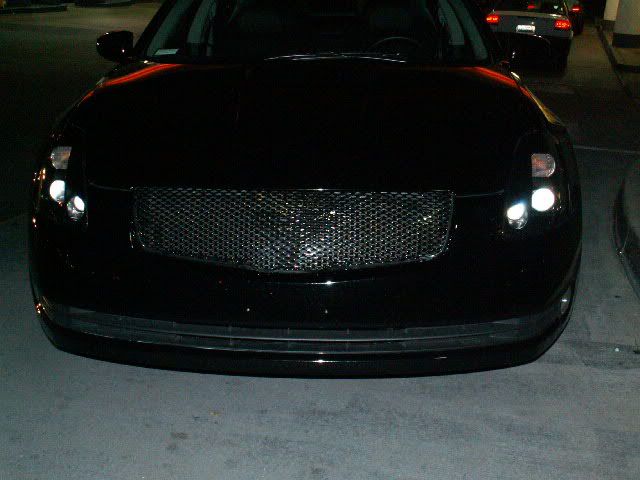
Do the other light and then install the lights in the car and reverse the order of removing the bumper cover and grill. Here are pictures taken after the lights were installed:
Big difference, especially in person. The glare from the camera doesnt show how nice the darkened light looks.
Do the other light and then install the lights in the car and reverse the order of removing the bumper cover and grill. Here are pictures taken after the lights were installed:
 03-28-2005, 12:02 AM
#10
Supporting Maxima.org Member
Thread Starter
iTrader: (1)
Join Date: Nov 2004
Location: Upland CA
Posts: 7,353
Thats it. If you have questions contact me. Thank you for all your feedback and support in this project.
DeusExMaxima
****Make sure to let painted headlights cure and air dry thoroughly (maybe a few days) before installing. fumes from the paint may cause haze [NismoMax80]****
http://www.vqpower.com/v2/articles.php?article_id=91
http://forums.maxima.org/6th-generat...eadlights.html
http://forums.maxima.org/6th-generat...-chrome-4.html
http://forums.maxima.org/6th-generat...ml#post7513265
http://forums.maxima.org/6th-generat...nt-scheme.html
http://forums.maxima.org/6th-generat...eadlights.html
http://forums.maxima.org/6th-generat...t-finally.html
Last edited by NismoMax80; 11-15-2010 at 12:06 PM.

Thread
Thread Starter
Forum
Replies
Last Post
litch
4th Generation Maxima (1995-1999)
123
01-04-2024 07:01 PM
atriuum
4th Generation Classifieds (1995-1999)
3
09-28-2015 01:19 PM