Stillen lip fit issue

 03-13-2011, 04:47 AM
#2
Member
Thread Starter

Join Date: May 2010
Location: Boston
Posts: 114
How about insight from people who have installed theirs? Did it all match up pretty easy or was there a lot of shaving, pulling, bending, etc.... I know the part # stamped on the lip matches that of my car. KB12742


 03-13-2011, 03:11 PM
#6
Member

Join Date: Feb 2011
Location: Toronto
Posts: 279


 03-13-2011, 07:00 PM
#12
Member
Thread Starter
Join Date: May 2010
Location: Boston
Posts: 114
I just kind of tried to fit it real quick to see how it lined up, but now that I just looked at the lip I noticed the edges of the lip where it meets the bumper are routed a bit on each end. Thinking about how I tried fitting it, I believe I might have tried snugging the lip right up to the bumper and not let the bumper fall into the routed groove. That just might give me the clearance I need. I'll be checking it out closer tomorrow. Ill keep you guys updated....
03-13-2011, 07:17 PM
#13
Member
Join Date: Feb 2011
Location: Toronto
Posts: 279
mine just came in last friday, I had it delivered to my buddys body shop so I havent done a test fit yet. he's ordering the paint tomorro and I hope to install it along with the roof wing by the end of the week. I'll let you know if I have any fit issues.
03-13-2011, 10:13 PM
#14
Member

Join Date: May 2009
Location: Oklahoma
Posts: 240
Let us know how that paint comes along and if it matches well.
03-14-2011, 06:55 AM
#15
Senior Member

Join Date: Nov 2010
Location: Maryland
Posts: 4,020
i respectfully disagree on the stillen lip though. ive had everyone from Infinity to BMW owners say it looks hot and looks "factory". i love how subtle it is and that it completes the front end so nicely.
03-14-2011, 11:24 AM
#16
Member
Thread Starter
Join Date: May 2010
Location: Boston
Posts: 114
OK..I fit the lip and it does fit. The problem I had was that I snugged the lip right up against the bumper and didnt let it sit down like it was supposed to. So now it fits. I feel like an idiot. What kind of bodywork/prep did everyone have to do? Im sure each lip is different but as far as sanding goes, what did you guys have to do?
 03-19-2011, 04:12 PM
#18
Member
Thread Starter
Join Date: May 2010
Location: Boston
Posts: 114
OK..dropped the lip off at paint today. He's a little backed up with a couple projects so I'm looking at a week or so. I'm sure he will be sending me progress pics, so they will be up. Anybody have a couple close ups of their lip to show how tight their fit is?
03-20-2011, 06:16 AM
#22
Member
Thread Starter
Join Date: May 2010
Location: Boston
Posts: 114
He's adding some flex agent to the paint so it will be somewhat flexible to the point where the paint isnt gonna crack when I put it on, but to answer your question....He's gonna give me a hand after paint to throw it on. I can fit it myself, but I dont want to risk any scratches doing it alone. The process is pretty easy tho. some 3M and a couple set self tapping screws!
03-20-2011, 06:30 AM
#23
Senior Member

Join Date: Jul 2010
Location: Columbus, Ohio
Posts: 326
Nice well if it isnt too much trouble can you take some pics of the process. My concern is one scrathes of course and the whole fitment process cuz i read that it would need to be sanded and all of that. Thanks for your help man!

 05-01-2011, 09:06 AM
#26
Senior Member
Join Date: Nov 2010
Location: Maryland
Posts: 4,020
One word of warning to you - every time you park and walk away from your car you'll want to walk backwards now so you can stare at your ride. Also you'll be tempted to park backwards in every parking spot from here on out. Best mod ever, you'll love it.
05-01-2011, 12:33 PM
#27
Member
Join Date: Feb 2011
Location: Toronto
Posts: 279
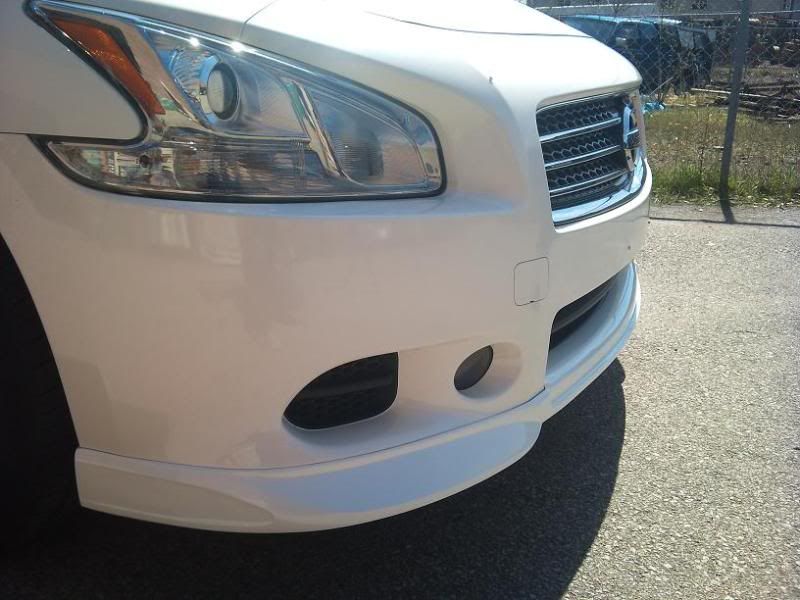
Installed mine over the weekend and yes it is a tight fit. It fit so tight that I didnt even bother with the screws. Se7enth_Gen came down on Saturday, we installed his and took a few pics...will be posting pics shortly
05-01-2011, 01:56 PM
#29
Member
Join Date: Feb 2011
Location: Toronto
Posts: 279
[quote=Rking21;8032159]Yo haw much presanding did u have to do white? quote]
I prepped 2 lips, both definitely came out of the same mold as they had the same markings on them. First thing I did was wash and scuff them using Comet, warm water & a gray scotch brite pad. After they dried I wiped them down to check for imperfections. One had a few pin holes in the front lower edge that I had to fill. Both had imperfections in various spots that I smoothed out by sanding with 800. We shot a white based adhesion promoting primer on them, let them sit overnight then I sanded them down completely with 800 before they went into the booth.
I prepped 2 lips, both definitely came out of the same mold as they had the same markings on them. First thing I did was wash and scuff them using Comet, warm water & a gray scotch brite pad. After they dried I wiped them down to check for imperfections. One had a few pin holes in the front lower edge that I had to fill. Both had imperfections in various spots that I smoothed out by sanding with 800. We shot a white based adhesion promoting primer on them, let them sit overnight then I sanded them down completely with 800 before they went into the booth.
05-01-2011, 06:58 PM
#30
Senior Member
Join Date: Jul 2010
Location: Columbus, Ohio
Posts: 326
ok cool so there wasnt much sanding down to fit more so just for paint, correct? I'm just making sure cuz I didnt do much to the lip before I sent it to get painted, but the place did all the presanding b4 paint. So i was just asking in regards to having it sanded down to fit. Also did you sand down the bumper? people said u are suppose to for it to adhere better but that that seem like a permanent flaw on the car that i dont want to do.
05-02-2011, 07:28 PM
#31
Member
Join Date: Feb 2011
Location: Toronto
Posts: 279
correct. I did not sand/scuff the bumper cover as the instructions suggested. Instead I cleaned it thoroughly and wiped with rubbing alcohol. The two-sided tape holds very well. The lip fit so tight on the pre-fit line up that I didnt see the need to scar the bumper cover  glad I didnt.
glad I didnt.
05-04-2011, 05:46 PM
#32
Junior Member

Join Date: Feb 2011
Location: Southern Ontario, Canada
Posts: 41
Here's some tips on the fit up
install from Stillen
http://www.stillen.com/product_files/KB12742~inst.pdf
As Will said above, use alcohol to clean the surface.
Remove front licence plate, if you would like some extra room. (it's not required)

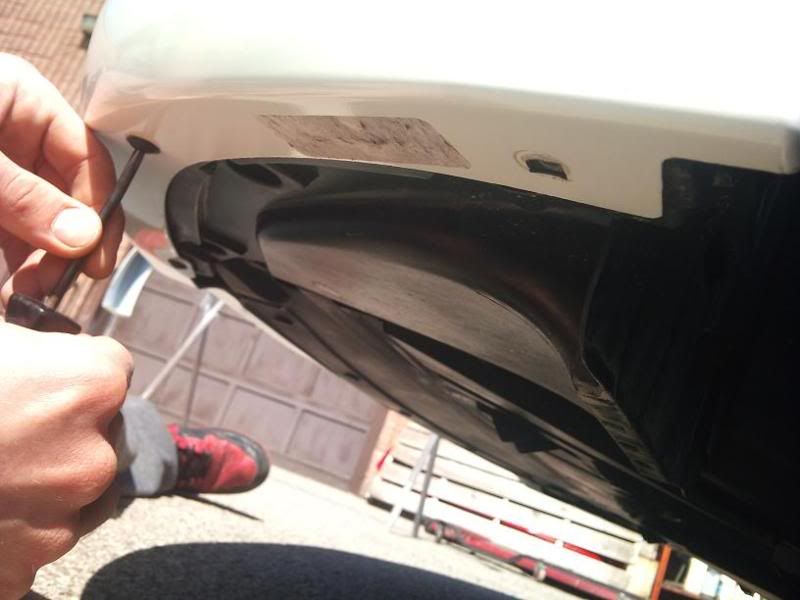
Remove the lower splash guard screws, it will allow for a bit more flexability when fitting the lip.
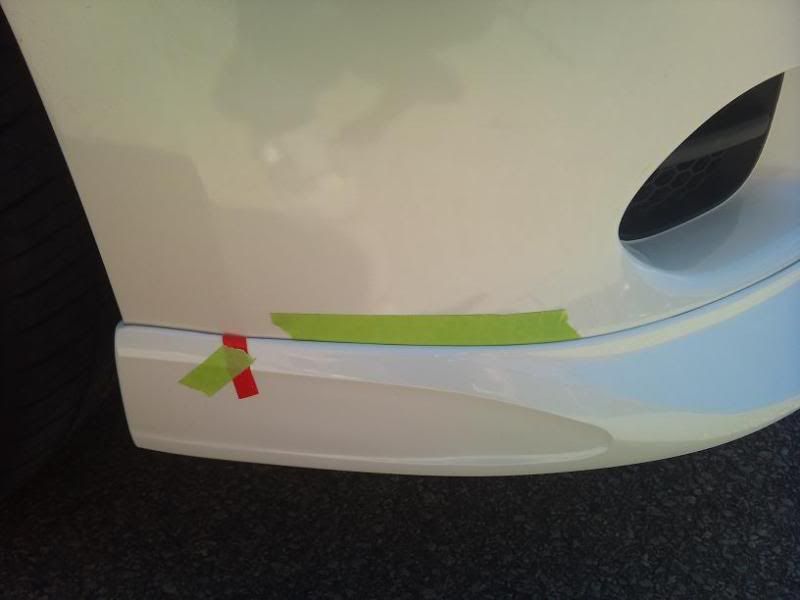
Dry fit the lip, and measure from the headlight down for a good measurement location. Apply tape to mark your measurement to ensure the lip is even.
After dry fitting and measured to your liking, peel back the tape and secure it as it says in the stillen instructions.

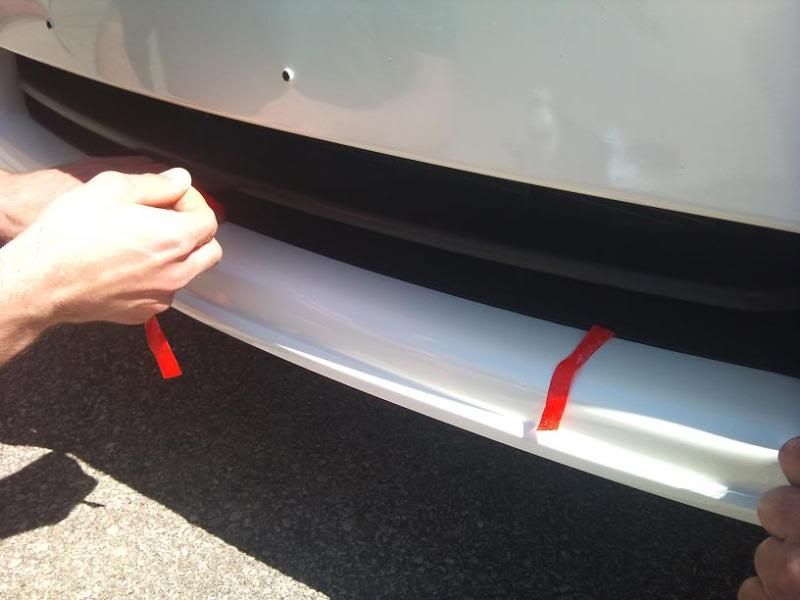
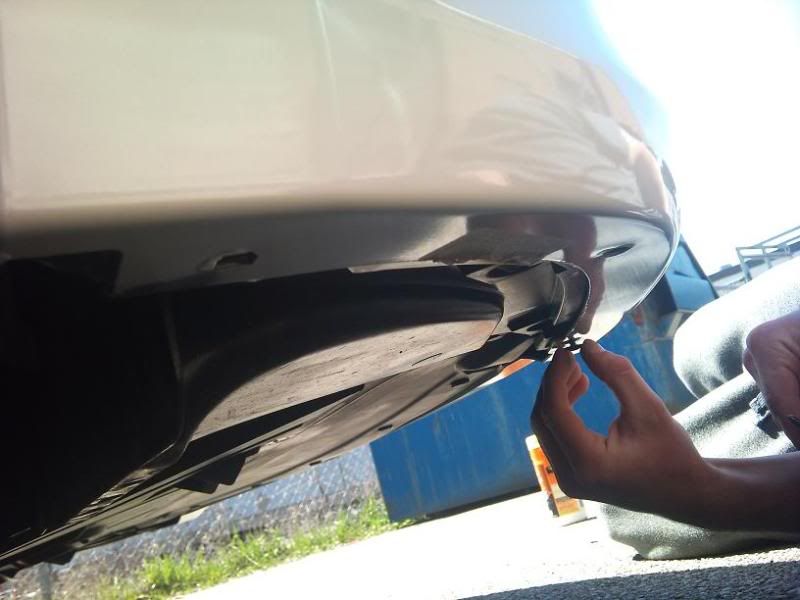
Use a tool that will separate the lip from the bumper as you peel the tape off. Be sure to have someone help you keep the lip in place as you peel the tape. (obviously use a tool that will not scratch the paint... please don't use a screw driver... please.)
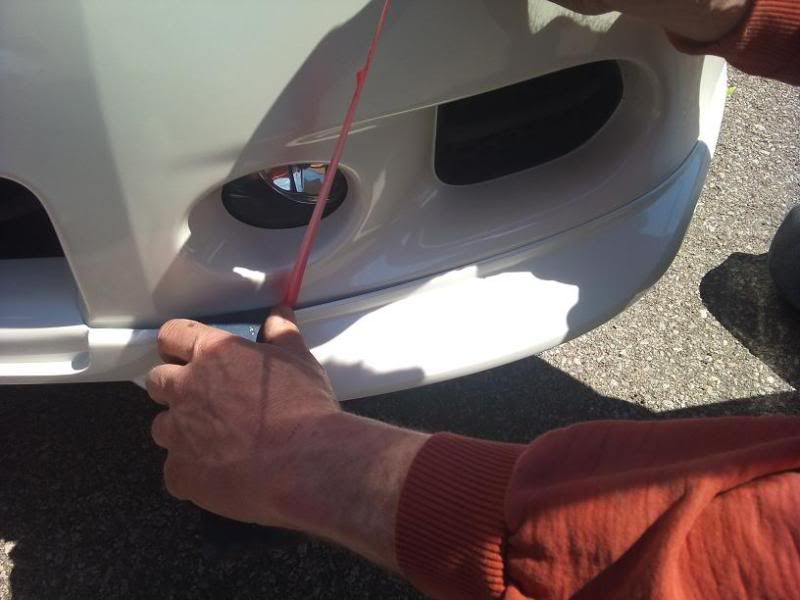
The front of the lip is a bit easier, you may not require a tool.
Put the screws back in, and use the fender well screw for added security if required.
And enjoy your new look..
install from Stillen
http://www.stillen.com/product_files/KB12742~inst.pdf
As Will said above, use alcohol to clean the surface.
Remove front licence plate, if you would like some extra room. (it's not required)
Remove the lower splash guard screws, it will allow for a bit more flexability when fitting the lip.
Dry fit the lip, and measure from the headlight down for a good measurement location. Apply tape to mark your measurement to ensure the lip is even.
After dry fitting and measured to your liking, peel back the tape and secure it as it says in the stillen instructions.
Use a tool that will separate the lip from the bumper as you peel the tape off. Be sure to have someone help you keep the lip in place as you peel the tape. (obviously use a tool that will not scratch the paint... please don't use a screw driver... please.)
The front of the lip is a bit easier, you may not require a tool.
Put the screws back in, and use the fender well screw for added security if required.
And enjoy your new look..
Last edited by Se7enth_Gen; 05-04-2011 at 05:52 PM.
05-04-2011, 08:08 PM
#35

But I have a front lip on mine and it fit like perfect.. Josh @ Stillen should be able to help if you have any issues.. He's always my go to guy
05-06-2011, 02:14 PM
#37
Member
Join Date: Feb 2011
Location: Toronto
Posts: 279
If you are referring to the tool he suggested when peeling the 2 sided tape, go with a nylon/plastic wedge. I was there that day and thats what we used, it made the job much easier You slide it along as you are pulling the tape back.
You slide it along as you are pulling the tape back.


