Valve Cover Gasket Replacement...
 03-23-2011, 08:41 AM
#1
Junior Member
Thread Starter

Join Date: Jul 2009
Location: West Chester, PA
Posts: 90
Valve Cover Gasket Replacement...
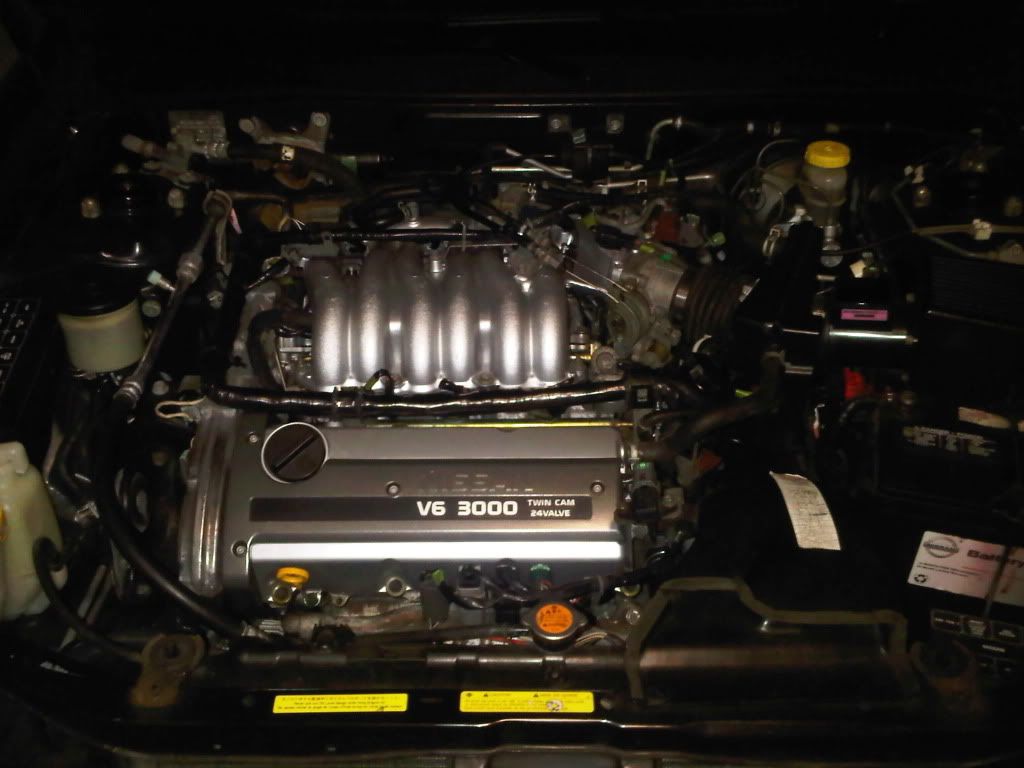
So I recently decided to replace both of my leaky valve cover gaskets and clean the engine bay up a bit. I ran into some problems that I would like to share to forewarn some members.
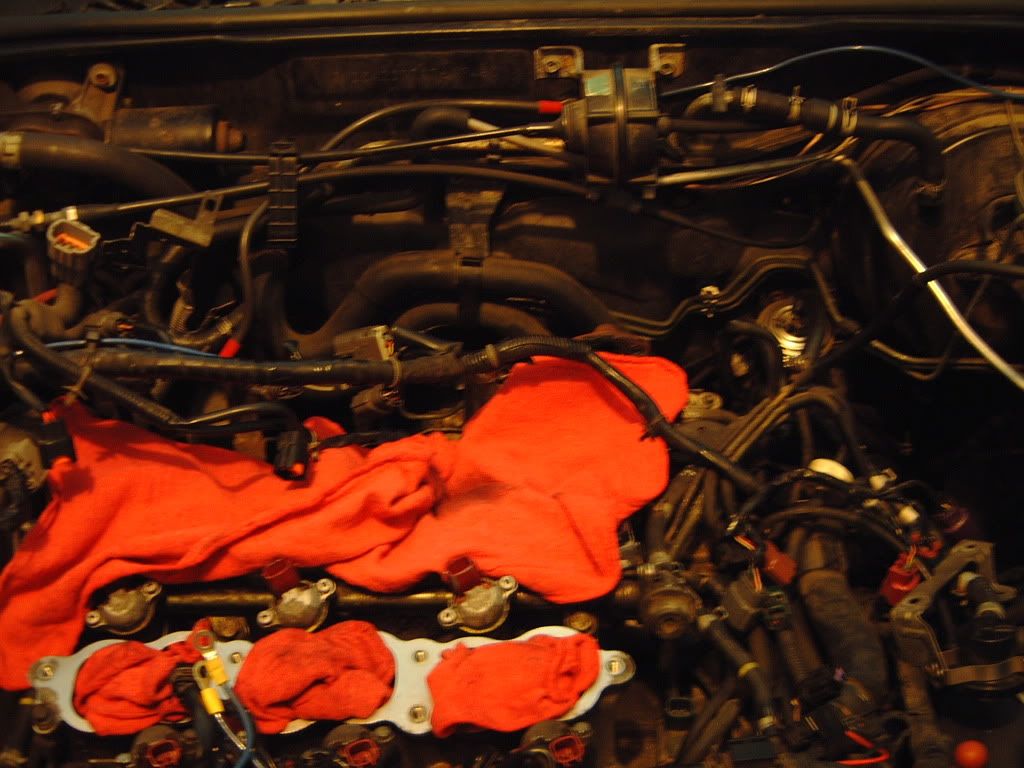
1. When I removed the upper intake to get to the rear cover, I had to cut two coolant hoses that connect to the back of the intake. I couldn't reach the clips so this was my only option. These hoses are a Nissan only part, so I had to wait a bit to get them.
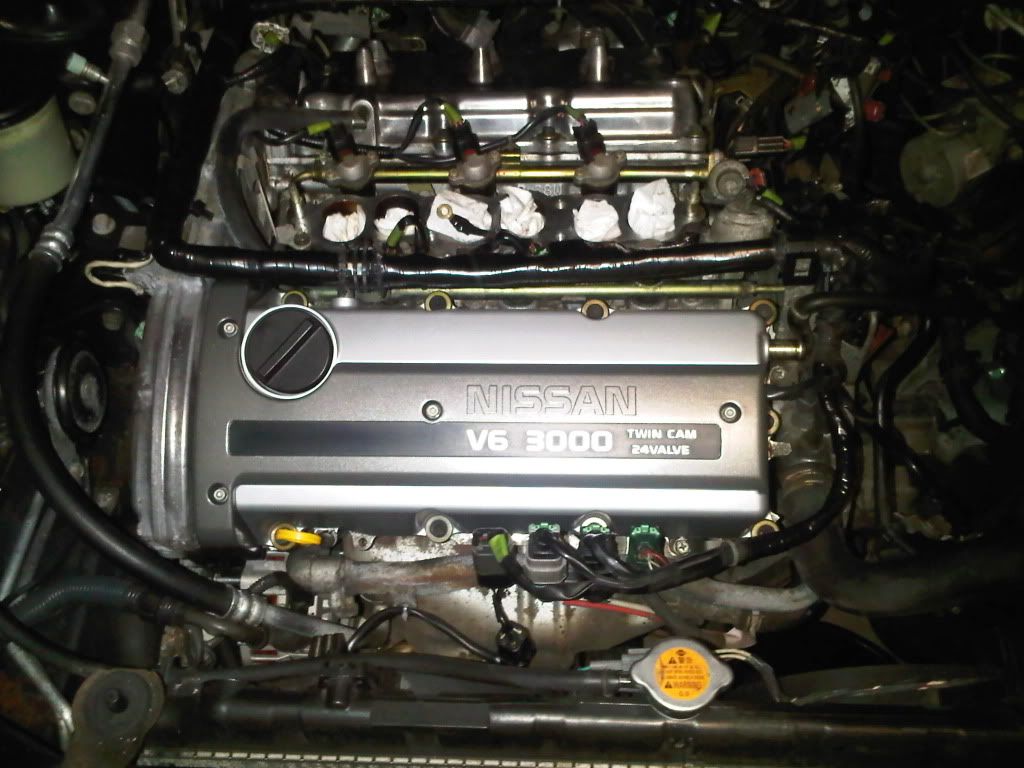
2. I decided to replace the lower intake manifold gasket since it came as part of the intake gasket kit. I didn't relieve the fuel pressure beforehand, so I simply pivoted the fuel rail assembly out of the way. The first time I put the rail back onto the lower intake, I forgot the spacers and torqued it down. I noticed my mistake, removed it and added the spacers only to later find out that the fuel rail tabs were bent from my mishap. This caused a MAJOR vacuum leak that stumped me for several days. To fix this, I ended up installing smaller spacers to properly seat the injectors in the lower intake in addition to new injector insulators.
3. The fuel rail to lower intake bolts strip easily! I stripped one and ended up re-tapping it with a 3/8-24 bolt.
4. You MUST use RTV at the sharp edges on the front and rear valve cover. Most members know this, but I neglected it and ended up doing both covers twice. I also recommend using the OEM Nissan gasket or the Felpro one.
All in all, I removed the upper intake and re-assembled it 4 times. By the last time, I could disassemble and reassemble in 1 hour. I did all of the following while I had it apart, and the car runs AWESOME now:
-Replaced Valve Cover, EGR, IACV, Throttle body, and all Intake gaskets.
-Painted front valve cover, ornament cover, and upper intake.
-Polished rear valve cover.
-Cleaned IACV, EGR tube, upper intake, and throttle body.
-Replaced ALL coolant hoses.
-Replaced blow-by hose and all cracked vacuum lines.
-Replaced lower intake insulators.
-Replaced PCV valve.

1. When I removed the upper intake to get to the rear cover, I had to cut two coolant hoses that connect to the back of the intake. I couldn't reach the clips so this was my only option. These hoses are a Nissan only part, so I had to wait a bit to get them.
2. I decided to replace the lower intake manifold gasket since it came as part of the intake gasket kit. I didn't relieve the fuel pressure beforehand, so I simply pivoted the fuel rail assembly out of the way. The first time I put the rail back onto the lower intake, I forgot the spacers and torqued it down. I noticed my mistake, removed it and added the spacers only to later find out that the fuel rail tabs were bent from my mishap. This caused a MAJOR vacuum leak that stumped me for several days. To fix this, I ended up installing smaller spacers to properly seat the injectors in the lower intake in addition to new injector insulators.
3. The fuel rail to lower intake bolts strip easily! I stripped one and ended up re-tapping it with a 3/8-24 bolt.
4. You MUST use RTV at the sharp edges on the front and rear valve cover. Most members know this, but I neglected it and ended up doing both covers twice. I also recommend using the OEM Nissan gasket or the Felpro one.
All in all, I removed the upper intake and re-assembled it 4 times. By the last time, I could disassemble and reassemble in 1 hour. I did all of the following while I had it apart, and the car runs AWESOME now:
-Replaced Valve Cover, EGR, IACV, Throttle body, and all Intake gaskets.
-Painted front valve cover, ornament cover, and upper intake.
-Polished rear valve cover.
-Cleaned IACV, EGR tube, upper intake, and throttle body.
-Replaced ALL coolant hoses.
-Replaced blow-by hose and all cracked vacuum lines.
-Replaced lower intake insulators.
-Replaced PCV valve.


 03-23-2011, 08:48 AM
#4
Junior Member
Thread Starter
Join Date: Jul 2009
Location: West Chester, PA
Posts: 90
03-23-2011, 08:52 AM
#5
 03-23-2011, 09:08 AM
#7
Junior Member
Thread Starter
Join Date: Jul 2009
Location: West Chester, PA
Posts: 90
I was worried about bending a hose in the u-shape and having it crimp. I was ordering stuff from Nissan anyway, so it didn't hurt. I did replace the blow-by hose with some cut-to-length stuff from pepboys. That worked great and saved me a few bucks.
03-24-2011, 05:29 AM
#8

 03-24-2011, 05:43 AM
#9
same here...i just did this a few weekends ago. Those hoses werent bugging, had to cut them off
03-25-2011, 12:24 AM
#10

I am doing the same as we speak. I also checked valve lash since the valve covers were off.... that's a whole story on it's own.
I also needed to change the steering rack, so I decided to change the headers and y pipe since I was already there. I had to replace the RTV for the lower oil pan, so I decided to remove the aluminum oil pan to change the RTV there as well. Front and rear motor mounts were torn, I plan on addressing those soon too. Since I have all of that apart, I decided to change the water pump, tensioner and half-moon seals and crank main seal. I also decided to change the crank pulley as well as the two drive belts too.
I needed to change the sway bar bushings and lower control arm bushings too.
Like the original poster stated about changing the hoses, I too ordered a plethora of hoses from Courtesy Parts.
A $100 fix became a $1000 fix.
03-25-2011, 06:32 AM
#11
Newbie - Just Registered

Join Date: Jun 2009
Posts: 12
Those hoses on the back of the UIM are tough. You can make this easier though by disconnecting the longer one from the end that connects to the throttle body, then you only have to mess with the litle U-shaped one. That one becomes a whole lot easier after the first time, since age seals it to the little tubes. If it has been on there a long time, definitely cut it. For replacement hose, fule injector hose at parts store works well. They also sell a lubricant that you can put on there, makes it easier to put on and take off. I usually replace the hose clamps with ones with the screw as well for the U-shaped one, found its easier to get to again if you position it correctly
03-25-2011, 10:01 AM
#12
Member

Join Date: Jan 2004
Location: Ottawa, Canada
Posts: 104
I have been wondering, since the Rear VC always leaks at the back corner, has somebody tried to clean the surface around the leaking area and smudge lots of RTV there to see if it will continue leaking. When you think about it, there isn't really pressure that pushes the oil out - it is the opening that appears from the old gasket + RTV when they age.
 03-26-2011, 06:10 AM
#14
When I did mine, I put RTV in the groove for the gasket on the VC and then laid the gasket on top of that, and then ran a small bead around the mating surface on the head, i put a slight build up on the back corners.
03-27-2011, 02:14 PM
#15
Junior Member
Thread Starter
Join Date: Jul 2009
Location: West Chester, PA
Posts: 90
Those hoses on the back of the UIM are tough. You can make this easier though by disconnecting the longer one from the end that connects to the throttle body, then you only have to mess with the litle U-shaped one. That one becomes a whole lot easier after the first time, since age seals it to the little tubes. If it has been on there a long time, definitely cut it. For replacement hose, fule injector hose at parts store works well. They also sell a lubricant that you can put on there, makes it easier to put on and take off. I usually replace the hose clamps with ones with the screw as well for the U-shaped one, found its easier to get to again if you position it correctly
 07-26-2011, 07:50 AM
#17

http://s1224.photobucket.com/albums/ee376/jwholley68/?action=view¤t=VID00005.mp4
I first tried changing the oil twice along with adding some CD2 oil detergent but that made no difference. I removed the rear valve cover again and saw that the valves were well lubricated so I just poured CD2 onto all 12 valves. After starting her up again the clicking noise went away in about 30 seconds. Taking her apart the second time took less than half the first time.
Removing the nuts off those rear mounting brackets was not hard using a 3/8" ratchet.
The only struggle I had during disassembling was removing those coolant hoses connected from the TB to the EGR guide tube mounting. I didn't have to cut them but it still wasn't easy. Like others suggested I replaced the clip-on clamps with screw-on clamps to make it easier next time.
I replaced those injector o-rings along with their cap spacers, pintle caps, and side mesh filters. I didn't use the injector spacers that came in the felpro kit because they were narrower. I just left the wider OEM spacers sit in the LIM.
I also cleaned it up and did some painting

Last edited by jholley; 07-26-2011 at 01:19 PM.
 07-26-2011, 09:20 AM
#20
Junior Member

Join Date: Jul 2011
Posts: 42
actually just did this today and got to the 2 coolant hoses and after about an hour of trying to grip those rusty clips i finally cut them. A whoppin $2 for a foot of hose at the auto store wish i would have cut them right away
07-26-2011, 02:14 PM
#21

didnt have a problem with the coolant hoses when i did this. all you need to do is what the other dude said disconnect the one on the throttle body end. hose clamp pliers and twist the hose back and fourth. people forget to twist
 07-27-2011, 03:37 AM
#23

I ended up replacing the coolant hose coming from the throttle body. I didn't cut it, just got a little bit of a longer hose so I can have some more play in it next time. Btw everyone def cover your LIM I dropped a few bolts down there FML
07-27-2011, 04:14 AM
#24
neither mine. I hate cutting **** !
07-27-2011, 06:59 AM
#25
Senior Member

Join Date: Oct 2009
Location: Montgomeryville, PA
Posts: 394
 did u get the bolts out?
07-27-2011, 09:48 PM
did u get the bolts out?
07-27-2011, 09:48 PM
#26
I ended up changing the valve gasket because cylinder 3 spark plug gasket had fallen out of it's place and slid down the plug tube. It was frighteningly close to the valves 
Something about cutting the parts when taking it apart bothers me. I've replaced most of my pinch clamps with screw clamps so that I don't have to fight with removing them if something needs fixed again.
Something about cutting the parts when taking it apart bothers me. I've replaced most of my pinch clamps with screw clamps so that I don't have to fight with removing them if something needs fixed again.
07-28-2011, 09:21 AM
#27

If your gonna drive/work on imports you need these. I was able to remove and reuse my hoses. also use a pick between the hose and nipple and work it around.
http://www.google.com/products/catal...ed=0CFIQ8gIwBA#
http://www.google.com/products/catal...ed=0CFIQ8gIwBA#
12-26-2011, 01:43 PM
#28
Junior Member

Join Date: Dec 2011
Location: Florida.....Space Coast
Posts: 21
trouble with spark plug gaskets
I got my valve cover off easily. The gasket came away clean.
But the spark plug seals seem to be nearly impossible to remove.
Am I missing something? can they possibly be this hard to deal with?
But the spark plug seals seem to be nearly impossible to remove.
Am I missing something? can they possibly be this hard to deal with?
12-26-2011, 02:00 PM
#29
Junior Member
Join Date: Dec 2011
Location: Florida.....Space Coast
Posts: 21
more on plug seals
I saw some posts that indicate that with some valve covers, the plug seals are built-in. Is that true for 1999 4th gen?
They certainly seem to be permanently atttached, but I have damaged one now. If I can't replace it, I'll have to replace the whole valve cover.
Why would the gasket kit include these seals if they are not replaceable?
They certainly seem to be permanently atttached, but I have damaged one now. If I can't replace it, I'll have to replace the whole valve cover.
Why would the gasket kit include these seals if they are not replaceable?
12-26-2011, 02:47 PM
#30
When installing the new seals coat the outer sides with engine oil then force them in. You also want the curved side of those seals facing down towards the spark plugs.
Last edited by jholley; 12-26-2011 at 06:04 PM.
12-26-2011, 06:31 PM
#32
Junior Member
Join Date: Dec 2011
Location: Florida.....Space Coast
Posts: 21
Big screwdriver was the key! Popped them out by using a large screwdriver as a lever. from the inside of the valve cover, I stuck the screwdriver under one side of the ring and pressed down using the other side of the ring as the fulcrom. Had to be carefull to no gouge the wall, but all three in the cover popped right out.
Thanks for the tip.
Thanks for the tip.

 12-27-2011, 08:17 AM
#37
you'll save money by not buying quarts of oil to keep it at the proper level.
01-01-2012, 10:43 PM
#38
Newbie - Just Registered

Join Date: Jan 2012
Posts: 9
I was trying to get 15 posts so i could make a thread but i know you guys can answer this since your in the area i need to know about..
From under the car I see oil leaking from the general area of under the intake manifold. What sources can it be coming from? I see oil on some intake bolts from underneath the car?
From under the car I see oil leaking from the general area of under the intake manifold. What sources can it be coming from? I see oil on some intake bolts from underneath the car?
01-02-2012, 06:21 AM
#40
Junior Member
Join Date: Dec 2011
Location: Florida.....Space Coast
Posts: 21
I was trying to get 15 posts so i could make a thread but i know you guys can answer this since your in the area i need to know about..
From under the car I see oil leaking from the general area of under the intake manifold. What sources can it be coming from? I see oil on some intake bolts from underneath the car?
From under the car I see oil leaking from the general area of under the intake manifold. What sources can it be coming from? I see oil on some intake bolts from underneath the car?

