Headers installed
 07-18-2014, 07:17 AM
#1
Supporting Maxima.org Member

Thread Starter
Join Date: Sep 2005
Location: NH
Posts: 311
Headers installed
As you may know I have a set of headers and was planning on installing them myself. It looks pretty daunting considering I can't even see most of the bolts.
I decided to start with just gutting the precats. Baby steps..
I am able to remove the front precat pretty easily without removing anything else. I removed all of the bolts just to see if I could. I put it all back together. I may have to go to Sears and pickup a oxygen sensor wrench. I don't have anything small enough to fit in the space as-is and there doesn't appear to be enough slack with the wire to drop it down and remove it.
I know the rear is going to be more of a pain.
 07-18-2014, 11:45 AM
#2
Supporting Maxima.org Member
Thread Starter
Join Date: Sep 2005
Location: NH
Posts: 311
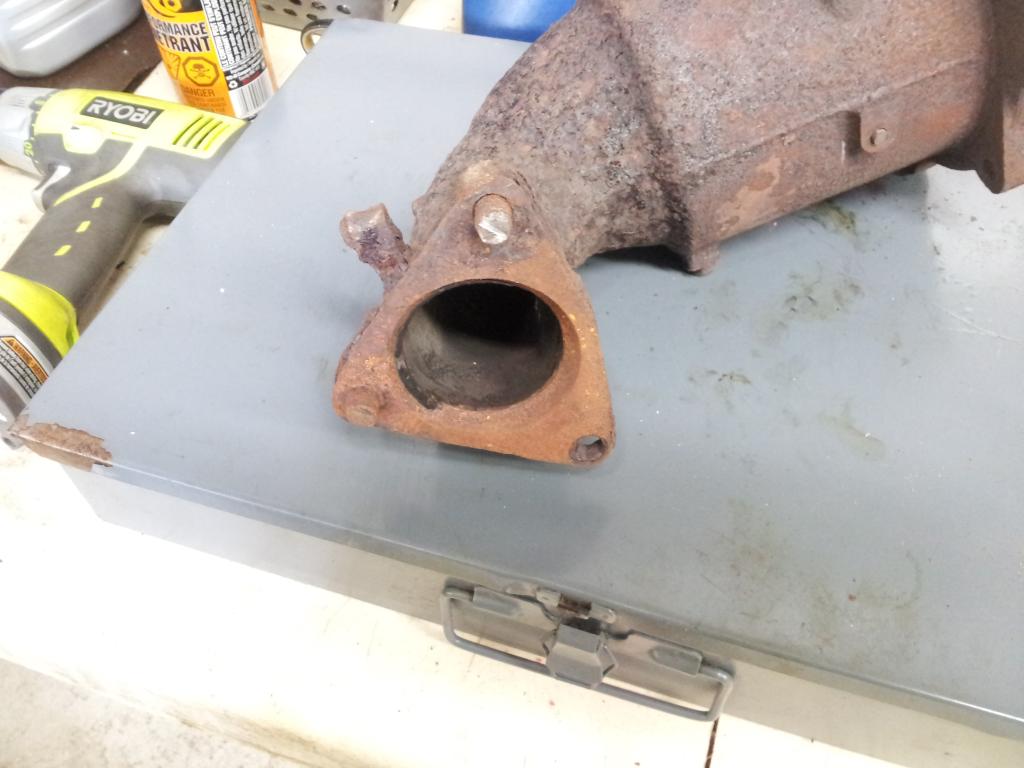
it looks like getting the bolts and oxygen sensor off was the easy part. It seems to be rust-welded to the flanges. I tried breaking it loose with a hammer but still no-go.
I removed 4 bolts between the precat and manifold and 3 bolts going to the y-pipe. It looks like that's all I have to remove.
Any suggestions?
I removed 4 bolts between the precat and manifold and 3 bolts going to the y-pipe. It looks like that's all I have to remove.
Any suggestions?
07-18-2014, 12:43 PM
#4
Supporting Maxima.org Member
Thread Starter
Join Date: Sep 2005
Location: NH
Posts: 311
I've got all the nuts and bolts removed and it's not rust seized ( I can see the separation), I can move it a little but it's still won't come out. What am I missing?
I'm beginning to see why people say just install headers. The thing still doesn't want to break free.
The manifold nuts looks pretty clean.
I'm beginning to see why people say just install headers. The thing still doesn't want to break free.
The manifold nuts looks pretty clean.
Last edited by barristan; 07-18-2014 at 02:01 PM. Reason: update
07-18-2014, 07:04 PM
#6

The front manifold should be bolted to the engine with 6 14mm nuts and then 3 bolts/nuts (can't remember which ones) on the bottom. Then you can take it out. The back one us similar: 6 nuts on top, 3 on the bottom. I assume the rear one will be the hard one. The time I messed with those I had the engine out, so it was easy for me.
07-18-2014, 07:37 PM
#7
Supporting Maxima.org Member
Thread Starter
Join Date: Sep 2005
Location: NH
Posts: 311
The front manifold should be bolted to the engine with 6 14mm nuts and then 3 bolts/nuts (can't remember which ones) on the bottom. Then you can take it out. The back one us similar: 6 nuts on top, 3 on the bottom. I assume the rear one will be the hard one. The time I messed with those I had the engine out, so it was easy for me.

 07-19-2014, 10:21 AM
#10
Supporting Maxima.org Member
Thread Starter
Join Date: Sep 2005
Location: NH
Posts: 311
Wow! you've got a lot of rust there. Yeah, it looks like that and it looks like I took off all the nuts/bolts. Maybe that lip on the top piece is holding it in. I did bash the hell out of it with a pipe but the damn thing didn't want to move.
Thanks for the pic.
Thanks for the pic.
07-19-2014, 12:07 PM
#13
Crazy rust on the car I took this off. The lower rad support wasn't even there practically. The front of the motor was just hanging in air. Good old Canadian winters.
07-19-2014, 12:50 PM
#14
07-26-2014, 08:05 AM
#15
Supporting Maxima.org Member
Thread Starter
Join Date: Sep 2005
Location: NH
Posts: 311
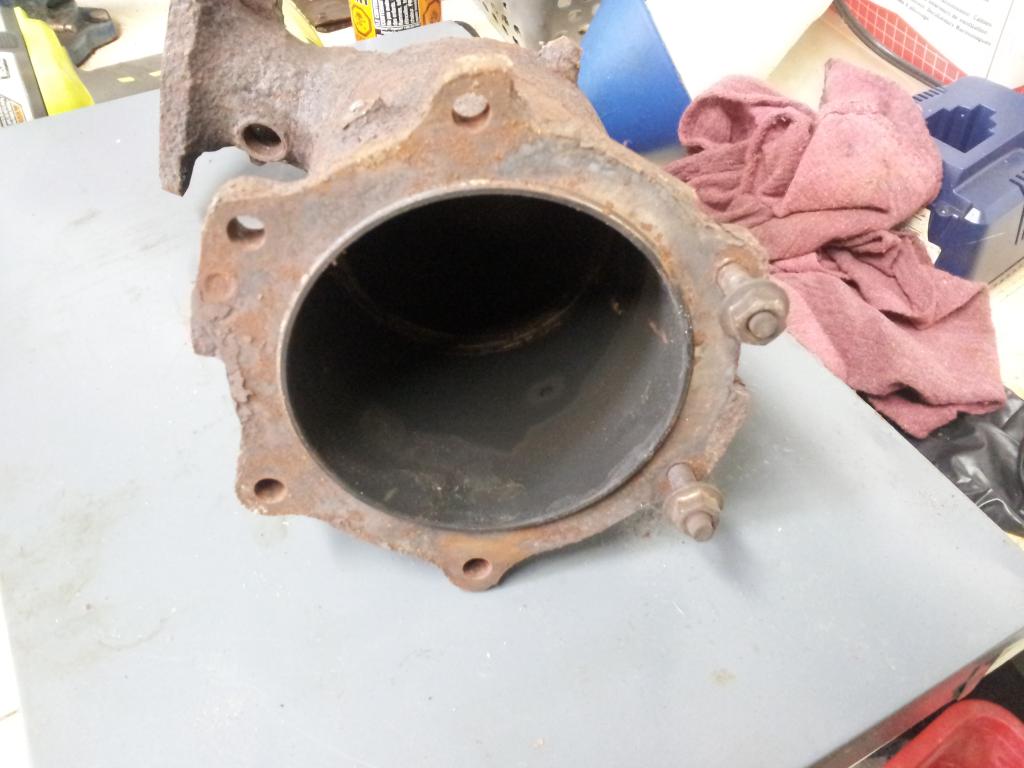
someone could have told me that I couldn't just remove the front precat by itself. I pried a small gap between the flange from the precat and the y-pipe and noticed some sort of gasket. Not a flat gasket, but one that goes inside the holes and is holding them together. No wonder the thing wasn't budging. Do I have to remove the whole y-pipe to make enough slack?
07-26-2014, 10:20 AM
#16
Supporting Maxima.org Member
Thread Starter
Join Date: Sep 2005
Location: NH
Posts: 311
Okay, here's the deal: To gut the front precat you need to remove the three nuts (in my case two of the bolts came off with nuts attached) from the rear precat. You also need to remove two bolts between the front and rear precat that hold the y-pipe to the frame. After that it should come out easily (no bashing required).
Anyway, the gutting was pretty easy. If you were so inclined you could probably get the whole mess out in one piece. It only took 15 minutes or so to clean it out. Wear a mask.
Put it all back together.
In the near future I will do the rear. Or maybe after I get the rear off I will just go ahead and install the headers.
 08-09-2014, 07:51 AM
#18
Supporting Maxima.org Member
Thread Starter
Join Date: Sep 2005
Location: NH
Posts: 311
Sorry I missed your question.
I only gutted the front. I just used a screwdriver and a wire brush. The front is pretty fragile so it's easily removed. Once you pull out the majority of it there is some fabric type material(probably asbestos or some other noxious material). I used the wire brush to scrub it out. I did wear a good respirator.
As far as the back goes it looked to be not much more trouble to install the headers. So that's my plan.
I have been working on that this weekend. I'm done for now thanks to a 10mm bolt on the rear heat shield. If I could have got that one out I probably could have finished the job without much trouble. It's the center one. What a PIA. I tried from up top and down below. Under the car seemed to be the most promising. I got a socket on it a couple of times but I don't think it was at the perfect angle and it slipped.
Thinking about taking it to a shop to see if they can reach it from the top.

 08-10-2014, 05:56 AM
#23
Gutting is akin to headers without the cost. Basically remove the two precats, remove the material inside them which increases flow and prevents the possibility of them failing and breaking up on their own and then reinstall the precats.
Be warned though its not a fun job.
Be warned though its not a fun job.
 08-10-2014, 12:12 PM
#25
Supporting Maxima.org Member
Thread Starter
Join Date: Sep 2005
Location: NH
Posts: 311
It depends. For the front all you need to do is loosen the exhaust just enough to make room for the lower gasket on the front precat to slide out (about an inch). It's not a flat gasket like the one at the main cat.
The rear would be a major PIA. The biggest problem is the heat shield on the precat. There are three 10mm bolts. Two are fairly easy to reach but the center one is a bear.
08-15-2014, 02:17 PM
#27
Supporting Maxima.org Member
Thread Starter
Join Date: Sep 2005
Location: NH
Posts: 311
 08-16-2014, 07:23 AM
#29


 08-17-2014, 10:21 AM
#33
Supporting Maxima.org Member
Thread Starter
Join Date: Sep 2005
Location: NH
Posts: 311
My first impressions:
1) It smells like hell. The heat wrap is still curing. It smoked for a good 30 minutes.
2) It's definitely more noisy. There is a rumble when letting off the gas and coasting.
3)I think I may have some rubbing issues to work out. I have been avoiding winding it up too much due to the rubbing.
4) It seems like the engine bay gets a lot hotter now.
5) I still need to fix the ghetto weld job.
[IMG]
 P1000396 by Barristan, on Flickr[/IMG]
08-21-2014, 02:23 PM
P1000396 by Barristan, on Flickr[/IMG]
08-21-2014, 02:23 PM
#36
Supporting Maxima.org Member
Thread Starter
Join Date: Sep 2005
Location: NH
Posts: 311
No, the cat is factory as far as I know.
I only gutted the front, so it's not a good comparison. Gutting the front seemed to free up a few hp and gave a slight grumble (barely noticeable).
With the headers I've freed up much more hp and the grumble has gotten more noticeable. I usually cruise around 80mph to and from work(major highway) and now it feels like the car is working much less to maintain that speed and it still wants to pull. I really like the grumble when coasting at +2500 rpm.
I'm so happy with the headers that I feel the need to take it to the track again this weekend and try not to finish off my clutch (next project).

 08-27-2014, 03:19 PM
#39
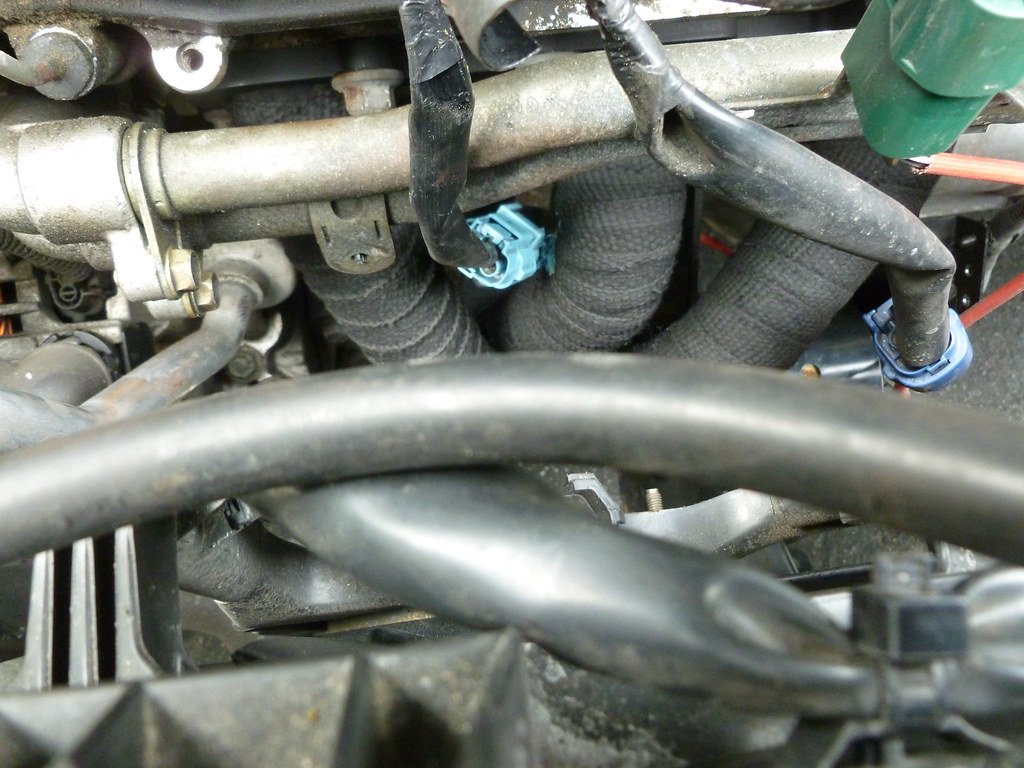
I have the rear heat shield unbolted. How have people removed it. The last one I did was in such poor shape it fell apart and was flexible enough to pull out. This one is solid and catches on everything - everywhere.
08-27-2014, 03:54 PM
#40