Maxima HID Retrofit Build


 02-22-2012, 06:31 PM
#362
Junior Member

Join Date: Feb 2012
Posts: 21
I did get the TSX to fit, but it looks a little bugeye. The only reason why i got them is because I bought them from a pair of botched headlights for d.i.r.t. cheap.
02-24-2012, 08:00 PM
#363
Ok so I found the sickest looking shroud. 2007- unknown G35 Sedan
Picture is of these projectors retro'd into a 05/06 coupe. See thread below
http://www.hidplanet.com/forums/show...rojector-Retro
This is what I'm using when I do mine, period. That looks f-ing amazing.
Picture is of these projectors retro'd into a 05/06 coupe. See thread below
http://www.hidplanet.com/forums/show...rojector-Retro
This is what I'm using when I do mine, period. That looks f-ing amazing.
Last edited by TunerMaxima3000; 02-24-2012 at 08:02 PM.
02-24-2012, 08:43 PM
#364

I saw Ivory GT creation. Look awesome. I have to see in the car though. The LED is cool, but the color is a bit much for my taste.
That shroud is on the G37 sedan also (not sure the years), those are the exact shrouds that came with my projectors.
Someday when the kids are little older, I'll get myself G37 sedan
That shroud is on the G37 sedan also (not sure the years), those are the exact shrouds that came with my projectors.
Someday when the kids are little older, I'll get myself G37 sedan
02-24-2012, 08:45 PM
#365


http://www.theretrofitsource.com/pro...oducts_id=4889
 02-24-2012, 08:52 PM
#367
I saw Ivory GT creation. Look awesome. I have to see in the car though. The LED is cool, but the color is a bit much for my taste.
That shroud is on the G37 sedan also (not sure the years), those are the exact shrouds that came with my projectors.
Someday when the kids are little older, I'll get myself G37 sedan
That shroud is on the G37 sedan also (not sure the years), those are the exact shrouds that came with my projectors.
Someday when the kids are little older, I'll get myself G37 sedan
So you have those shrouds they're just not shown i nyour pics recently? Ok I thought they changed them to the style you showed.
Those shrouds are freaking amazing you don't like them?
I've been wanting to try the replicas of those but no one wants me to do it
http://www.theretrofitsource.com/pro...oducts_id=4889
http://www.theretrofitsource.com/pro...oducts_id=4889
02-24-2012, 09:05 PM
#369
I tried it, it was in my first few pics. It was to small to be installed in in the circular bezel and too big to mount them in the projector. Plus it was way too big for the high beam and I don't want to have mismatched. It looks like E46 is the best fit for both low and high beam slots.
02-24-2012, 09:19 PM
#370
 02-24-2012, 10:30 PM
#371
I tried it, it was in my first few pics. It was to small to be installed in in the circular bezel and too big to mount them in the projector. Plus it was way too big for the high beam and I don't want to have mismatched. It looks like E46 is the best fit for both low and high beam slots.
 ), and didn't see a picture of this shroud tested did I miss it?
02-25-2012, 09:13 AM
), and didn't see a picture of this shroud tested did I miss it?
02-25-2012, 09:13 AM
#372
this is the one I was talking about. The G shroud is mounted in the projector but it was only to cover the gap between the projector lens holder and the headlight round opening. I couldn't put them in front of bezel opening since it will hit the front lens. IF I don't have the headlight bezel, in other word, it the projector was mounted in the reflector style, then I have lot better chance to mount any shroud I want. Really the headlight bezel IS the shroud already, I just need to make any put more garnish to make it more complete.
Am I confusing you even more here...
02-25-2012, 12:50 PM
#373
Nah got it now just didn't see them! they're tucked away in there and with the big nasty CCFL's blocking even more I just didn't spot them.
If those are OEM ones do they have that blue tinge to them? Maybe you can ship them over to Chrisman for my quad setup if we go that route
If those are OEM ones do they have that blue tinge to them? Maybe you can ship them over to Chrisman for my quad setup if we go that route
02-25-2012, 01:25 PM
#374
Nah got it now just didn't see them! they're tucked away in there and with the big nasty CCFL's blocking even more I just didn't spot them.
If those are OEM ones do they have that blue tinge to them? Maybe you can ship them over to Chrisman for my quad setup if we go that route
If those are OEM ones do they have that blue tinge to them? Maybe you can ship them over to Chrisman for my quad setup if we go that route
No blue tinge at all, straight chrome plating. Mine are cut already, plus you better off going with TRS or you can find a pair in mint condition at ebay for under $30.
I found this for you, you should grab this. OEM shroud with this condition and this price doesn't come often
http://www.ebay.com/itm/Infiniti-G35...item2eb86c7c4a
02-25-2012, 01:46 PM
#375
I checked out a 2007 g35 sedan and it had these shrouds but had a strange blueish tinge, almost like the burnt titanium look. super subtle but cool. Maybe a reflection somehow I dunno but they were definately stock.
For the link... broken and skuffed up, meh. Thanks though dude much appreciated. I'll stop stealing your thread now
For the link... broken and skuffed up, meh. Thanks though dude much appreciated. I'll stop stealing your thread now
02-26-2012, 05:34 PM
#376
Ebay Projector style Mini D2S retro
I couldn't stand the Ebay projector style headlights on my car. I've been driving with it for a while now and it just plain sucked. So, I put Mini D2S (2.5" inch) projectors in there. Removed the stupid H3 halogen projectos, drilled 3 new holes on the existing bracket, removed the ugly angel eyes, temped to put another set of Mini D2S in the high beam bracket, but decided not to since I need to be done before Monday. Spent last night putting it together and completed this morning. This retro is the most basic retro I've done. Plane jane Mini D2S. Spent few hours this afternoon rebuilding the wire hardness since my Mori Ballast was dead.
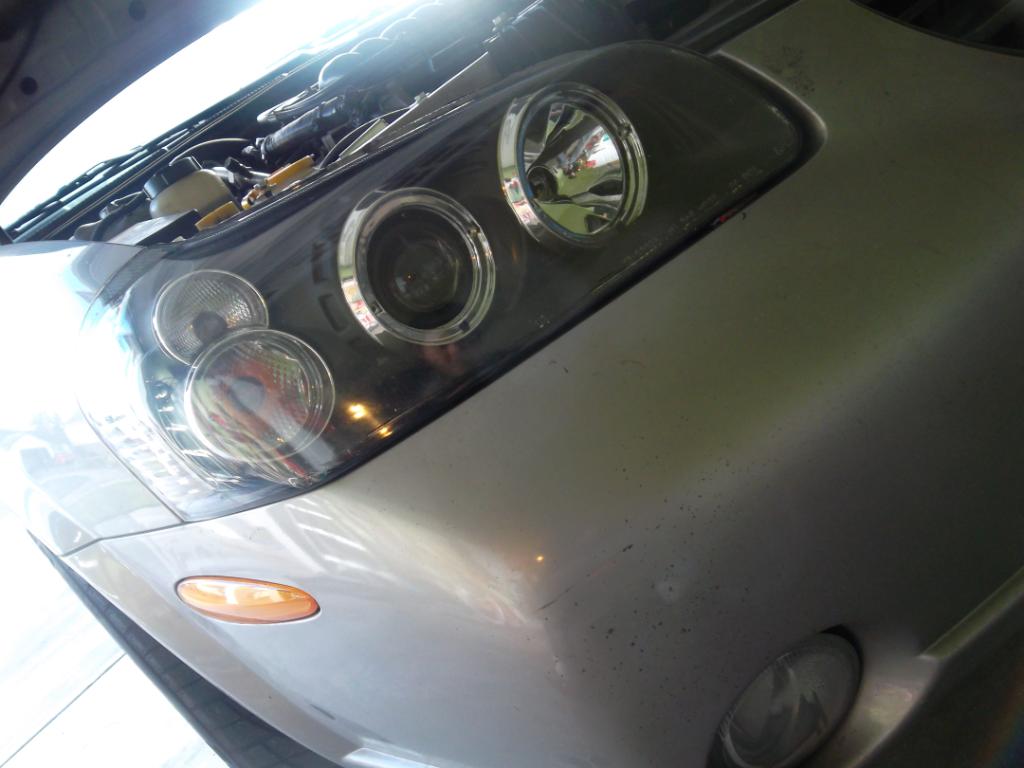

Tried the quad retro, so far the height and the horizontal aiming are good.
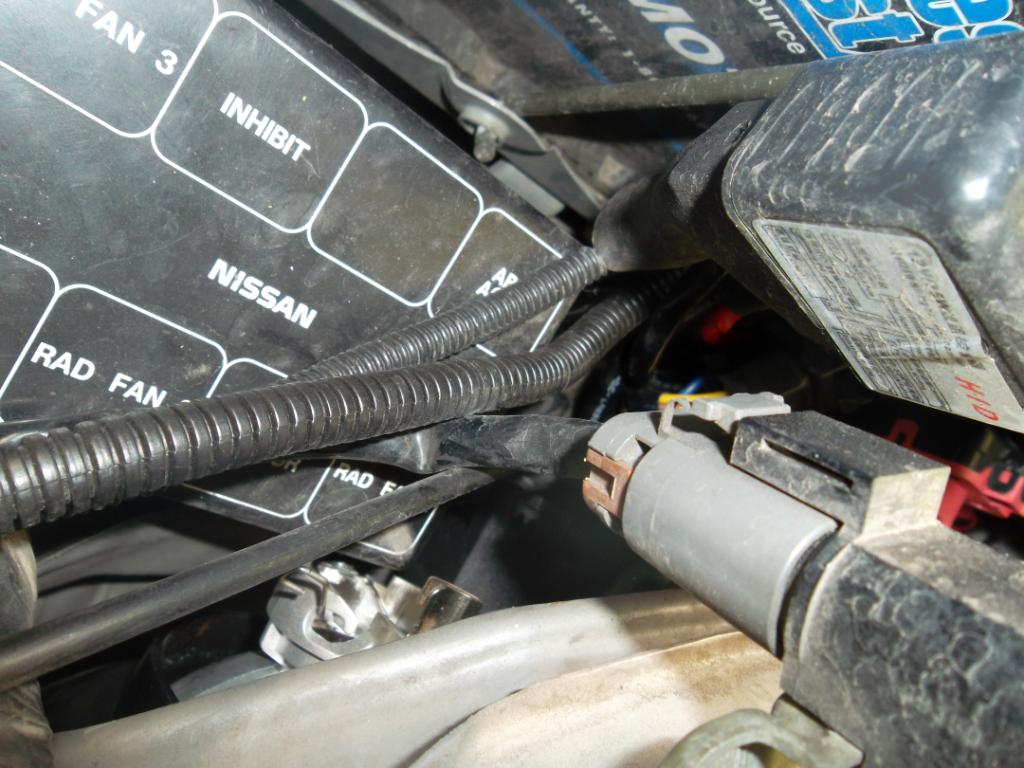
I had to relocate the realy box, since it is so close to the high beam projector that I could't put bulb in there. Not sure what to do yet. Really don't want to mess with relocating any car parts.
Tried the quad retro, so far the height and the horizontal aiming are good.
I had to relocate the realy box, since it is so close to the high beam projector that I could't put bulb in there. Not sure what to do yet. Really don't want to mess with relocating any car parts.
Last edited by Genes1s; 02-26-2012 at 05:36 PM.
02-26-2012, 05:54 PM
#378
The relay box can just be moved over a bit too. Not too bad. Heck you could ziptie it out of the way for all that matters as long as the wiring is secure and not rubbing, and nothing is going to move around.
Looking sweet dude!
Looking sweet dude!
02-26-2012, 06:02 PM
#379
02-26-2012, 06:07 PM
#380
I have few ideas about the LED turn signal and the light pipe, I'll gather my thought and get your take on this Tuner.
Thanks in advance.
02-26-2012, 06:32 PM
#381
IIRC, it's just 2 or 3 10mm head/phillips bolts that hold that relay box to the battery mount frame. Once you remove those bolts you'll have enough play to move it. You can't go hog wild unless you start removing electrical tape wrapping and ties, but you will easily get enough to get the harness on there.


 02-28-2012, 08:12 AM
#384
Not sure, but I 'm sure there is away to make it work. Putting Mini D2S was a cake walk since it is pretty small. Those FX-Rs has wider mounting points. I know G37 sedan fits in there (Eurodriver did it) and G37 projector and FX-R are similar.
03-01-2012, 10:01 PM
#386
MSU with those new fxr 3.0 shots I'm so tempted to buy a pair and make them work one way or another. I had a thought of rather than it being close to the outer lens or perfectly in line (mounting screw issue) what if it were sunken back a little? Is that a viable option. I'm probably down to move my battery over a bit as well if the headlight back is going to stick out too far.
03-01-2012, 10:32 PM
#387
MSU with those new fxr 3.0 shots I'm so tempted to buy a pair and make them work one way or another. I had a thought of rather than it being close to the outer lens or perfectly in line (mounting screw issue) what if it were sunken back a little? Is that a viable option. I'm probably down to move my battery over a bit as well if the headlight back is going to stick out too far.
It is almost easier to mount the projector to the housing if you want to mount them deep, but then you loose OEM adjustment....

Last edited by Genes1s; 03-01-2012 at 10:34 PM.
03-09-2012, 09:27 PM
#388
00-03 Quads 03/09/12
Worked on new bracket to mount the high beam selenoid RX330 projector.
Right is OEM stock, Left is new bracket with slightly less foreground and Mini H1 Selenoid assy.

Left is new shield, right is OEM

New RX330 Bixenon


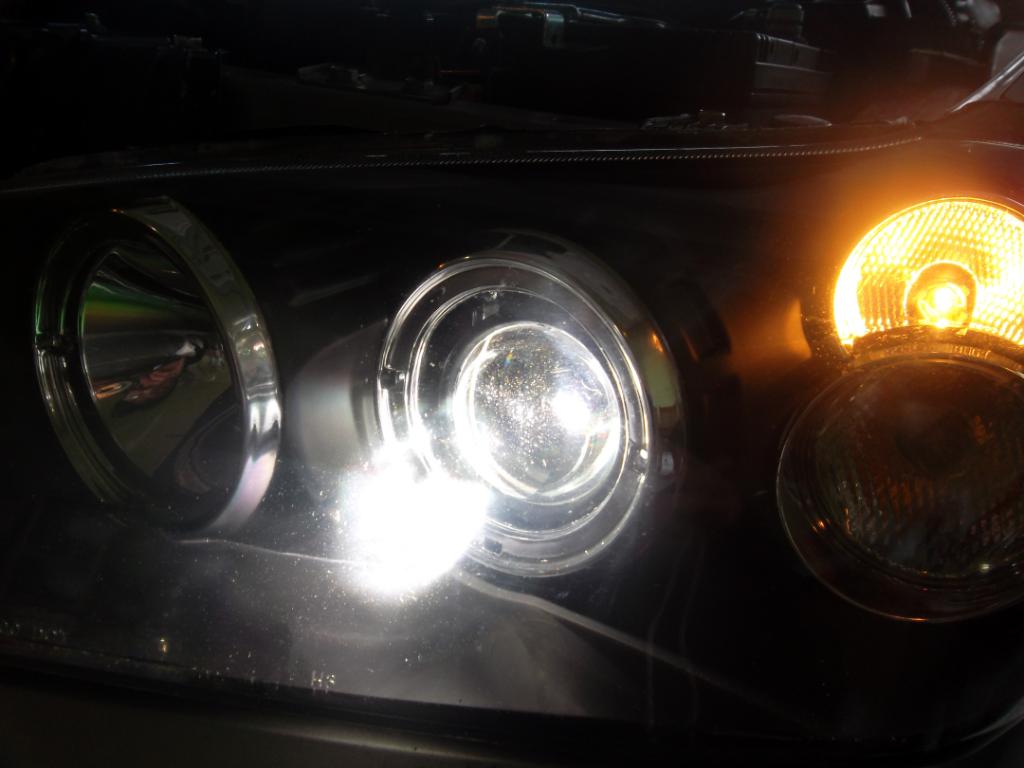
Low beam

High beam

Right is OEM stock, Left is new bracket with slightly less foreground and Mini H1 Selenoid assy.
Left is new shield, right is OEM
New RX330 Bixenon
Low beam
High beam
Last edited by Genes1s; 03-13-2012 at 08:55 PM.
03-10-2012, 01:06 PM
#389
00-03 Quads 03/10/12
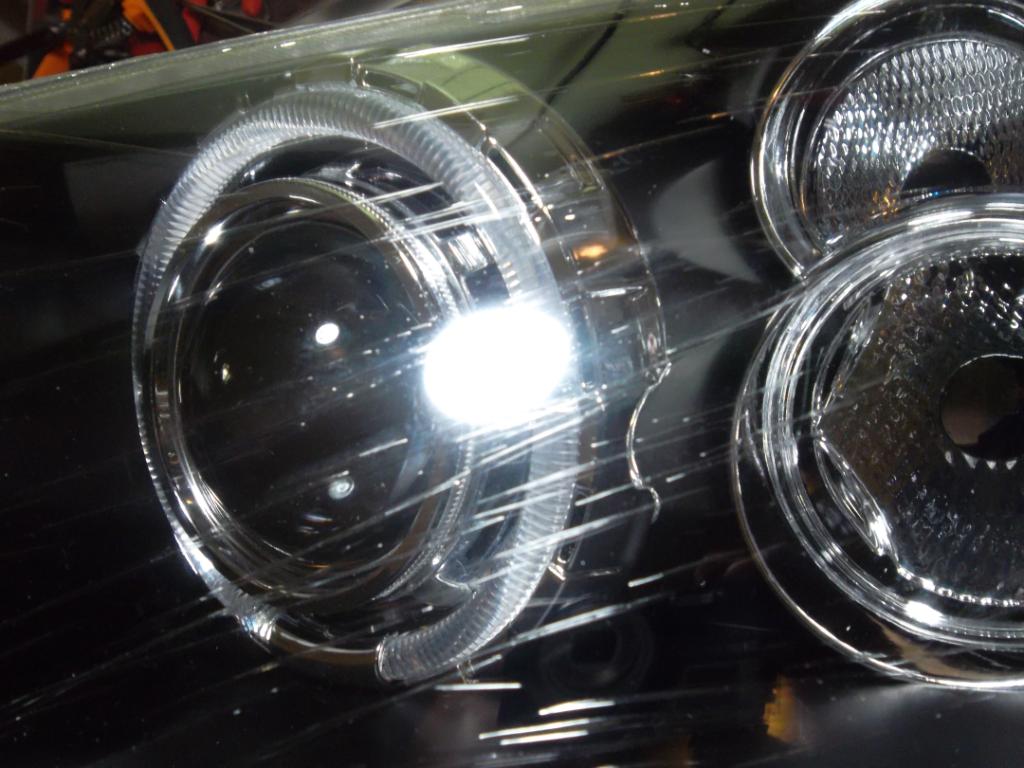
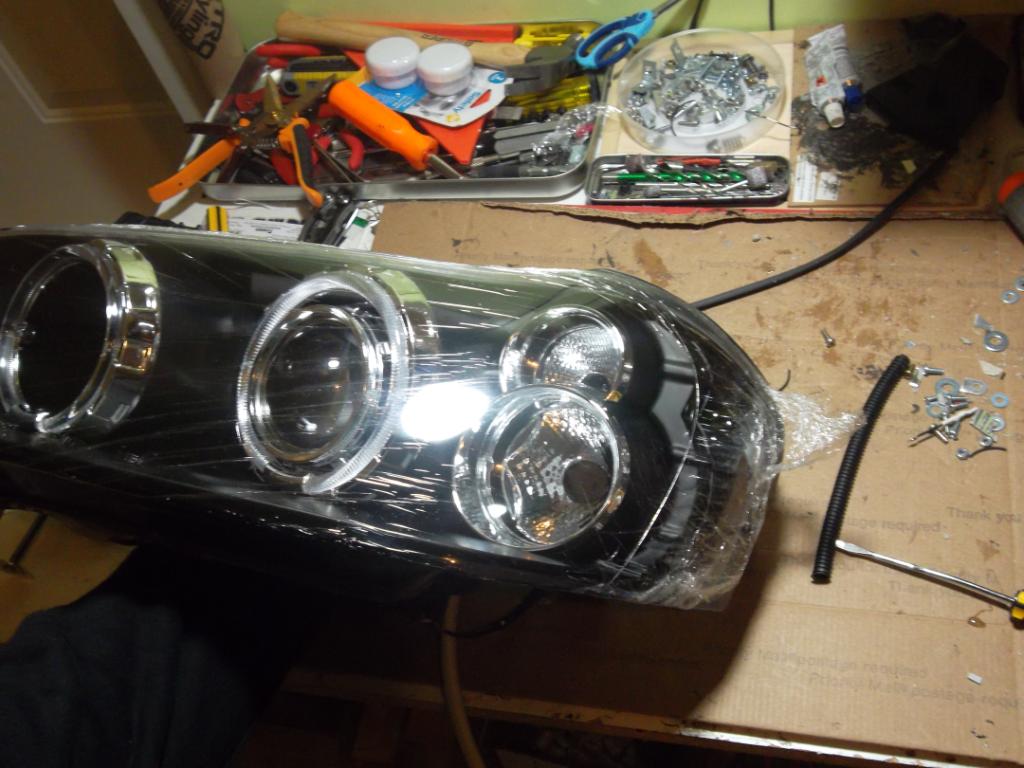
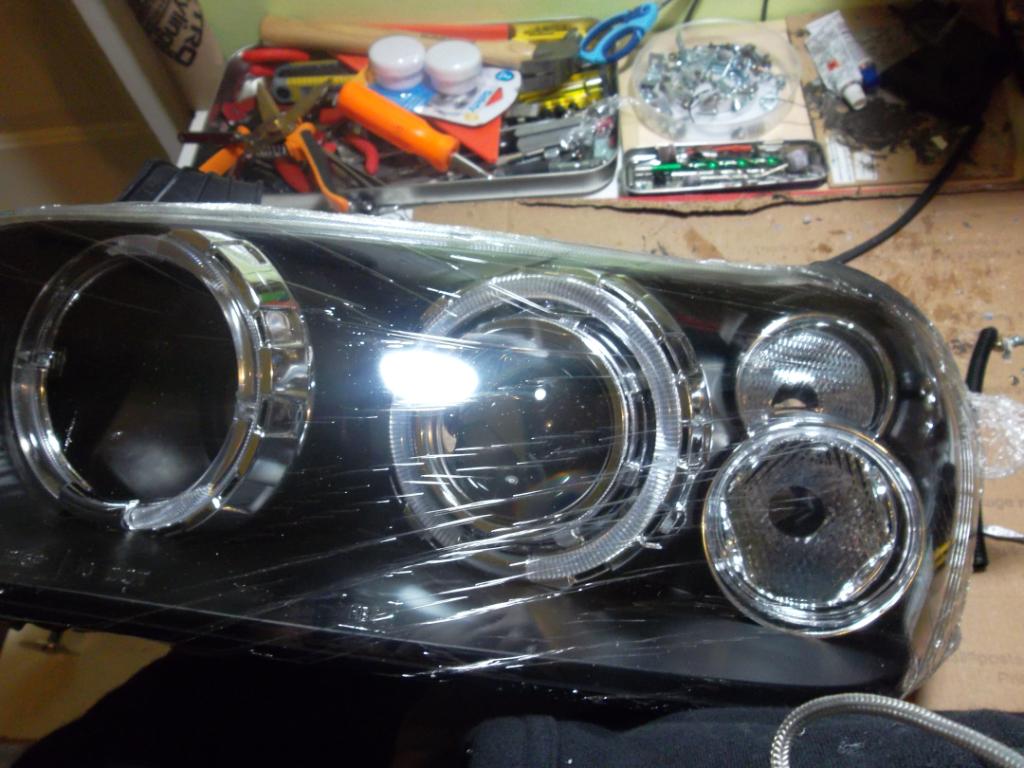
Worked on the shroud extensions. I wasn't going to use the angle eyes that came with the lights, but after few tries it was kinda kool to have it sandwhiched bettern the shroud and shourd extension. It's not that bright now, but probably need to upgrade to brigther one and "warm white" color instead of bluish white, or run SMD rings like the Bimmner/CCFL...still debating.


03-11-2012, 12:08 PM
#391

Worked on the shroud extensions. I wasn't going to use the angle eyes that came with the lights, but after few tries it was kinda kool to have it sandwhiched bettern the shroud and shourd extension. It's not that bright now, but probably need to upgrade to brigther one and "warm white" color instead of bluish white, or run SMD rings like the Bimmner/CCFL...still debating.
03-11-2012, 02:18 PM
#392
Benchtop HID power supply for $10
Found few old desktop computers power supply laying around the dumpster area at work place awhile back. Brought it home and tested to see if it still have some life. 2 of them were dead, but the other 2 were still alive. I took the switches and fan from the dead ones since this would be usefull for building boosted ballast in the futrure. One of the good ones was a heavy duty power supply which is rated at 400W with dual rails, 12V @15 amp and 12V @ 14 amp. This would be perfect for quad aiming process. My old is is single rail and it was blowing up fuse when I tried to power up 2 ballasts at the same time, but with this dual rail, it would be do it.

Dual rails

Cleaned them up, cut/tie wrap all wires and connection that I don't need. There were a bunch of +12V yellow wires, so I just took a few and soldered it together to make one wire. Same thing with the ground (black). I added another 12+ conenction to hook up the selenoid also. I put a on/off switch and fuse on one +12V for one ballast so I can toggle it on/off during projectors aiming process.
9006 power inputs to both ballasts and selenoid.

10amp fuse and toggle switch just in case the ballast draws too much.

Jumper is needed to bypass the computer on/off

I'm only showing this jus to show the possibilities of powering your HID system outside your car with very little money.TThis setup works for me but may not work with your own application. Use this at your own risk. Make sure you wear proper eye protection when soldering and working with metal.
in the futrure. One of the good ones was a heavy duty power supply which is rated at 400W with dual rails, 12V @15 amp and 12V @ 14 amp. This would be perfect for quad aiming process. My old is is single rail and it was blowing up fuse when I tried to power up 2 ballasts at the same time, but with this dual rail, it would be do it. Dual rails
Cleaned them up, cut/tie wrap all wires and connection that I don't need. There were a bunch of +12V yellow wires, so I just took a few and soldered it together to make one wire. Same thing with the ground (black). I added another 12+ conenction to hook up the selenoid also. I put a on/off switch and fuse on one +12V for one ballast so I can toggle it on/off during projectors aiming process.
9006 power inputs to both ballasts and selenoid.
10amp fuse and toggle switch just in case the ballast draws too much.
Jumper is needed to bypass the computer on/off
I'm only showing this jus to show the possibilities of powering your HID system outside your car with very little money.TThis setup works for me but may not work with your own application. Use this at your own risk. Make sure you wear proper eye protection when soldering and working with metal.
Last edited by Genes1s; 03-11-2012 at 02:22 PM.
03-13-2012, 01:24 AM
#393

Please note you need to properly ground out the capacitors inside the power supply before touching them. It's recommened to probe them with a voltmeter first, then ground each leg to an earth ground. This way you'll know all stored voltages are grounded and it's safe to touch.
03-13-2012, 08:15 AM
#394
Please note you need to properly ground out the capacitors inside the power supply before touching them. It's recommened to probe them with a voltmeter first, then ground each leg to an earth ground. This way you'll know all stored voltages are grounded and it's safe to touch.
Hmm...good stuff to know. I'm still learning with these stuff, do you know which capacitors you are talking about, there are a bunch of them. Maybe pictures would be best to explain if you don't mind. When you say earth ground, is it the casing or ground to the electrical outlet?
FYI, I can touch any surfaces in the casing and no problem there. My old setup was like this also except with only one +12V power.
Anyway, thanks for the tips
 03-15-2012, 09:50 PM
#396
03-16-2012, 03:50 AM
#397
Hmm...good stuff to know. I'm still learning with these stuff, do you know which capacitors you are talking about, there are a bunch of them. Maybe pictures would be best to explain if you don't mind. When you say earth ground, is it the casing or ground to the electrical outlet?
FYI, I can touch any surfaces in the casing and no problem there. My old setup was like this also except with only one +12V power.
Anyway, thanks for the tips
FYI, I can touch any surfaces in the casing and no problem there. My old setup was like this also except with only one +12V power.
Anyway, thanks for the tips
Earth ground is the ground plug on the three prong wall outlet. Stick something into that (Not the two verticle slots, that'll put out an amp and if you are holding bare metal, you'll stop your heart!!) then touch one capacitor leg at a time to discharge it.
I use the leads for a multimeter since one end is a right angle banana plug and the other is a probe. Its also some what insulated. Rather that get melted than high voltage messing with me.
03-16-2012, 11:07 PM
#398
The caps have their specs listed on them. Higher uF means higher stored charge, those also are larger. Same goes for the listed voltage.
Earth ground is the ground plug on the three prong wall outlet. Stick something into that (Not the two verticle slots, that'll put out an amp and if you are holding bare metal, you'll stop your heart!!) then touch one capacitor leg at a time to discharge it.
I use the leads for a multimeter since one end is a right angle banana plug and the other is a probe. Its also some what insulated. Rather that get melted than high voltage messing with me.
03-16-2012, 11:22 PM
#399
00-03 Quads 03/16/12
It's been raining for 2 weeks straights and it will rain again this weekend and next week. Can't do squad!
Found a bunch of old pictures when I was backing up hard drive.
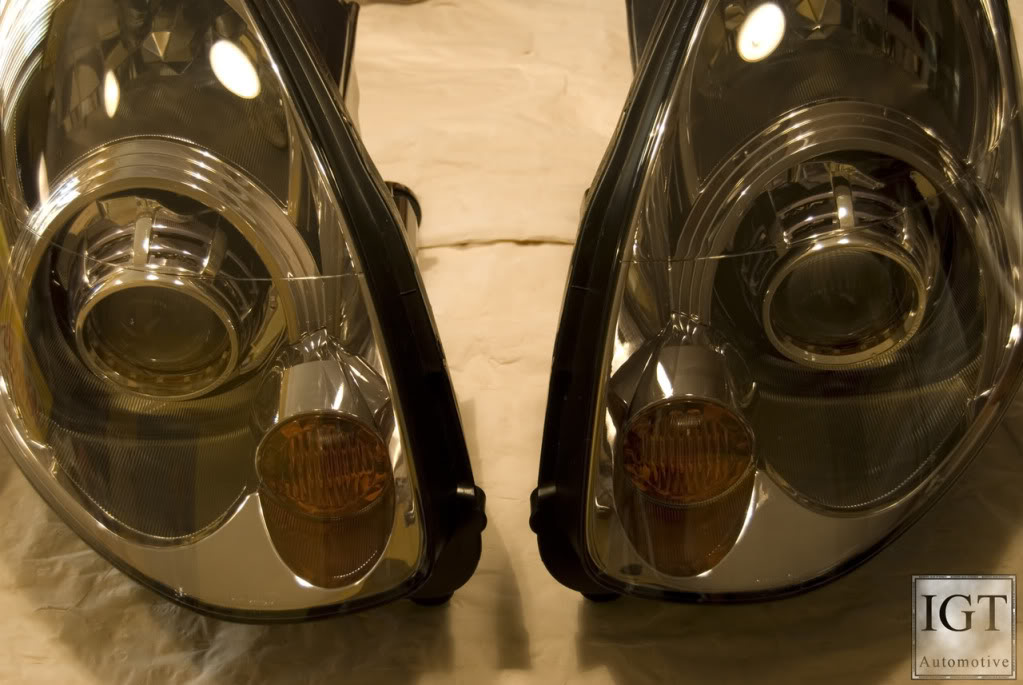
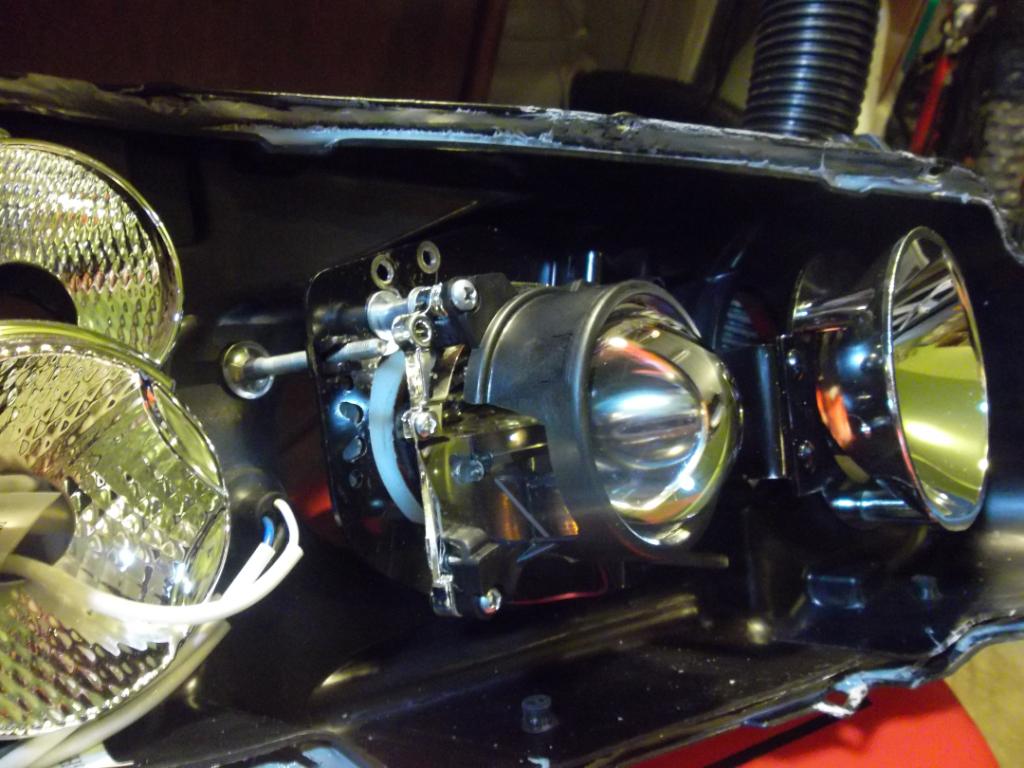
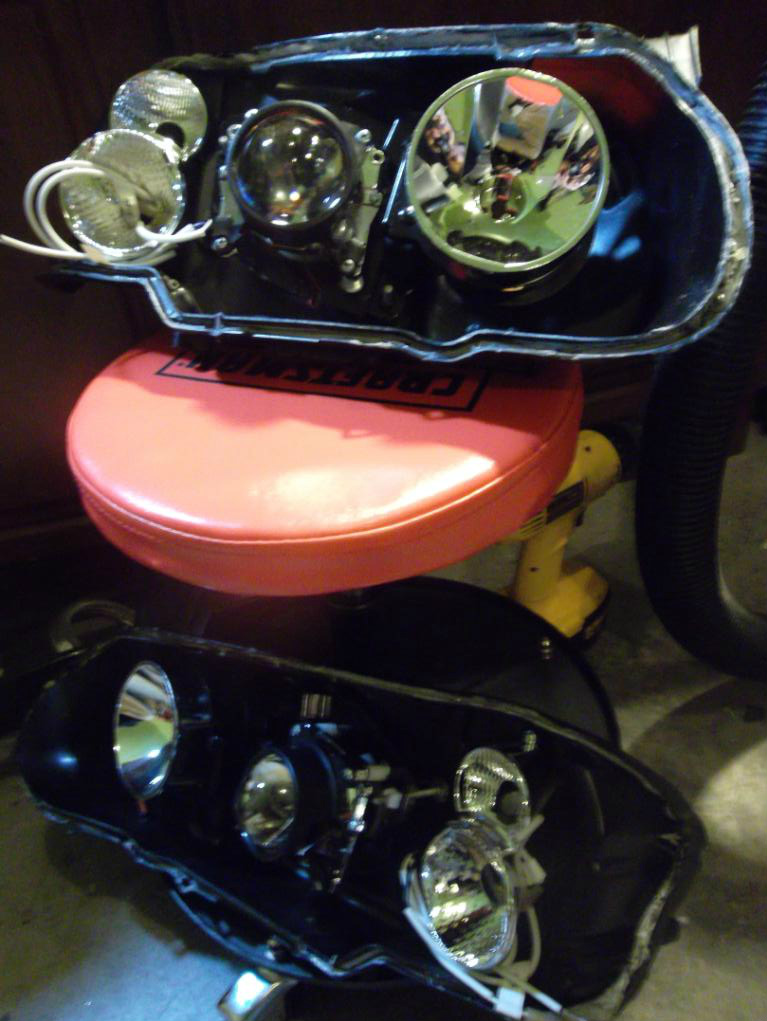
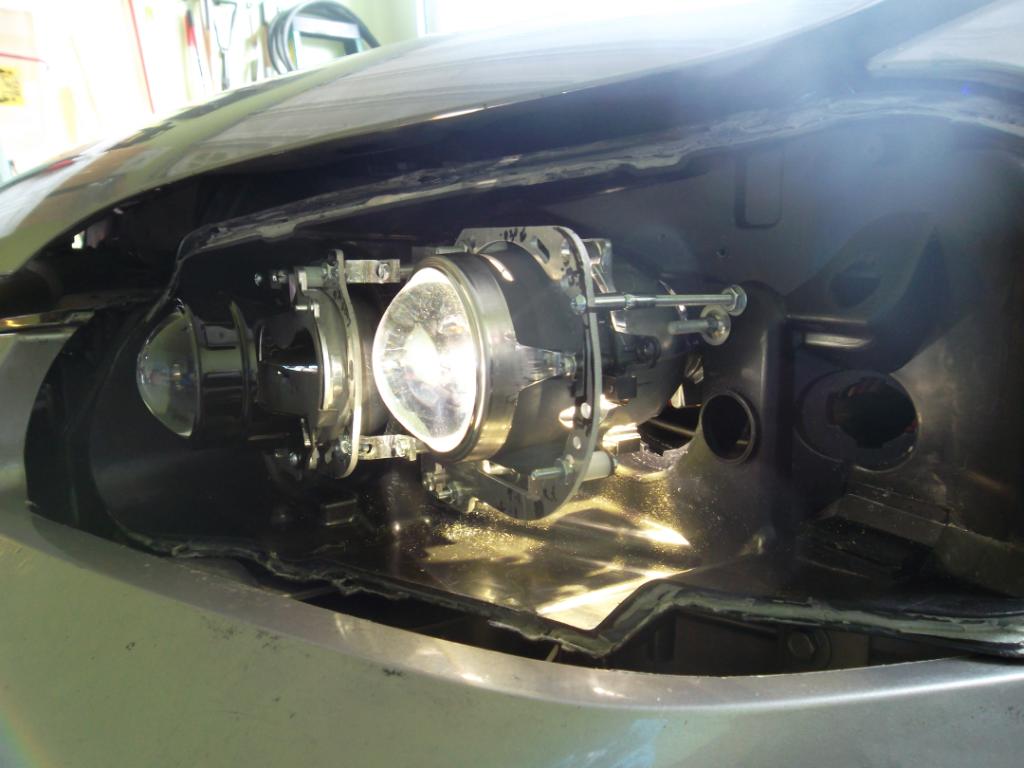
My very first retrofit. I bought a pair of used Audi A6 OEM HID headlights + a pair of OEM halogen headlights, complete with two pair of OEM HID bulbs and ballasts in brand new condition for $150. Sold the halogen lights for $150, so basically I got all those good stuff for free, not a bad way to start the journey. I was getting tired with PnP kits, bought PIAA, Osram, Sylvania bulbs, and finally decided to give retrofit a try and never looked back
It took me 40 hours to do it and it was still sad looking


Found a bunch of old pictures when I was backing up hard drive.
My very first retrofit. I bought a pair of used Audi A6 OEM HID headlights + a pair of OEM halogen headlights, complete with two pair of OEM HID bulbs and ballasts in brand new condition for $150. Sold the halogen lights for $150, so basically I got all those good stuff for free, not a bad way to start the journey. I was getting tired with PnP kits, bought PIAA, Osram, Sylvania bulbs, and finally decided to give retrofit a try and never looked back
It took me 40 hours to do it and it was still sad looking
Last edited by Genes1s; 03-16-2012 at 11:24 PM.
03-17-2012, 09:52 AM
#400

Not bad! We all have to start somewhere! Look how far you're retros have come, haha. Although, the black putty/epoxy/tar/adhesive stuff looks like a mess. On that note, I've never actually understood those who use epoxy or some other contact substance to mount their projectors instead of using bolts and/or brackets. At least with brackets and/or bolts you are able to adjust and aim the projectors during the initial stages AND later down the road, unlike with epoxy, you are SOL if you mess up the first time.