Installing ES Bushings under the Shifter Assembly
 10-17-2009, 03:46 PM
#1
Installing ES Bushings under the Shifter Assembly
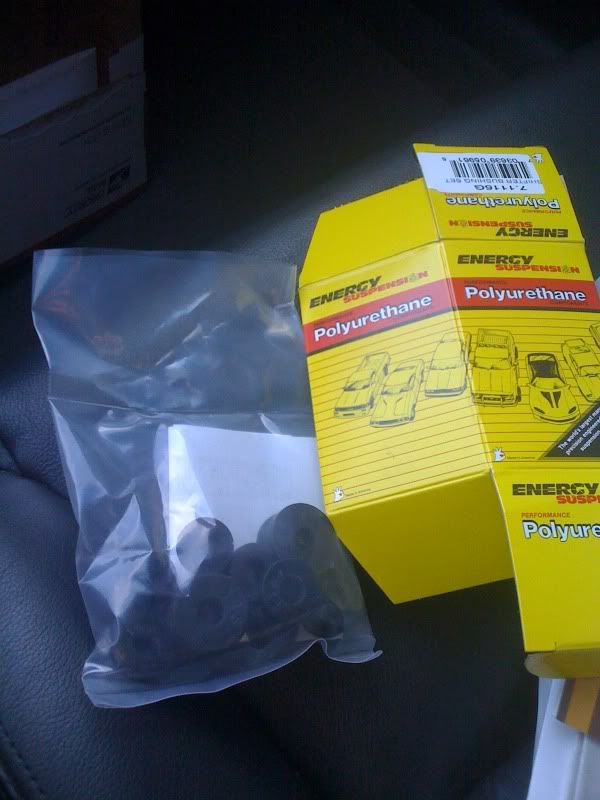
In early 2009, I swapped out the OEM banjo bushings on each end of the shifter cable with replacement bushings from Energy Suspension. In addition to the banjo bushings, the kit came with 4 pairs of bushings for underneath the big, plastic shifter assembly. They seemed somewhat unnecessary, but mostly it seemed like a PITA kind of job. And it was still winter. So I put the bushings in the glove box and forgot about them.
Fast forward to the end of the year, and a little encouragement from elsewhere in the forum, I finally got around to this project. And I took notes. Some pictures too.
Here are the notes on removing the shifter trim and center console. Pictures follow.
Next up are the steps I used to replace the bushings underneath the shifter assembly. eclid98 suggests wearing mechanics gloves for certain things. I don't have any, and yes, I cut myself.
Now put everything back together.
Remember the E-clamp ring for the side-to-side cable on the driver’s side of the shifter. And remember to use a lock-nut on the banjo bushing… not too tight, not too loose. When putting the center console back in, don’t forget to plug in the rear lighter. And when putting the shifter trim back in, don’t forget the plug in the front lighter, hazard light switch and ashtray light.
That’s it. Go crazy.
Fast forward to the end of the year, and a little encouragement from elsewhere in the forum, I finally got around to this project. And I took notes. Some pictures too.
Here are the notes on removing the shifter trim and center console. Pictures follow.
- Remove the ashtray and the screw behind the ashtray. (picture)
- Unsnap the shifter trim by gently pushing your fingers into the leather on the back end for grip, then pull upwards to unclip it. (picture)
- Lift the shifter trim from the back end, and wiggle it down from the front end. The shifter trim fits under the climate controls and will slip free with a little effort.
- Once the trim piece is free, unclip the power connectors that go to the hazard lights, ashtray light, and cigarette lighter. (Yeah, there’s an ashtray light. Who knew?) Use a small flat-head screwdriver to help unclip these connectors.
- Unsnap the leather boot and slip the entire trim piece off the shifter. Set it aside.
- Now on to the center console. Unscrew the 2 console screws made accessible now that you’ve removed the shifter trim. (picture)
- Unscrew the two (large) screws that are on the bottom sides of the console, accessible from the back seat. There are two screws here, you want the larger ones. (picture) I'm not sure what the other one is, but it's not the one you want.
- Unscrew the single screw inside the center console glove box. (picture)
- Find the clips inside the front of the center console that attach the console to the side trim. (picture) Unclip the center console from the front-side panels, and lift the console up and out. It’s not a smooth process the first time you try to pull the console away, so take your time. Figure out how to remove it safely by adjusting the position of the hand brake.
- Once the center console is free, unclip the power connector to the back seat cigarette lighter. Set the center console aside.
Next up are the steps I used to replace the bushings underneath the shifter assembly. eclid98 suggests wearing mechanics gloves for certain things. I don't have any, and yes, I cut myself.
- Disconnect the shifter cable from the shifter arm by removing the nut over the OEM banjo bushing. (picture)
- Take out the OEM banjo bushing and replace it with the new ES banjo bushing. It can be difficult putting the new bushing in -- use channel locks, or a couple of fat washers, a nut and bolt, screwing the washers together until the banjo bushing slips in. Do the same at the transmission end, under the hood. (I’m brushing past this part, because I already did this a while ago, and my playtime today consists of the bushings underneath the shifter assembly.)
- Don’t put the cable back on the shifter arm just yet. However, when you do, do not use the OEM nut. Go buy a replacement lock-nut... the kind with plastic in the threads. You see, now that you're loosened it, the OEM nut will just back off again in the future, and it’s been known to do so on a number of people. (Me included, but I was lucky and felt it getting sloppy before it completely fell off.) Use a lock-nut so you don't have to deal with that worry.
- Unclip the side-to-side articulating arm on the left side of the shifter. You do this by pushing it off its post, NOT by unclipping the white retention piece. That piece holds yet another plastic clip in place below it, who's purpose is for fine-tune adjustment to the centered placement of the shifter’s left-to-right position. Play with it if you want to figure it out, but it’s not part of these instructions.
- Now… you think there would be some kind of retention washer on this connector. The post is designed for it, but there wasn't anything there. I’m thinking that was a manufacturing-line SNAFU on my car, so I bought an E-washer for that purpose, and used it when everything went back together. Go figure.
- On to the shifter assembly. Use a 10mm socket to remove the 4 nuts that are holding the shifter assembly to the floor.
- Wiggle and lift the shifter assembly off those four bolts. You don’t need to remove the entire thing; you just need to establish clearance one bolt at a time.
- Working on one corner at a time… start by slipping the OEM metallic washer-tube-thingy (hereafter referred to just as the “washer”), off the OEM rubber bushings. Use a small flat-head to do this, prying the washer downward from the underside of the shifter assembly. Be careful you don’t lose this thing into the floorboards. That would be bad.
- Once the washer is removed, use pliers or a big screwdriver to force the OEM rubber bushing out of the hole. You can pull it upward (difficult), or push it downward (easier).
- Take the normal looking ES bushing and push it over the washer’s post (with a little force.) It's probably easier to do this in your hand now, rather than after you re-install put the washer. (Thanks to eclid98 for that tip.)
- Now slip the metallic washer back on the bolts. Note, you’re still working on the underside of the shifter assembly.
- Repeat this step on the other 3 corners. You’ll probably cut yourself, bleed and swear a lot. It’s all part of the fun.
- Now slip the shifter assembly back down over the four posts.
- With the assembly back on the floor flat, slip the other ES bushing piece into the one of the holes, small end downward. Select one of the 2 more accessible corners as your first one. Don’t worry about forcing it down into the hole… that will happen next.
- Put the OEM washer/nut over the bushing and screw the bushing down into the hole. Don't tighten it all the way just yet, just enough to push the bushing down into the hole. (Thanks again, eclid98.)
- Repeat this step on all four corners.
- Last step -- tighten down all four corners evenly.
Now put everything back together.
Remember the E-clamp ring for the side-to-side cable on the driver’s side of the shifter. And remember to use a lock-nut on the banjo bushing… not too tight, not too loose. When putting the center console back in, don’t forget to plug in the rear lighter. And when putting the shifter trim back in, don’t forget the plug in the front lighter, hazard light switch and ashtray light.
That’s it. Go crazy.
Last edited by Rochester; 10-25-2009 at 08:40 AM.


 10-17-2009, 03:48 PM
#4
As to impressions... well, there is a change in the shifter feel. It’s kind of hard to describe, except to say shifts are more firm. The change is subtle, for sure, but noticeable none-the-less. There’s more “thud” than “clunk” now, if that makes any sense.
As to whether or not it was worth the PITA effort… I think so.
As to whether or not it was worth the PITA effort… I think so.

 10-18-2009, 06:51 AM
#7
Great write up.
I too only installed the banjo bushings as I didn't think the rest were worth the effort. Since you're saying they are, I am probably actually gonna install them... but might wait till the spring.
Great point on the lock tight for the nut. I was foolish enough not to put any on. I was going to keep an eye on it and maybe put some on in the future, but I totally forgot about it. As you may predict, a year later while driving I heard a clunk and then my shifter got stuck in what seemed like in between 2nd and neutral. Luckily i rolled to a red light and after some wiggling around it slid back into place. Nevertheless, not an adventure I'd recommend to anyone.

 10-19-2009, 05:36 AM
#9
Thanks, Roy!
The install wasn't exactly rocket science, but there were still a lot of little things to figure out. I hope the write-up helps somebody.
You know, it's a couple of days later as I write this, and there are a few more miles now for consideration on this mod. I have to say, I'm pleased with the changes.
If you're the kind of driver who feels every little thing in your car, and obsesses until things are exactly the way you want -- you should install the shifter assembly bushings. However, if you've ever done something to your car, then said to yourself, "Nothing's changed", then don't bother. It's pretty subtle.
10-19-2009, 06:01 AM
#10
Thanks, Roy!
The install wasn't exactly rocket science, but there were still a lot of little things to figure out. I hope the write-up helps somebody.
You know, it's a couple of days later as I write this, and there are a few more miles now for consideration on this mod. I have to say, I'm pleased with the changes.
If you're the kind of driver who feels every little thing in your car, and obsesses until things are exactly the way you want -- you should install the shifter assembly bushings. However, if you've ever done something to your car, then said to yourself, "Nothing's changed", then don't bother. It's pretty subtle.
The install wasn't exactly rocket science, but there were still a lot of little things to figure out. I hope the write-up helps somebody.
You know, it's a couple of days later as I write this, and there are a few more miles now for consideration on this mod. I have to say, I'm pleased with the changes.
If you're the kind of driver who feels every little thing in your car, and obsesses until things are exactly the way you want -- you should install the shifter assembly bushings. However, if you've ever done something to your car, then said to yourself, "Nothing's changed", then don't bother. It's pretty subtle.
B
10-19-2009, 06:09 AM
#11
Absolutely you can do this! It's more like solving a small jigsaw puzzle than it is actual auto-mechanics.
10-19-2009, 06:51 AM
#12
Thanks, Roy!
The install wasn't exactly rocket science, but there were still a lot of little things to figure out. I hope the write-up helps somebody.
You know, it's a couple of days later as I write this, and there are a few more miles now for consideration on this mod. I have to say, I'm pleased with the changes.
If you're the kind of driver who feels every little thing in your car, and obsesses until things are exactly the way you want -- you should install the shifter assembly bushings. However, if you've ever done something to your car, then said to yourself, "Nothing's changed", then don't bother. It's pretty subtle.
The install wasn't exactly rocket science, but there were still a lot of little things to figure out. I hope the write-up helps somebody.
You know, it's a couple of days later as I write this, and there are a few more miles now for consideration on this mod. I have to say, I'm pleased with the changes.
If you're the kind of driver who feels every little thing in your car, and obsesses until things are exactly the way you want -- you should install the shifter assembly bushings. However, if you've ever done something to your car, then said to yourself, "Nothing's changed", then don't bother. It's pretty subtle.
10-19-2009, 06:54 AM
#13
B
PS - did you decide on the brakes yet?
10-19-2009, 07:10 AM
#14
Well, I'm more confident in my plans, yes. Something could change my mind, but the 95% likelihood is zinc-plated RTP blank rotors and Hawk HPS composite pads. I already picked up the front pads last months with that awesome Pep Boys tip here on the forum; ($26 for the front set... that was a crazy good deal!) I'll order the rear pads in November, and then the rotors in December.
Then in January, front strut mounts (Moog) and dust boots (OEM). In February, a set of 4 struts (Tokico HR Blues). In March, a couple of new tires (Goodyear Eagle F1's). And finally in April -- strut and brake installation.
Before the install, I'm going to have my mechanic scope out the current state of my calipers, emergency brake, and brake lines. As well as the tie-rod ends, ball joints, and front sway bar end-links. For this stuff, just fix what's broken.
So that's my plan for winter. Buy stuff for Spring. Lay low. Don't crack up the car in the snow.
10-19-2009, 07:23 AM
#15
Well, I'm more confident in my plans, yes. Something could change my mind, but the 95% likelihood is zinc-plated RTP blank rotors and Hawk HPS composite pads. I already picked up the front pads last months with that awesome Pep Boys tip here on the forum; ($26 for the front set... that was a crazy good deal!) I'll order the rear pads in November, and then the rotors in December.
Then in January, front strut mounts (Moog) and dust boots (OEM). In February, a set of 4 struts (Tokico HR Blues). In March, a couple of new tires (Goodyear Eagle F1's). And finally in April -- strut and brake installation.
Before the install, I'm going to have my mechanic scope out the current state of my calipers, emergency brake, and brake lines. As well as the tie-rod ends, ball joints, and front sway bar end-links. For this stuff, just fix what's broken.
So that's my plan for winter. Buy stuff for Spring. Lay low. Don't crack up the car in the snow.
Then in January, front strut mounts (Moog) and dust boots (OEM). In February, a set of 4 struts (Tokico HR Blues). In March, a couple of new tires (Goodyear Eagle F1's). And finally in April -- strut and brake installation.
Before the install, I'm going to have my mechanic scope out the current state of my calipers, emergency brake, and brake lines. As well as the tie-rod ends, ball joints, and front sway bar end-links. For this stuff, just fix what's broken.
So that's my plan for winter. Buy stuff for Spring. Lay low. Don't crack up the car in the snow.
sounds like a good plan. im going to be doing pretty much the same thing (only a lot more stretched out...gotta a wedding to pay for). ES bushings. rotors, pads, SS lines, FSTB and RSB in the next 4-6 weeks. put the RSB and FSTB on myself and then wait till feb or march for the brakes. save some more and purchase some Eibach and koni yellows around late spring early summer.
i got this new car and the addiction is back...my wallet is going to take a beating.
B
another PS - do you know a good place to get some Redline mt-90? i found some website but they want like 8-9 bucks a quart and that seems high
10-19-2009, 07:36 AM
#16
Can't help you with the MT-90 purchase advice. You're only talking about a few dollars more or less, so it doesn't really matter.
Wedding, huh? Nice! Marry the hell out of that girl
(yeah, I don't know what that means, but it sounds funny)
Boy, we're OT. We should stop.
Wedding, huh? Nice! Marry the hell out of that girl
(yeah, I don't know what that means, but it sounds funny)
Boy, we're OT. We should stop.
10-19-2009, 07:46 AM
#17
Can't help you with the MT-90 purchase advice. You're only talking about a few dollars more or less, so it doesn't really matter.
Wedding, huh? Nice! Marry the hell out of that girl
(yeah, I don't know what that means, but it sounds funny)
Boy, we're OT. We should stop.
Wedding, huh? Nice! Marry the hell out of that girl
(yeah, I don't know what that means, but it sounds funny)
Boy, we're OT. We should stop.
lol...i dont know what it means either but ill do it
ill do some more searching...dealer said they didnt carry it so i have to provide my own but they will still change it for me.
yes we are OT
ill comment in here again after i get my STS and bushing put it...im pumped
B
10-19-2009, 08:00 AM
#18

 10-24-2009, 02:15 PM
#21
So it's been one week since I swapped the bushings underneath the shifter harness. There's something I've been observing, and I'm kind of confused about it.
Like a lot of 6MT owners, I have the infamous 3rd gear crunch. It's usually not that bad (unless I shift from 2nd gear red-line), but I'm pretty sensitive to it at all speeds. However, over the last 7 days the crunch has been noticeably reduced. Seriously.
I almost didn't want to say anything because it doesn't make a lot of sense, but I swear it's true.
10-25-2009, 06:31 AM
#22

Thanks Rochester for posting this How-To. Just finished mine this morning. A few tips I hope others find useful.
1. When pushing out the OEM washers and bushings you'll want a hand underneath to catch them. Be sure to wear a mechanics glove. This will certainly save a good number of expletives as the screwdriver will inevitably slip through.
2. I found it easier to flip flop steps 20-21. In other words, I fitted the #1189 bushings onto the OEM washer prior to slipping them back onto the bolts. Piece of cake.
3. As you re-tighten the 4-nuts of the shifter assembly be sure to take your time and work in a criss-cross pattern, frequently checking that the shifter assembly is aligned properly. This will help ensure that the bushings seat properly.
10-25-2009, 06:40 AM
#23
Thanks Rochester for posting this How-To. Just finished mine this morning. A few tips I hope others find useful.
1. When pushing out the OEM washers and bushings you'll want a hand underneath to catch them. Be sure to wear a mechanics glove. This will certainly save a good number of expletives as the screwdriver will inevitably slip through.
2. I found it easier to flip flop steps 20-21. In other words, I fitted the #1189 bushings onto the OEM washer prior to slipping them back onto the bolts. Piece of cake.
3. As you re-tighten the 4-nuts of the shifter assembly be sure to take your time and work in a criss-cross pattern, frequently checking that the shifter assembly is aligned properly. This will help ensure that the bushings seat properly.
1. When pushing out the OEM washers and bushings you'll want a hand underneath to catch them. Be sure to wear a mechanics glove. This will certainly save a good number of expletives as the screwdriver will inevitably slip through.
2. I found it easier to flip flop steps 20-21. In other words, I fitted the #1189 bushings onto the OEM washer prior to slipping them back onto the bolts. Piece of cake.
3. As you re-tighten the 4-nuts of the shifter assembly be sure to take your time and work in a criss-cross pattern, frequently checking that the shifter assembly is aligned properly. This will help ensure that the bushings seat properly.
Thanks for the feedback!

 ill update my observations in here when i do..
10-28-2009, 10:15 AM
ill update my observations in here when i do..
10-28-2009, 10:15 AM
#26
ok done.. my thoughts and insight on the installation process...
i didnt have to disconnect the heated seat switches and rear cig lighter,..there was enough play, after it was unbolted of corse, where i was able to just move it up and away so i didnt have to mess with that...
in terms of the ''washer'', once the top nut was off,.. i found it eaiser to pick the plastic shifter plate piece up maybe 1/2" so that the washer was still on the bolt, and then apply pressure to the top of the washer with a regular screwdriver,..so that when it pops off it slides right down the bolt and its impossible to lose it..i also did this at every corner before moving on,..so that all 4 washers were sitting on the bolt independtly off the bushing..
in terms of taking the old bushing off.. i found it eaiser to grab it from the top with a pair of needle-nose plyers,.. and pull up while simutanously pushing in one corner of the bushing on the bottom with your finger,.. came out hassle free..i also did this at all 4 corners before moving on,
from there.. once i had all 4 bushing out and the 4 washers sittin on the 4 bolts,.. i found it simple to slip my fingers under and slide the small bushing down on top of the washer on all 4 corners...
from there,.. i lined up the plastic piece,..slipped all four top bigger bushings on and then all 4 top bolts, tightening them like lugs on a car,(do not over tighten:could snap)
my impressions: well.. i havnt driven it yet ill update later if i notice anything,.. but they do seem to hold the shifter plate firmer down to the floor,.. you dont realize how much impact these bushing have in holding the shifter down till you take it apart and try to move the shifter around...
..its really not that hard,.. when i first started taking everything apart,.. i said oh man what am i getting myself into,.. i need to drive this thing in a few hours,..but it got really easy as i went along,.. took me about an hour and change ..
...and yes.. im bleeding,.. mechanics gloves might not of been a bad idea but i dont own any..
10-28-2009, 11:35 AM
#27
Newbie - Just Registered

Join Date: Aug 2007
Posts: 8
I installed these about a month and half ago, and I am very happy with them. They work fantastic, nice firm and direct shift. A+++ The only other thing I did differently on mine, I put some moly lube on the banjo bushings so they rotate alittle easier.
10-28-2009, 12:23 PM
#28
Good for you! And yeah, that's a good point about pulling the washers out directly down on to their respective bolts. I did that on the back washers, because of the limited play. That, and I was freaked out about losing them in the floorboards.
So you cut yourself, too, eh?
So you cut yourself, too, eh?
10-28-2009, 12:33 PM
#29

 10-31-2009, 11:38 PM
#32

Just picked up a set, quick Q, which lubricant would you recommend and how hard is it to swap out the bushing thats at the other end under the hood. Do you have to remove the airbox assembly or you can just jack it up? Thank you.
11-01-2009, 06:13 AM
#34
Um, stretch out your back before you do this
 10-09-2010, 02:31 PM
#37
Senior Member

Join Date: Dec 2008
Location: NYC
Posts: 1,779
Thanks to Rochester's instructions, I tackled this today with minimal problems. I have to say, I believe that the 3rd gear crunch is reduced/softened after swapping out the bushings under the assembly.
One more tip for installation, the easiest way to pop out the metal sleeved washers is to grab a deep 7mm socket and push it down & out. The 7mm socket is wide enough to clear the threads but not the washer. Attach it to the socket wrench and you have the perfect leverage to top them out. Then use a needle nose pliers, grab a hung of rubber washer and shove it out through the bottom.
One more tip for installation, the easiest way to pop out the metal sleeved washers is to grab a deep 7mm socket and push it down & out. The 7mm socket is wide enough to clear the threads but not the washer. Attach it to the socket wrench and you have the perfect leverage to top them out. Then use a needle nose pliers, grab a hung of rubber washer and shove it out through the bottom.
Last edited by TallTom; 10-09-2010 at 09:16 PM.
10-09-2010, 02:51 PM
#38
Thanks to Rochester's instructions, I tackled this today with minimal problems. I have to say, I believe that the 3rd gear crunch is reduced/softened after swapping out the bushings under the assembly.
One more tip for installation, the easiest way to pop out the metal sleeved washers is to grab a deep 7mm socket and push it down & out. The 7mm socket is wide enough to clear the threads but not the washer. Attach it to the socket wrench and you have the perfect leverage top top them out. Then use a needle nose pliers, grab a hung of rubber washer and shove it out through the bottom.
One more tip for installation, the easiest way to pop out the metal sleeved washers is to grab a deep 7mm socket and push it down & out. The 7mm socket is wide enough to clear the threads but not the washer. Attach it to the socket wrench and you have the perfect leverage top top them out. Then use a needle nose pliers, grab a hung of rubber washer and shove it out through the bottom.
Isn't that awesome about reducing the 3rd gear crunch? Man, I lived with that for years, and after these bushings, and ES torque mount bushings, and finally the NWP Torque Link connector.... the infamous crunch is but a memory.
01-27-2011, 09:00 AM
#40
Newbie - Just Registered

Join Date: Jan 2011
Posts: 1
Hi. New here, but I've been searching for two days looking for the part number for the ES shifter bushing set. I've got a rather modded P11 with a QR 6-speed paired to an import DET motor.
All the photos I've found on sites selling the 7.1115 bushing set show the same bushings used on the older (non-cable) MTs (stock photo I'm guessing?). Now seeing the picture posted above by someone I'm sure it's got to be the right kit? I swear I've looked at a dozen different forums and no one ever refers to the ES kits by the actual part number!
All the photos I've found on sites selling the 7.1115 bushing set show the same bushings used on the older (non-cable) MTs (stock photo I'm guessing?). Now seeing the picture posted above by someone I'm sure it's got to be the right kit? I swear I've looked at a dozen different forums and no one ever refers to the ES kits by the actual part number!