OEM Electrical System Upgrade I of II: OEM Ground Wire Upgrade (HOW-TO)
 08-25-2006, 09:16 PM
#1

OEM Electrical System Upgrade I of II: OEM Ground Wire Upgrade (HOW-TO)
This is the second section of my electrical system upgrade. You can read the first part, how to upgrade the OEM ground wire, here.
This how-to will be covering the details on how to perform the upgrade known as the 'Big Three'. Essentially, it will yeild the following:
1) Reduced dimming and smaller voltage drops
2) More stable voltage and better current flow
3) Less strain on your vehicle's charging system
The BIG THREE consists of:
(1) Battery negative to chassis
(2) Alternator to battery positive
(3) Engine Block to chassis
...it essentially does the same thing as a conventional grounding kit, however it does so in a different fashion. I am not a big fan of grounding kits as I prefer this method. People will argue this one way or another, but I swear by this. So, let's get started!
TOOLS/SUPPLIES
10mm Socket
12mm Socket
Ratchet
10ft. of 1/0AWG Power Cable
3 1/0AWG Ring Terminals
1 1/0AWG Fuse Terminal w/ 300-amp fuse
STEP I - BATTERY NEGATIVE TO CHASSIS
Simple enough. We are going to be making an attachement from the negative terminal of the battery to the chassis. If you peek behind the battery you will see a good place to plant the wire.
Remove the bolt with your 10mm socket and sand away the spot to bare steel. After that, attach about a 1-ft. length of wire to one of your terminals, crimp, and bolt everything back together.
STEP II - BATTERY POSITIVE TO ALTERNATOR POST
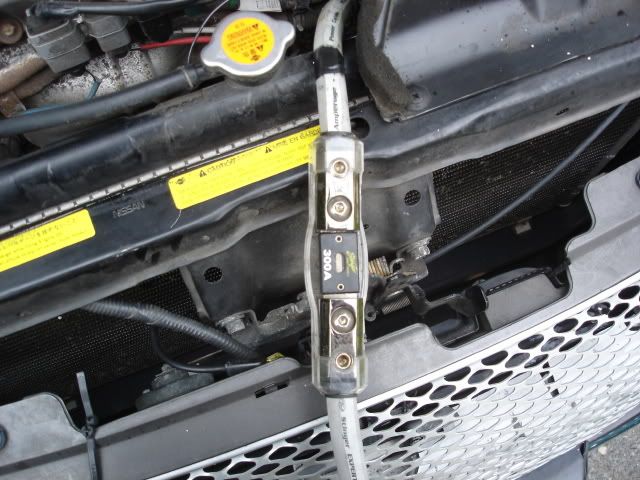
Alright, this one is a bit more tricky. You are going to need about 5ft of wire split into two equal 2.5ft. lengths. We are going to be attaching the wire to the battery positive to a fuse terminal, then fuse terminal to alternator post.
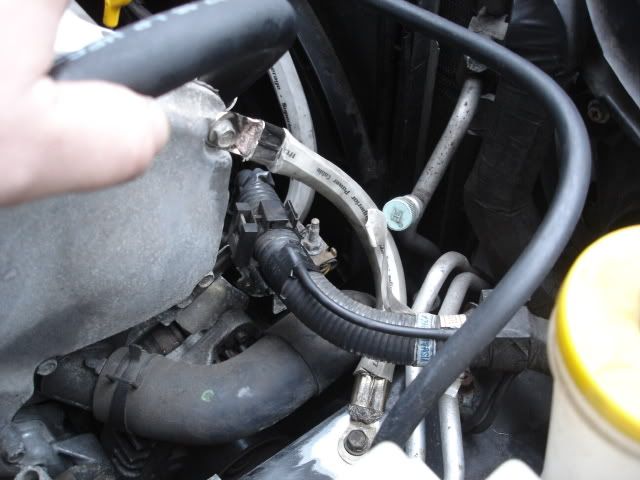
You can find the alternator just to the outside end of the engine block on the passenger side. Look for a rubber boot covering a bolt. That's your alternator post. We'll start there. Remove the bolt using a 12mm socket.
Attach one crimped end of the 1/0AWG wire to the bolt, then screw everything back together.
Take the lead attached to the alt. post and run this to the fuse. Take the other length of wire and run this from the opposite end of the fuse and lead it to the battery. We're almost done!
This how-to will be covering the details on how to perform the upgrade known as the 'Big Three'. Essentially, it will yeild the following:
1) Reduced dimming and smaller voltage drops
2) More stable voltage and better current flow
3) Less strain on your vehicle's charging system
The BIG THREE consists of:
(1) Battery negative to chassis
(2) Alternator to battery positive
(3) Engine Block to chassis
...it essentially does the same thing as a conventional grounding kit, however it does so in a different fashion. I am not a big fan of grounding kits as I prefer this method. People will argue this one way or another, but I swear by this. So, let's get started!
TOOLS/SUPPLIES
10mm Socket
12mm Socket
Ratchet
10ft. of 1/0AWG Power Cable
3 1/0AWG Ring Terminals
1 1/0AWG Fuse Terminal w/ 300-amp fuse
STEP I - BATTERY NEGATIVE TO CHASSIS
Simple enough. We are going to be making an attachement from the negative terminal of the battery to the chassis. If you peek behind the battery you will see a good place to plant the wire.
Remove the bolt with your 10mm socket and sand away the spot to bare steel. After that, attach about a 1-ft. length of wire to one of your terminals, crimp, and bolt everything back together.
STEP II - BATTERY POSITIVE TO ALTERNATOR POST
Alright, this one is a bit more tricky. You are going to need about 5ft of wire split into two equal 2.5ft. lengths. We are going to be attaching the wire to the battery positive to a fuse terminal, then fuse terminal to alternator post.
You can find the alternator just to the outside end of the engine block on the passenger side. Look for a rubber boot covering a bolt. That's your alternator post. We'll start there. Remove the bolt using a 12mm socket.
Attach one crimped end of the 1/0AWG wire to the bolt, then screw everything back together.
Take the lead attached to the alt. post and run this to the fuse. Take the other length of wire and run this from the opposite end of the fuse and lead it to the battery. We're almost done!
Last edited by Metal Maxima; 01-24-2009 at 06:13 PM.
 08-25-2006, 09:21 PM
#2
STEP III - ENGINE BLOCK TO CHASSIS
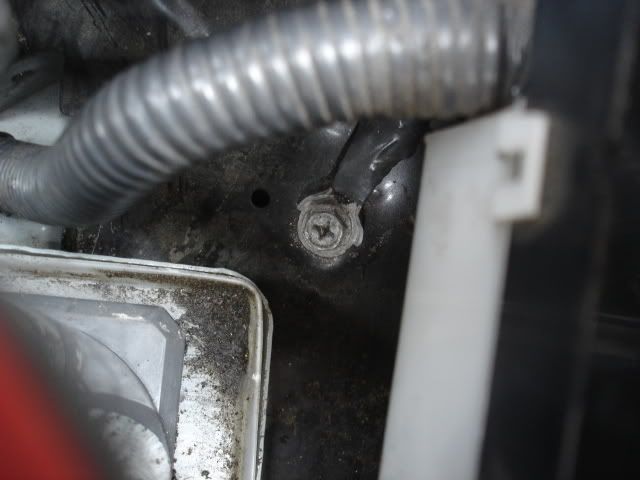
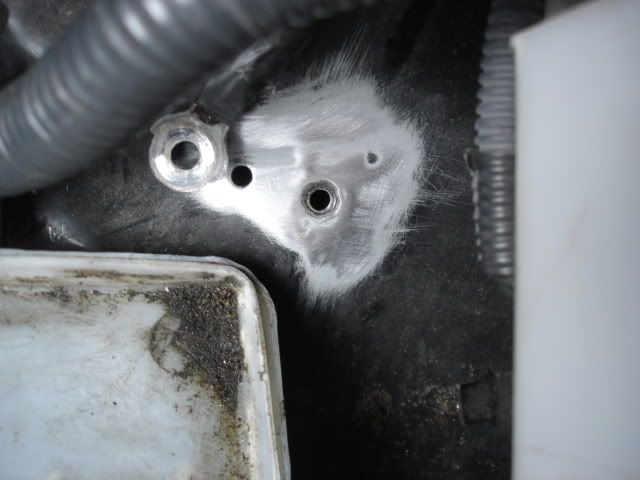
The final step is simple enough. Start off by locating a spot where you want to land the lead on the chassis. I chose an empty bolt hole located by the engine block. Sand away as we have done before.
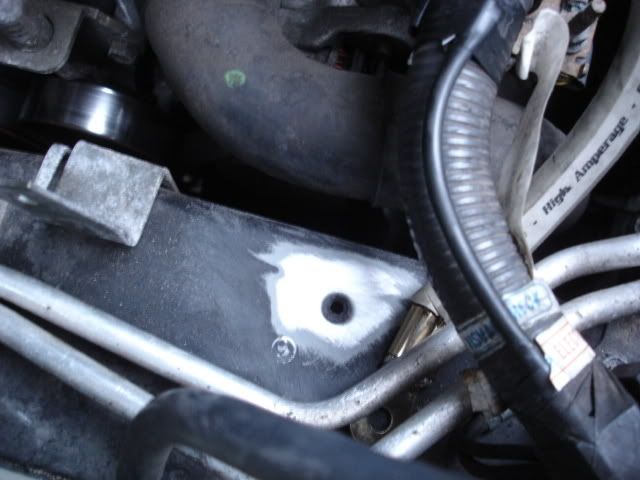
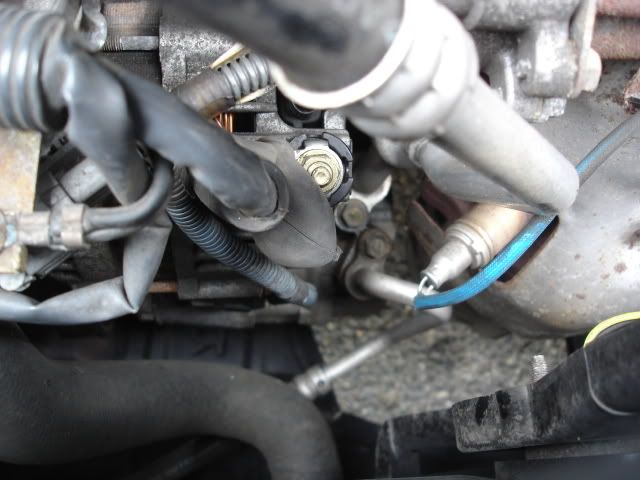
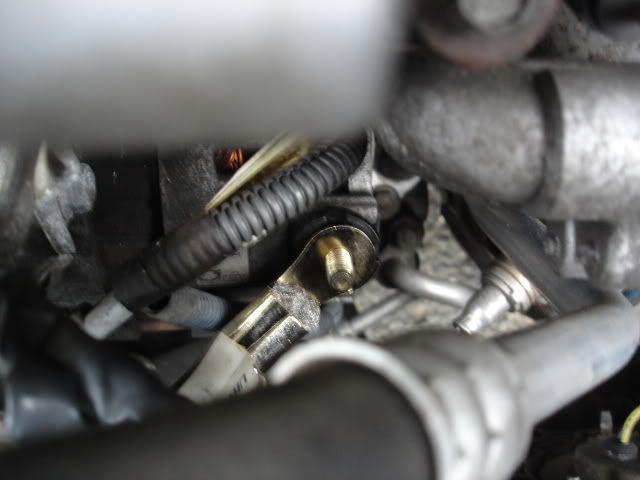
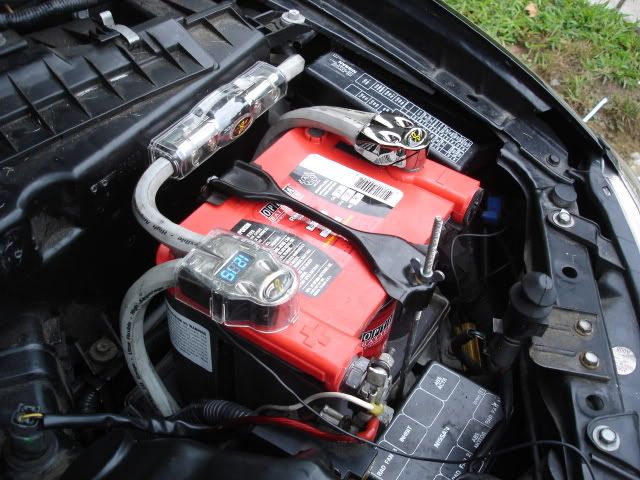
Next, simply ground this to the engine block. I chose one of the 10mm bolts located on the side of the block. You can choose just about anywhere on the block; for instance, you will see two grounding points on top of the block. Golden rule with grounding wires is to keep them as short as possible, so just keep that in mind when doing this...
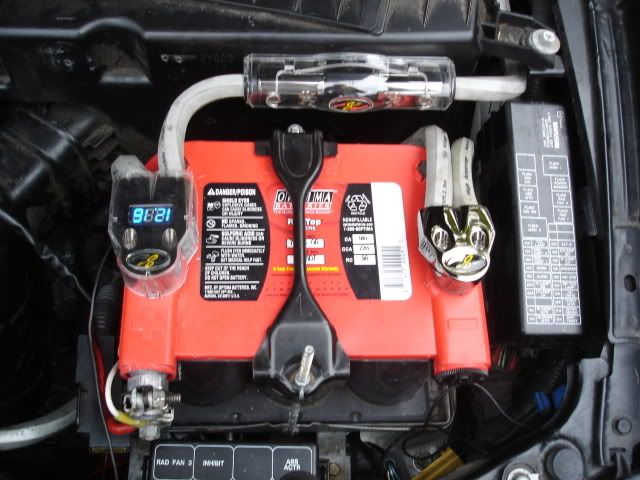
...and now you're done! Here's a shot of the battery when all is said and done...pretty bada'ss if I say so myself!
The final step is simple enough. Start off by locating a spot where you want to land the lead on the chassis. I chose an empty bolt hole located by the engine block. Sand away as we have done before.
Next, simply ground this to the engine block. I chose one of the 10mm bolts located on the side of the block. You can choose just about anywhere on the block; for instance, you will see two grounding points on top of the block. Golden rule with grounding wires is to keep them as short as possible, so just keep that in mind when doing this...
...and now you're done! Here's a shot of the battery when all is said and done...pretty bada'ss if I say so myself!
Last edited by Metal Maxima; 01-24-2009 at 06:14 PM.
 08-25-2006, 09:52 PM
#5
Originally Posted by The Law
HOLY CRAP!!!!!! hows the start up?
Good! I can't say there's this 'monstrous' change, but I am going to wait until I do the Big 3 in addition to this before I weigh in with the final verdict.
 08-25-2006, 10:00 PM
#6
Originally Posted by Metal Maxima
Good! I can't say there's this 'monstrous' change, but I am going to wait until I do the Big 3 in addition to this before I weigh in with the final verdict.


 08-25-2006, 10:23 PM
#10
Originally Posted by BLK2BLU
There was in the audio forum a few months ago. It also had a link to another forum explaining in detail about how it worked.
 08-26-2006, 05:02 AM
#12
Member

Join Date: Aug 2006
Posts: 45
Hey, I pm'ed on the car audio site and asked if you had done the big 3 on your Max some time ago, I guess I got my answer. Anyways, I have done the big 3 on my Max, I haven't had the amp tested to see how many volts I am getting yet. I didnt replace the stock ground, just added on to it, but it Im gonna yank it out soon as I get a battery terminal. I used 1/0 Stinger Hpm wire for the job.
I have noticed better cranking after doing the big 3, I have yet to see if my lights dim from my system anymore, since my sub amp is being repaired. Pics are on CarAudio.com in the electrical system forums.
http://www.caraudio.com/forum/showth...&highlight=big
Excuse my ghetto terminals, I was broke that day so no Stinger terminal!
08-27-2006, 05:30 PM
#13

Looks good to me. I really need to get my a$$ in gear and do this. I have some knu 1/0 sitting aorund too.
Dan, if you want to clean it up even MORE, use electrical tape as your "ring terminal boot" instead of the red/black vinyl ones, which don't hold up very well under the engine bay.
Dan, if you want to clean it up even MORE, use electrical tape as your "ring terminal boot" instead of the red/black vinyl ones, which don't hold up very well under the engine bay.
08-27-2006, 06:36 PM
#14
Originally Posted by djfrestyl
Looks good to me. I really need to get my a$$ in gear and do this. I have some knu 1/0 sitting aorund too.
Dan, if you want to clean it up even MORE, use electrical tape as your "ring terminal boot" instead of the red/black vinyl ones, which don't hold up very well under the engine bay.
Dan, if you want to clean it up even MORE, use electrical tape as your "ring terminal boot" instead of the red/black vinyl ones, which don't hold up very well under the engine bay.
D'amn straight you need to get this done!


 04-05-2008, 11:43 PM
#22

hey buddy, you got four more posts to go till you hit 15!!! you're almost there!!!
01-24-2009, 06:14 PM
#24
 01-24-2009, 06:19 PM
#26
Wait hold on...
This thread now has the same pics as this thread: http://forums.maxima.org/audio-elect...other-how.html
I was looking specifically for the pictures of the OEM ground wire.
EDIT: Just noticed your post above mine. Oops. The admins should have a backup...maybe they can backup an individual thread. I don't know if VBulletin allows that though.
01-24-2009, 09:00 PM
#27
Wait hold on...
This thread now has the same pics as this thread: http://forums.maxima.org/audio-elect...other-how.html
I was looking specifically for the pictures of the OEM ground wire.
EDIT: Just noticed your post above mine. Oops. The admins should have a backup...maybe they can backup an individual thread. I don't know if VBulletin allows that though.
This thread now has the same pics as this thread: http://forums.maxima.org/audio-elect...other-how.html
I was looking specifically for the pictures of the OEM ground wire.
EDIT: Just noticed your post above mine. Oops. The admins should have a backup...maybe they can backup an individual thread. I don't know if VBulletin allows that though.
Anyway, it's pretty simple. If you pull your battery out you'll see an 8AWG wire connected to the chassis with what I think is a 12mm bolt and a metal wire clip. All you simply need to do is removed the clip, the bolt, and replaced with a better wire. Piece o' cake.
D'amn I'm pissed for having done this to the thread.
01-24-2009, 09:49 PM
#29

 another awesome writeup i must say
Thread
Thread Starter
Forum
Replies
Last Post
Slamrod
4th Generation Maxima (1995-1999)
5
04-10-2016 05:24 PM
JMag90
5th Generation Maxima (2000-2003)
2
08-25-2015 09:17 AM
MaximaDrvr
7th Generation Maxima (2009-2015)
16
08-19-2015 08:20 PM
bassmann
4th Generation Maxima (1995-1999)
1
08-03-2015 07:53 PM