Cheap DIY polyurethane motor mounts
 02-10-2014, 06:16 PM
#41

The stuff dries harder than the original rubber, and ES polyurethane supports engines fine, so I don't doubt this will work great.
Depends on your perspective. These are the mounts that bolt to the cross member and engine block. They are the engine mounts that control the torque. I call them the front and rear, as this is where they are located inside the engine bay.
Depends on your perspective. These are the mounts that bolt to the cross member and engine block. They are the engine mounts that control the torque. I call them the front and rear, as this is where they are located inside the engine bay.

I hope I'm wrong, but I don't see this stuff working/lasting that long either.
Although some claim success with the stuff you bought, did you see this post in the Honda thread you linked?
"So I used the PL door and window sealant...it's NOT the correct one. Came out white and dried to a soft texture, very similar to the OEM rubber inside the mounts."

 02-10-2014, 07:53 PM
#44


 02-15-2014, 06:38 PM
#48
I've had the mounts out in the garage on the jigs for 5 days under a large tote with a heater running inside. Today I took the mounts off the jigs to come inside the house and cure for the rest of the duration.


 02-15-2014, 10:31 PM
#50

correct me if i'm wrong, isn't there supposed to be a little play in those mounts as it reacts to bumps and engine torque? i mean, i understand the more solid the better, but i'm thinking you would want a little play in them, right? also, just cause it isn't rubber doesn't mean it's not safe, or does it? any write ups on how safe his mounts will be?
02-15-2014, 10:56 PM
#51

correct me if i'm wrong, isn't there supposed to be a little play in those mounts as it reacts to bumps and engine torque? i mean, i understand the more solid the better, but i'm thinking you would want a little play in them, right? also, just cause it isn't rubber doesn't mean it's not safe, or does it? any write ups on how safe his mounts will be?
02-15-2014, 11:00 PM
#52
I believe doing it as described in this thread results in stiffer mounts, which cater more to performance. There is still play, just not as much. IIRC the trade off is having less engine movement however more of that torque is transferred to the chassis which makes the driver feel it more. Smoother for the car but not the rider? Still doing my homework here myself.
Really digging this thread, always cool to see someone keeping a journal of sorts on their latest max project.
Really digging this thread, always cool to see someone keeping a journal of sorts on their latest max project.
02-16-2014, 01:13 AM
#53
Solid motormounts will cause buzzing of my dash and trim at idle, but the trade off in durability of the mounts will be well eorth it. Also there will be no more pushing and pulling on hoses and harnesses. Shifting will be crisper and there will be a firmer feel while driving. As it is now my motor moves enough to affect the car at speed. Like a strong wind hitting you. You can feel the qhole car shake and shimmy when the engine moves.
02-22-2014, 01:02 AM
#55

 If so, boy that's stiff.
02-22-2014, 04:55 AM
If so, boy that's stiff.
02-22-2014, 04:55 AM
#57
at three days i could have pulled the inner sleeve out by hand. These are solid poly, no rubber. It will take a long time. Right now its kinda like a water bed, push here, and it rises there. It is much stiffer than five days ago yhough.
04-02-2014, 12:16 PM
#58
Junior Member

Join Date: Aug 2004
Posts: 81
I'll add my voice, great job on the jig.
I'm in the process of reinstalling the upper pan on my 96 GLE, and the firewall and radiator mounts were both trashed. So I put in a pair of DEA's, and hope they're durable.
In fact, my question is about durability... How are these for durability? Both mounts are inches away from the exhaust manifolds; how is this material going to hold up at that point in the engine bay? How close to the manifolds are the engine mounts on Hondas?
Last, how do you maintain the left-right orientation on the center metal tube? This part isn't clear to me in your pictures.
04-02-2014, 12:24 PM
#59
Junior Member
Join Date: Aug 2004
Posts: 81
Actually, I think I may have answered the temperature question on my own:
http://www.loctiteproducts.com/tds/PL_SEAL_DWS_tds.pdf
Supposed to withstand temps > 200. Where I live, 200 degrees in the summer is just about guaranteed, front or rear.
I think you should oven-test these: Put them on a cheap pan your SO doesn't care about, and put them in the oven for an hour at increasing temps (I'd start at 300). If it's fine at temps up to 400, I bet these are just fine.


 05-21-2014, 04:50 PM
#65
I installed the new mounts today. There is a quite measurable improvement over the old mounts. Still spongy
 , but the engine doesn't knock around when shifting, or goosing the throttle in gear.
UPDATE: Don't use PL adhesives, they are much too soft and don't hold up well.
Front mount driver side view.

Front mount passenger side view.

Rear mount driver side view.

Still spongy, but the engine doesn't knock around when shifting, or goosing the throttle in gear.UPDATE: Don't use PL adhesives, they are much too soft and don't hold up well.
Front mount driver side view.

Front mount passenger side view.

Rear mount driver side view.

Last edited by asand1; 09-17-2014 at 03:34 PM.
05-24-2014, 01:30 PM
#67

i wish i could remember what specific brand of polyurethane it was but this was back in 07. good luck asand1, i read about this method from dsm forums years ago that inspired me to do this.
05-29-2014, 09:35 PM
#68
I've done some research and found some info for different fillers, with comparative pricing.
The PL S40 I used is only Shore A 28-32, and $7.99 a tube.
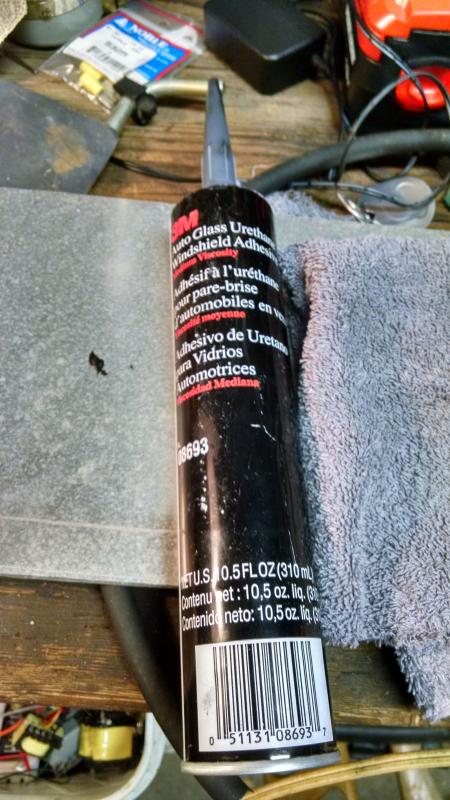
3M Auto Glass Urethane Windshield Adhesive-Medium Viscosity,
PN 08693, Is Shore A 50-55 and about $15.00 a tube.
3M Windo-Weld Super Fast Urethane, PN 08609, is Shore A 55-60 and $26.00 a tube.
I think 3M 08693 is the winner, and will go in my old mounts soon.
-----------------------------------------------------------------
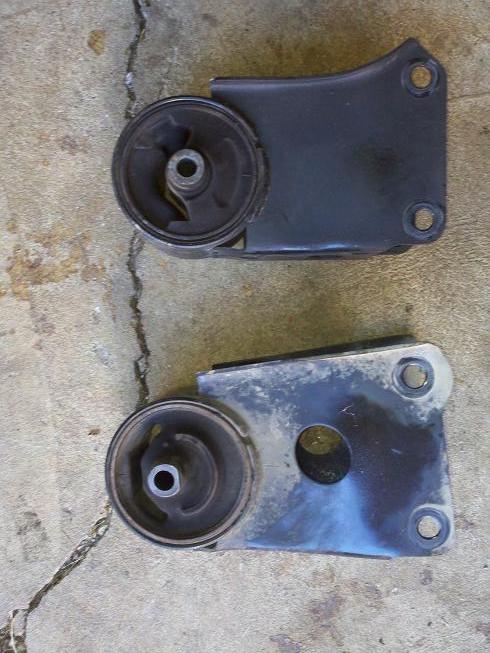
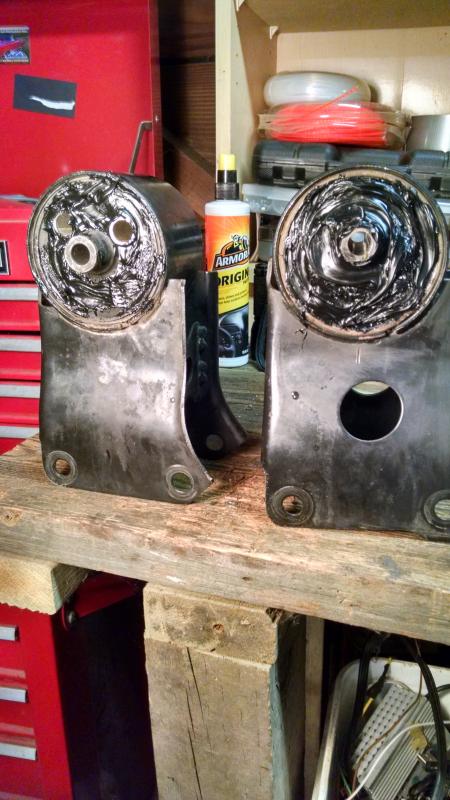
Pictured below are my OE MT motor mounts. Like the AT mounts, they are both fluid filled. The electronic mount is actually not an electrorheological fluid, like many believe. It simply has a servo motor that adjusts fluid damper valving like an adjustable shock to decrease vibration at idle. Old mounts were in better shape than the wrecking yard mounts. Perfect for filling gaps with construction adhesive
---------------------------------------------------------------
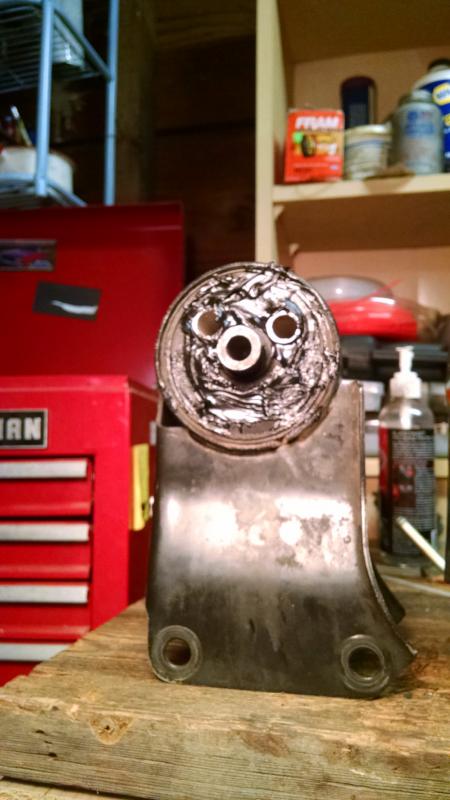
Here is the rear mount after cutting some rubber out of the top of the mount and draining fluid out. With these mounts I will cut out some rubber, drain, clean, and fill.
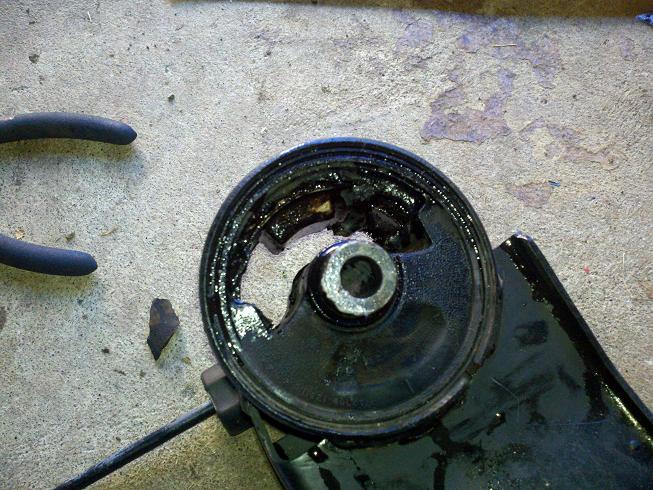
Fluid
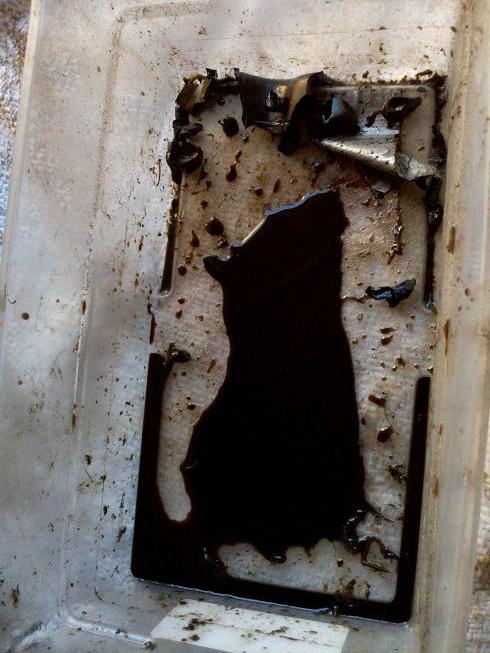
--------------------------------------------------------
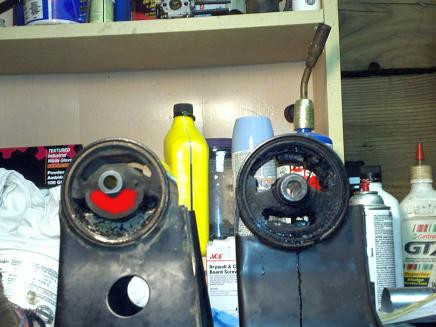
I have cut away rubber on these two with a 1/2" hole saw. You can see the rear mount on the right has a good sized cavity on the bottom that was fluid filled. Also the mount on the left must be drilled in the area marked with red, this will reveal a cavity that must also be filled. After drilling and cutting rubber away they can be cleaned with brake cleaner and a toothbrush.
The PL S40 I used is only Shore A 28-32, and $7.99 a tube.
3M Auto Glass Urethane Windshield Adhesive-Medium Viscosity,
PN 08693, Is Shore A 50-55 and about $15.00 a tube.
3M Windo-Weld Super Fast Urethane, PN 08609, is Shore A 55-60 and $26.00 a tube.
I think 3M 08693 is the winner, and will go in my old mounts soon.
-----------------------------------------------------------------
Pictured below are my OE MT motor mounts. Like the AT mounts, they are both fluid filled. The electronic mount is actually not an electrorheological fluid, like many believe. It simply has a servo motor that adjusts fluid damper valving like an adjustable shock to decrease vibration at idle. Old mounts were in better shape than the wrecking yard mounts. Perfect for filling gaps with construction adhesive

---------------------------------------------------------------
Here is the rear mount after cutting some rubber out of the top of the mount and draining fluid out. With these mounts I will cut out some rubber, drain, clean, and fill.

Fluid

--------------------------------------------------------
I have cut away rubber on these two with a 1/2" hole saw. You can see the rear mount on the right has a good sized cavity on the bottom that was fluid filled. Also the mount on the left must be drilled in the area marked with red, this will reveal a cavity that must also be filled. After drilling and cutting rubber away they can be cleaned with brake cleaner and a toothbrush.

Last edited by asand1; 09-17-2014 at 03:25 PM.
09-16-2014, 08:24 PM
#69
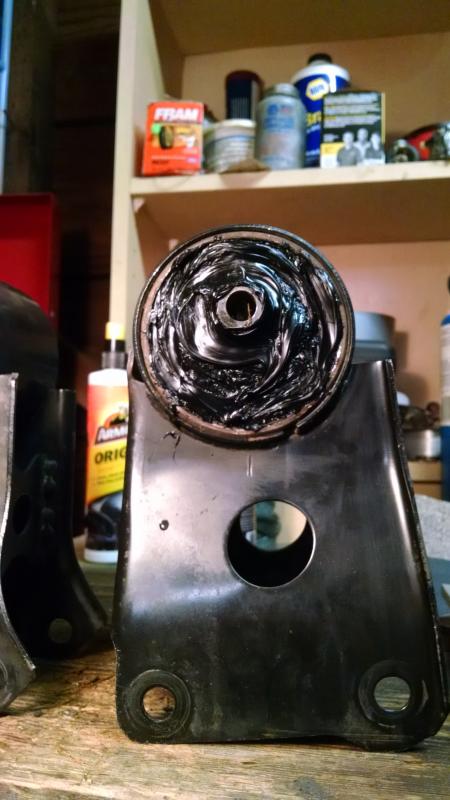
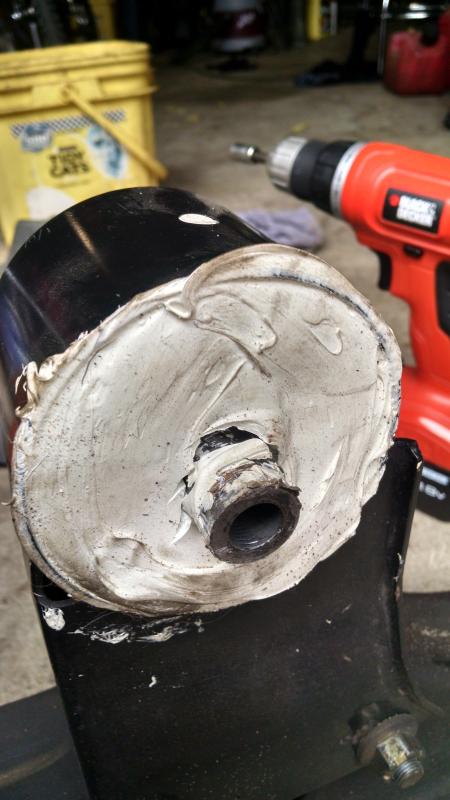
Today I picked up the 3M 08693 window urethane for $11.23 at NAPA auto parts and filled my original MT mounts. I cut a couple lengths of 1/2" aluminum tube to help fill the voids in one mount, this allowed me to complete the whole job with just one tube of urethane.


 09-18-2014, 09:45 AM
#70
Both flavours of 3M window sealer are moisture curing;
http://multimedia.3m.com/mws/mediawe...6EVs6E666666--
After letting the mounts cure over night I placed them in a bucket of hot water. and twice I have put them in the steamed up the bathroom with a heater. They are getting pretty hard now and they will be fully cured long before my next day off on Wednesday.
09-24-2014, 01:16 PM
#71
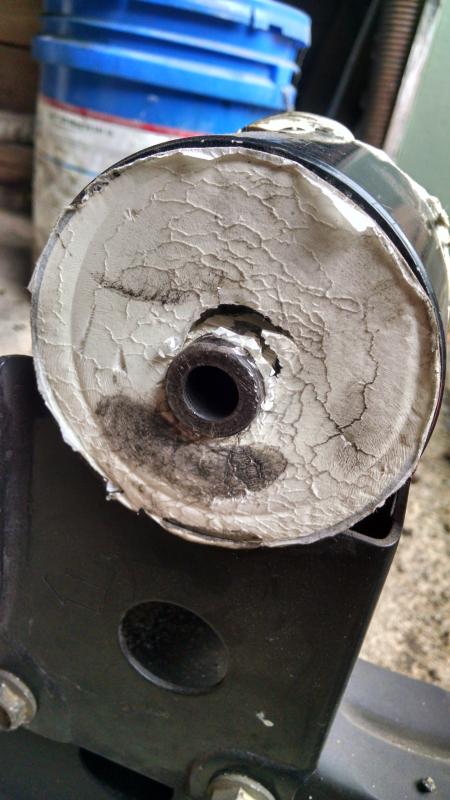
Today I installed the new DIY mounts. The white mounts were not pretty. The rear mount tore loose and formed a gap above the eye.
Mounted the new DIY urethane mounts and bolted the cross member in, torqued to 65ft/lbs.
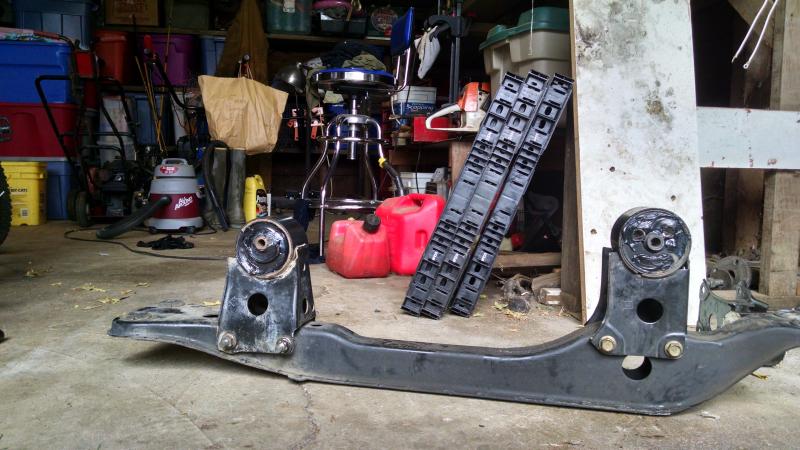
Car shakes a bunch at startup, but idle is still smooth.


Mounted the new DIY urethane mounts and bolted the cross member in, torqued to 65ft/lbs.

Car shakes a bunch at startup, but idle is still smooth.
09-26-2014, 06:37 AM
#73

Anybody ever fill a mount while it was on a car? I've been having vibration issues after a trans swap. I've swapped out the engine mounts and pass side mount. It's gotten better but not good enough for my liking. The last mount would be the MT mount BUT because of the swap I've welded it to the frame (Tip all - bolt it don't weld it). I didn't think of it at the time but now I can't remove it to swap it out. My solution would be to fill it while on the car. It can't make it any worse I suppose. Just wondering if anyone has tried it.
09-26-2014, 04:32 PM
#75
After diving to work and back, I am very pleased with how positive the shifting is now. No more shifter bouncing around in my hand with the motor and the car doesn’t lurch at low speed. Could be placebo, but the car also fells much more stable cornering on the highway, possibly from less weight shifting over the front tires.
09-26-2014, 11:51 PM
#76
After diving to work and back, I am very pleased with how positive the shifting is now. No more shifter bouncing around in my hand with the motor and the car doesn�t lurch at low speed. Could be placebo, but the car also fells much more stable cornering on the highway, possibly from less weight shifting over the front tires.


Thread
Thread Starter
Forum
Replies
Last Post
AaronL
5th Generation Maxima (2000-2003)
4
09-23-2015 03:34 PM
pears
5th Generation Maxima (2000-2003)
15
09-18-2015 05:25 AM
QueensMAX
5th Generation Maxima (2000-2003)
7
09-15-2015 04:14 AM