'95-'96 CF trunks!!


 05-12-2012, 06:13 PM
#49
 11-27-2013, 07:04 AM
#52
So over a year later, I finally bought one of these last week and it came in yesterday. I bought it off Amazon from Express Aero Kits for $583 shipped minus $170 I had in gift cards so it came out to $413 shipped for me.
I haven't had time to inspect it completely but from carrying it, it's extremely light (20lbs or less I believe). From some of the wrapping that I peeled off here are the things I noticed so far:
- The trunk isn't completely wrapped. The openings for the tail lights have no CF.
- Holes for the inner tail light mounting bolts must be drilled out.
I'll report back more once I fully unwrap the trunk.
Last edited by ChrisMan287; 11-27-2013 at 10:09 AM.
11-27-2013, 10:08 AM
#53
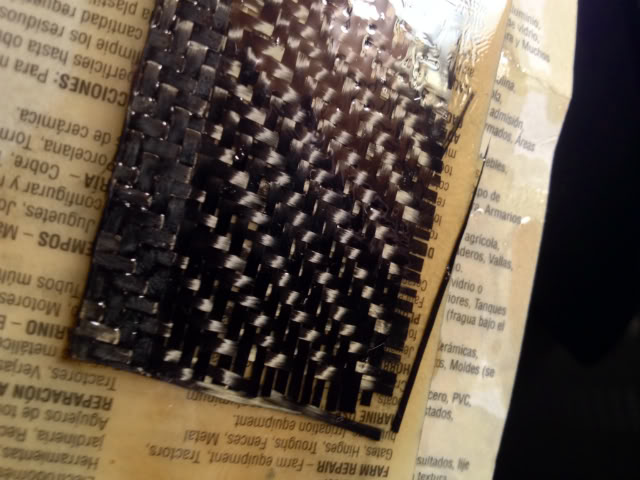
Alright so I had a little time to do some more unwrapping and here's what I found in there:
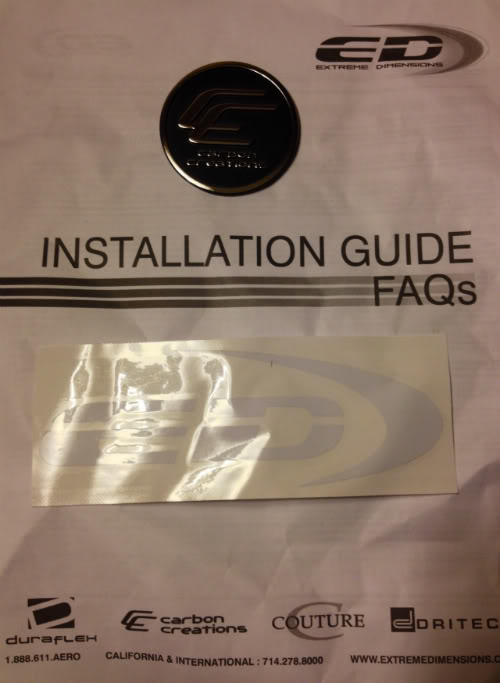
-Generic install instructions with a ED (Extreme Dimensions) sticker and a nice CC (Carbon Creations) badge. I'm not gonna put the ED sticker on the car but might put the CC badge on the inside of the trunk. It also came with a little bag of nuts/bolts and self tapping screws.
More findings on the trunk itself:
- There are predrilled holes for the mounting points and trunk latch. There's also a hole for the key cylinder.
- The inside of the trunk looks great. No need to mount the carpet in there.
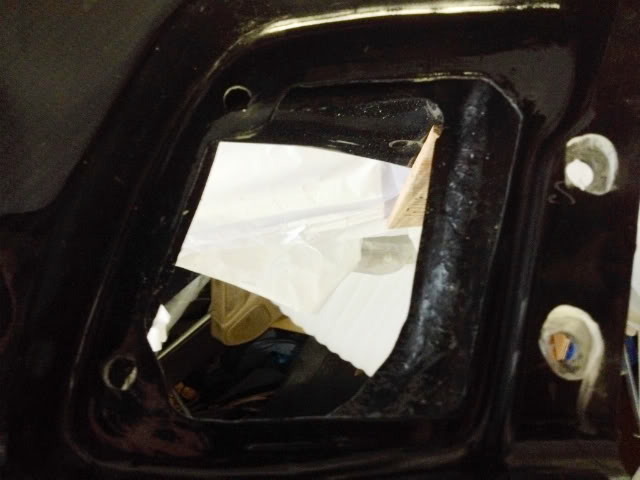
- HUGE NEGATIVE HERE... You can clearly see where ED cut corners on the product. Here and there around where they cut the CF, they cut it too short and simply put resin over everything as is. So in those spots you can see where there's no CF. From what I could see, I'm missing CF in a small portion on the bottom right where it meets the bumper, on the top left of the driver side inner tail and towards the center right of the same inner tail.
I will inspect more some time after Thanksgiving and report back.
-Generic install instructions with a ED (Extreme Dimensions) sticker and a nice CC (Carbon Creations) badge. I'm not gonna put the ED sticker on the car but might put the CC badge on the inside of the trunk. It also came with a little bag of nuts/bolts and self tapping screws.
More findings on the trunk itself:
- There are predrilled holes for the mounting points and trunk latch. There's also a hole for the key cylinder.
- The inside of the trunk looks great. No need to mount the carpet in there.
- HUGE NEGATIVE HERE... You can clearly see where ED cut corners on the product. Here and there around where they cut the CF, they cut it too short and simply put resin over everything as is. So in those spots you can see where there's no CF. From what I could see, I'm missing CF in a small portion on the bottom right where it meets the bumper, on the top left of the driver side inner tail and towards the center right of the same inner tail.
I will inspect more some time after Thanksgiving and report back.
11-30-2013, 02:10 AM
#55
Member

Join Date: Dec 2009
Location: Fort Worth, TX
Posts: 153
I've had the trunk lid off on my 95 before and it's not that heavy to begin with. Carbon Creations has one for 4th gens (http://www.carid.com/1995-nissan-max...FUsV7Aod5VEABg) that they claim "Up to 70% lighter than OEM parts while retaining maximum strength and durability" but the trunk lid really doesn't see to weigh much to me anyway. And what's the deal with the "racing inspired aerodynamics and style" claim? The aerodynamics and style are oem imitated style. Unless your max is a race car I don't see a valid reason for spending money on something like this.
12-01-2013, 05:24 AM
#56
It doesn't seem like something you'd put on one of your cars. Not with the flaws listed above.
Updates to come sometime this week once I can fit it to the car. That will conclude the review.
I'll have weights of both trunks added to my final review.
Updates to come sometime this week once I can fit it to the car. That will conclude the review.
I'll have weights of both trunks added to my final review.
 12-04-2013, 06:49 PM
#58
This thing weighs 16lbs
 And according to some old information I found here from Maxima_Joe, the OEM trunk without spoiler weighs 29lbs and the OEM trunk with spoiler weighs 34lbs.
12-04-2013, 07:15 PM
And according to some old information I found here from Maxima_Joe, the OEM trunk without spoiler weighs 29lbs and the OEM trunk with spoiler weighs 34lbs.
12-04-2013, 07:15 PM
#59
Member
Join Date: Dec 2009
Location: Fort Worth, TX
Posts: 153
Nah, I'm not going through the hassle of sending this thing back. I'll just deal with it's flaws. I do have some awesome news though..
This thing weighs 16lbs And according to some old information I found here from Maxima_Joe, the OEM trunk without spoiler weighs 29lbs and the OEM trunk with spoiler weighs 34lbs.
This thing weighs 16lbs
And according to some old information I found here from Maxima_Joe, the OEM trunk without spoiler weighs 29lbs and the OEM trunk with spoiler weighs 34lbs.
12-05-2013, 04:53 AM
#60
01-25-2014, 03:46 PM
#61
I've been extremely busy and it's been snowing every other week so I haven't installed the trunk but I have been prepping it so that it's ready to swap on.
First things first, I had to drill the holes for the tail lights. This was pretty easy. I took some old OEM inner tails, put antiseize on the end of the bolts, lined it up accordingly and broke out the dremel with a drill attachment. This is the passenger side only but you get the idea.
I then had to figure out how to plug up this pointless key lock hole.
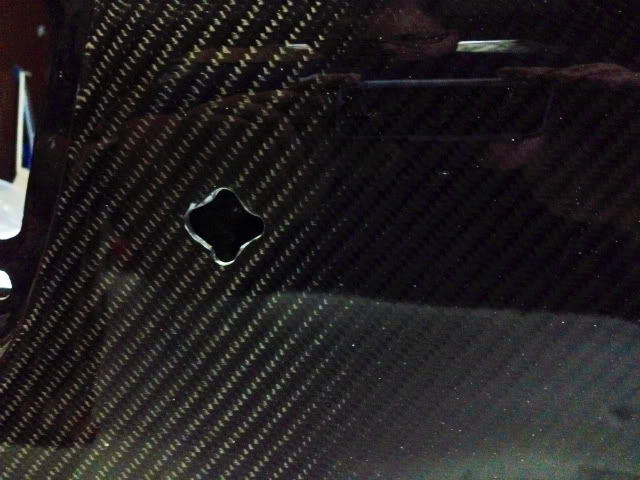
The OEM lock doesn't even fit into so you'd have to dremel out the hole some. I'd rather not. You'd also have to cut out the back of the trunk to swap everything over. There are no openings on the inside of the trunk. I really wish this hole wasn't here like the Ionic trunk.
What I decided to do was get a black 7/8" nylon plug hole from Lowes. It took a bit of trimming as you can see here. The red shows what's left from the back:
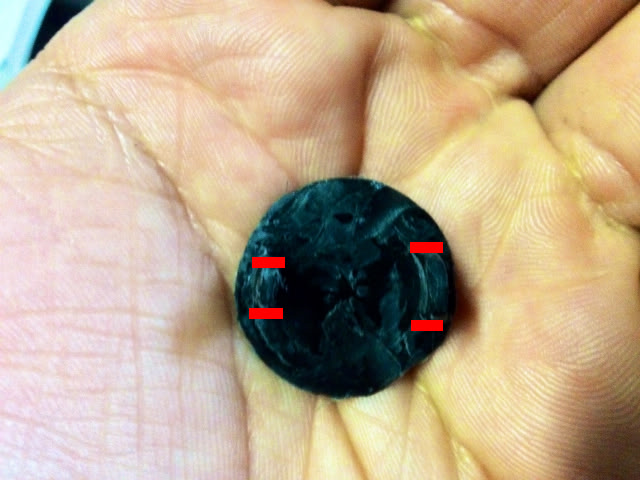
But the plug fits great.

I have another to do since I kind of butchered this one. I think I'm just going to clear coat the plug so the glossiness matches and it doesn't stick out as much as it does now. I'm probably gonna add some butyl to it as well so that no water gets in.
First things first, I had to drill the holes for the tail lights. This was pretty easy. I took some old OEM inner tails, put antiseize on the end of the bolts, lined it up accordingly and broke out the dremel with a drill attachment. This is the passenger side only but you get the idea.
I then had to figure out how to plug up this pointless key lock hole.
The OEM lock doesn't even fit into so you'd have to dremel out the hole some. I'd rather not. You'd also have to cut out the back of the trunk to swap everything over. There are no openings on the inside of the trunk. I really wish this hole wasn't here like the Ionic trunk.
What I decided to do was get a black 7/8" nylon plug hole from Lowes. It took a bit of trimming as you can see here. The red shows what's left from the back:
But the plug fits great.
I have another to do since I kind of butchered this one. I think I'm just going to clear coat the plug so the glossiness matches and it doesn't stick out as much as it does now. I'm probably gonna add some butyl to it as well so that no water gets in.
01-25-2014, 07:32 PM
#62

 01-26-2014, 08:36 AM
#64
Yeah, it's pretty annoying.
I have some twill weave here but no resin. I'm experimenting with some urethane since I have plenty of that from clearing headlight lenses. I'll see how that goes. Hopefully that'll work.
I have some twill weave here but no resin. I'm experimenting with some urethane since I have plenty of that from clearing headlight lenses. I'll see how that goes. Hopefully that'll work.
01-28-2014, 05:14 PM
#65
It has a slight yellowish hue like the urethane because the white cardboard under the CF absorbed it. It's also not 100% smooth because I used a plastic spoon to smooth the urethane over

Next time I'll use a black painted piece of cardboard with a thinned out urethane mix to see how that goes. It'll probably need more than five coats but whatever. It should come out decent enough for that plug. I wouldn't wrap a big piece like this.


 02-23-2014, 12:13 PM
#68
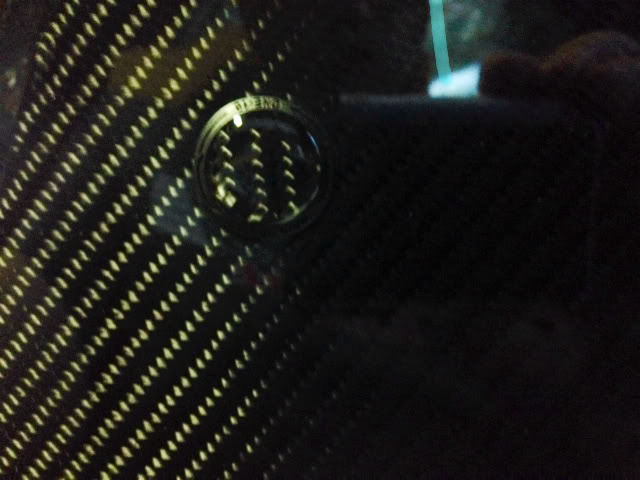
I ditched the DIY CF plug idea and decided to buy something. What I ended up using was a CF handlebar end plug from One-10 Sports. After some modification it fit pretty well and looks a lot better than the plain black nylon plug.
02-23-2014, 12:15 PM
#69
Now I have some questions for those who have CF trunks installed; what do you guys do about the torsion bars (if that's what they're called) that hold the trunk up? Do I remove one or both of them? What's the easiest way to remove them?
02-23-2014, 02:48 PM
#70
As for removal, I can't remember how I did it. Been way too long.
Plug looks good. Can you rotate it so the weave goes in the same direction as the trunk?
02-23-2014, 04:29 PM
#71
Does your trunk pop up when you unlock it without the bars?
For now I'm going to leave it as is. If it annoys me enough, I have another plug that I'll modify to make the weave go the same way.
03-17-2014, 11:40 AM
#73
Installed!
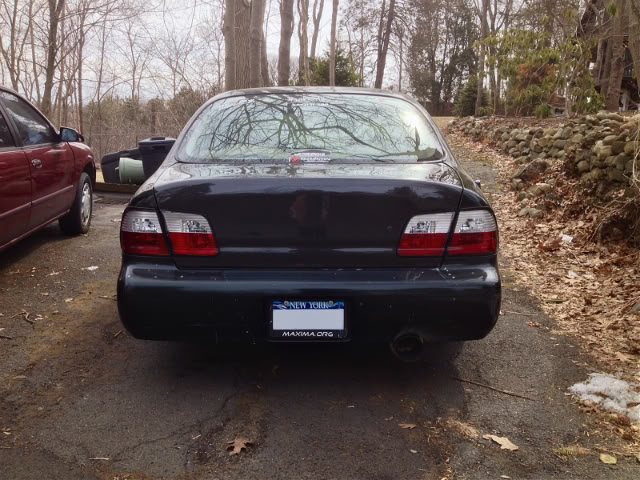
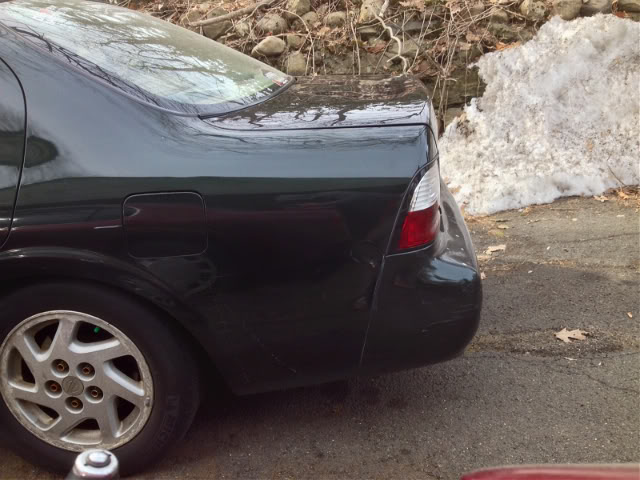
Install went straight forward. First thing I did was remove the bars that hold the trunk up when opened. What I did was use an angle grinder with cutting blade to cut them right in the center. Kind of sketchy but it worked. Both were easily removed.
Then I removed the tails, wiring, latch and OEM trunk (with the help of my brother). When installing the CF one, everything was pretty much a direct fit. I had to play with the fitment very little to get the gaps pretty much even on each side.
The only down side is that in the top corners, they sit a little lower on each side than the quarter panels. A little bit of an eye sore but I'm sure it can be solved with washers (haven't bothered yet).
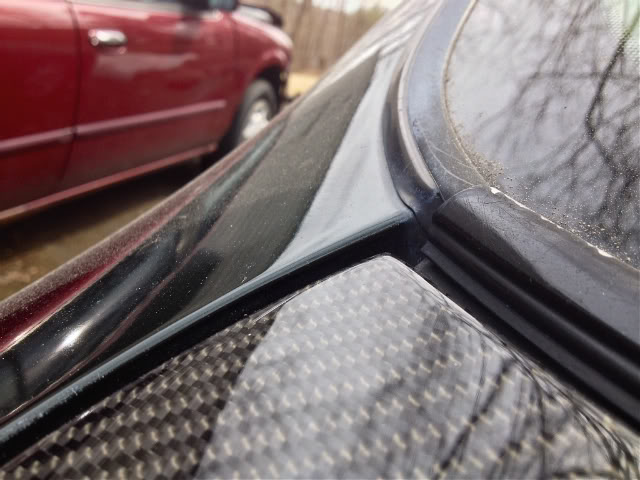
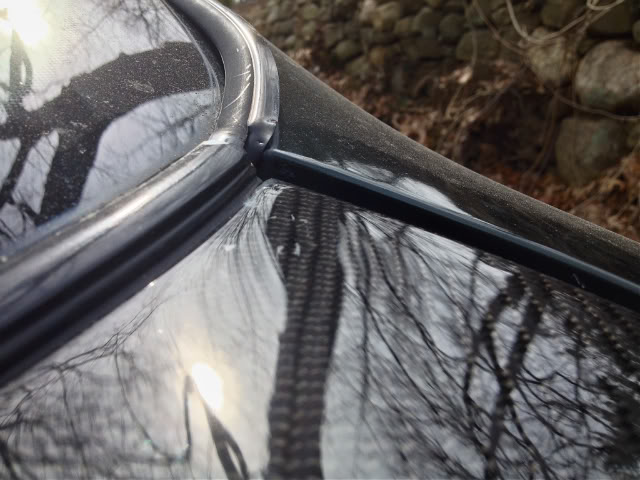
For now, I'm very happy with the way it looks and fits. Eventually I'll add some washers to get it to fit 100% and have to play with the tail light fitment a little as well. The OEM inners fit great. My eBay ones... not so great but acceptable for now.
Install went straight forward. First thing I did was remove the bars that hold the trunk up when opened. What I did was use an angle grinder with cutting blade to cut them right in the center. Kind of sketchy but it worked. Both were easily removed.
Then I removed the tails, wiring, latch and OEM trunk (with the help of my brother). When installing the CF one, everything was pretty much a direct fit. I had to play with the fitment very little to get the gaps pretty much even on each side.
The only down side is that in the top corners, they sit a little lower on each side than the quarter panels. A little bit of an eye sore but I'm sure it can be solved with washers (haven't bothered yet).
For now, I'm very happy with the way it looks and fits. Eventually I'll add some washers to get it to fit 100% and have to play with the tail light fitment a little as well. The OEM inners fit great. My eBay ones... not so great but acceptable for now.
03-17-2014, 12:47 PM
#76
After a little bit of searching: http://www.mrt-direct.com/2005-2014-...od-struts.html
http://www.customgassprings.com/gassprings.html
http://www.mcmaster.com/#gas-struts/=r4x7a0
So you have to do a little on your end but you can contact most places and they can help find a low pressure strut. Hey, maybe a worn out old one would be just enough pressure for the CF. But the lenght might be an issue. One day I shall have to tackle this issue too, no CF hood/trunk yet though, cars not on the road.
http://www.customgassprings.com/gassprings.html
http://www.mcmaster.com/#gas-struts/=r4x7a0
So you have to do a little on your end but you can contact most places and they can help find a low pressure strut. Hey, maybe a worn out old one would be just enough pressure for the CF.
But the lenght might be an issue. One day I shall have to tackle this issue too, no CF hood/trunk yet though, cars not on the road.
03-17-2014, 12:56 PM
#78
I use a stick to prop my hood up too. But that's because I'm in the process of replacing the struts. The internet supplies them for about $20. It's nice to have that feature. If you don't have them it's just better more racecar less weight. BTW don't let your friend hold your hood while you're trying to gently thread in the new struts. Now I need a tap and die set, oh well more tools is a good thing.
03-21-2014, 09:41 AM
#79
I don't know how I can make struts work. I use blown ones for my hood and they'd probably work on the trunk too but how to mount them?
A stick is a little too "ghetto" for me. Still looking into other options.
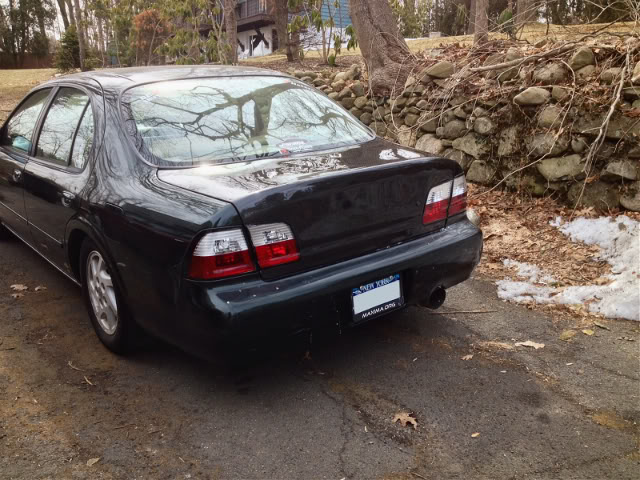
The no spoiler look has really grown on me though. Previously, I thought only '97-'99s could pull it off but it looks aggressive. It'll only look better when I put my roof spoiler and lip kit, wheels and tires.
A stick is a little too "ghetto" for me. Still looking into other options.
The no spoiler look has really grown on me though. Previously, I thought only '97-'99s could pull it off but it looks aggressive. It'll only look better when I put my roof spoiler and lip kit, wheels and tires.
Last edited by ChrisMan287; 03-21-2014 at 09:44 AM.