95 maxima radiator replacement
 01-29-2012, 04:09 PM
#1

95 maxima radiator replacement
ok so ive had to replace my radiator and saw that there was no how to for it, so i decided to make one for everyone who doesnt already know how to do it. the whole repair should only take a half hour or so depending on how hard you want to work lol
what tools you'll need are a 10mm socket, pair of pliers, and a bucket to drain your used coolant in.
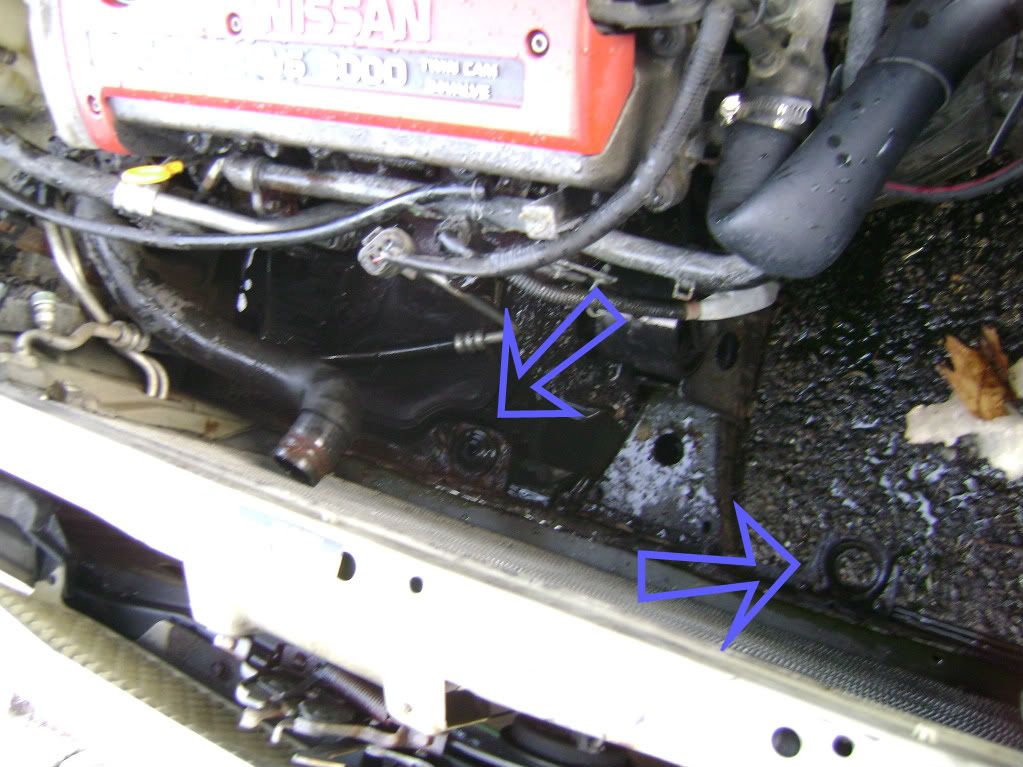
step 1. drain the coolant from your radiator and remove the two bolts on the upper support that hold the radiator in place
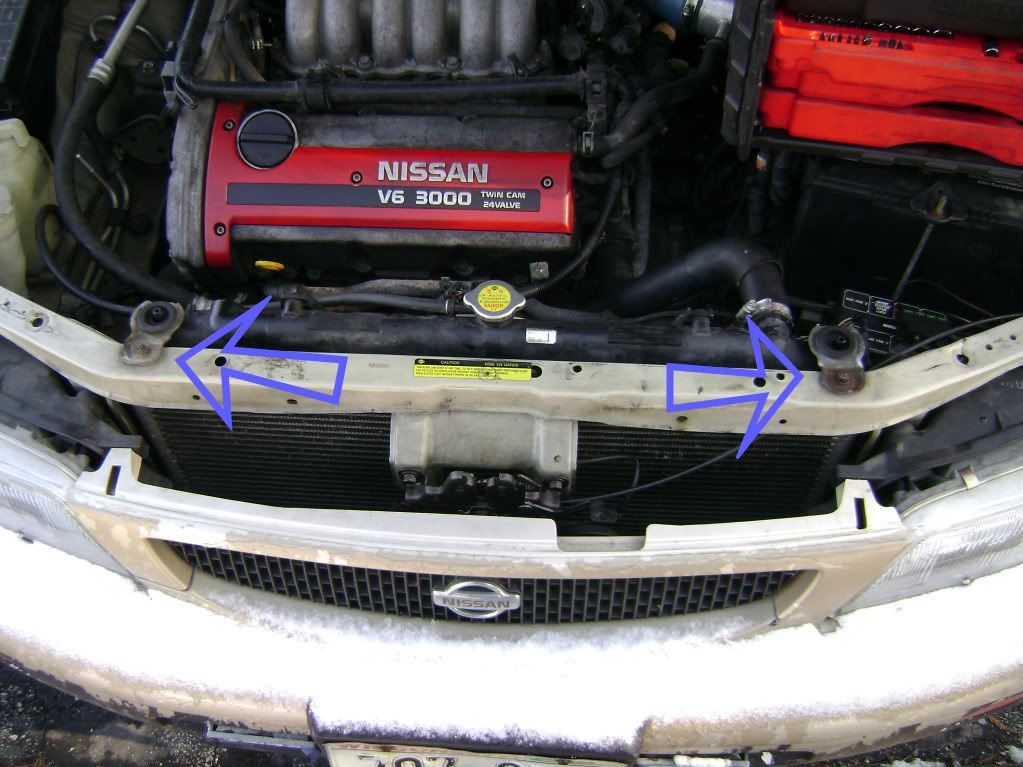
step 2. disconnect the two connectors that run to your radiator fans
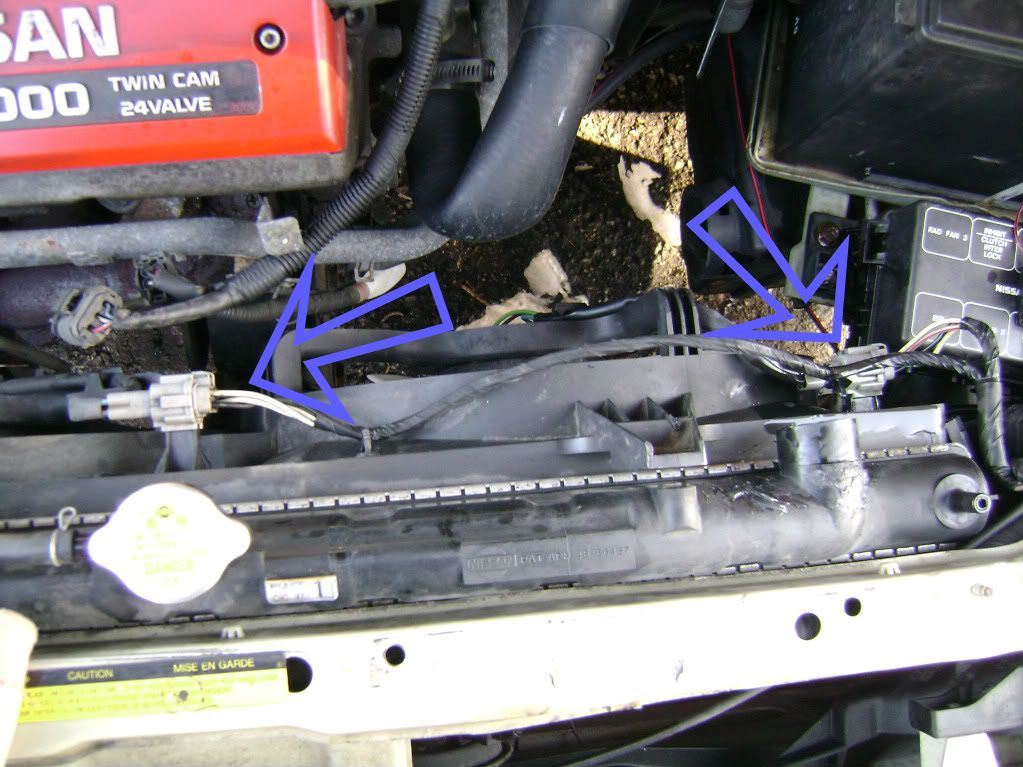
step 3. remove the two screws on either side securing the radiator fans to the radiator
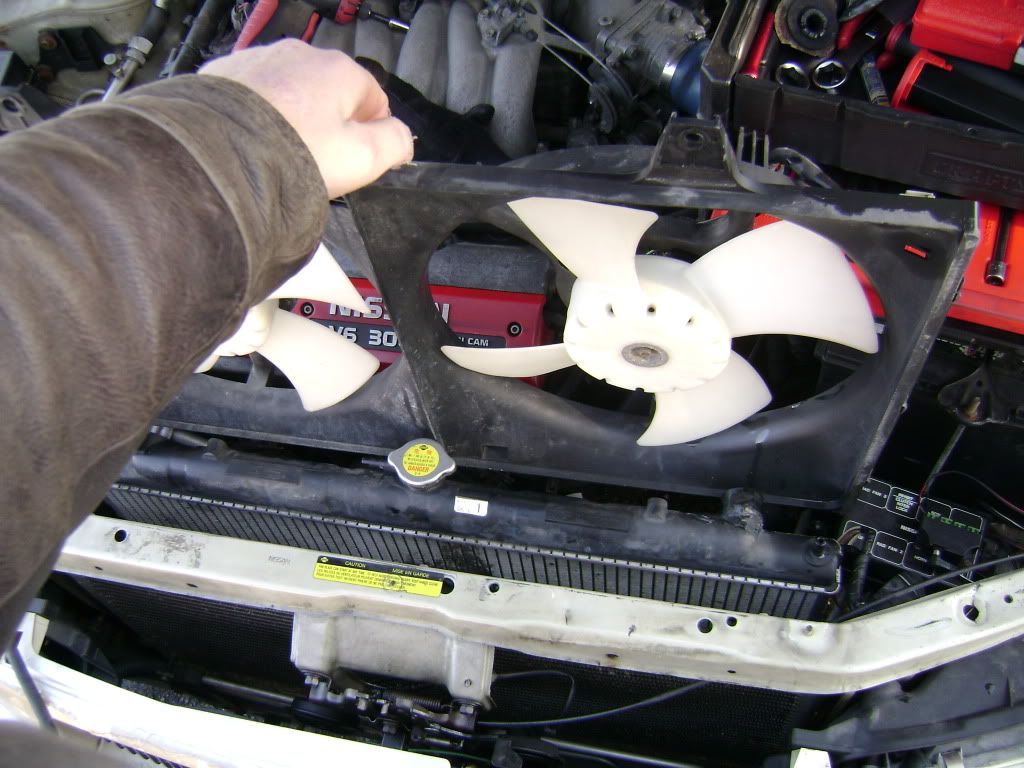
step 4. pull out the radiator fans being carefull not to damage the side plastice pieces of the case (yess i know the driver side one on mine is broken from the last time i took it out)... you'll probly have to wiggle and shove things out of the way to get it out but no biggie
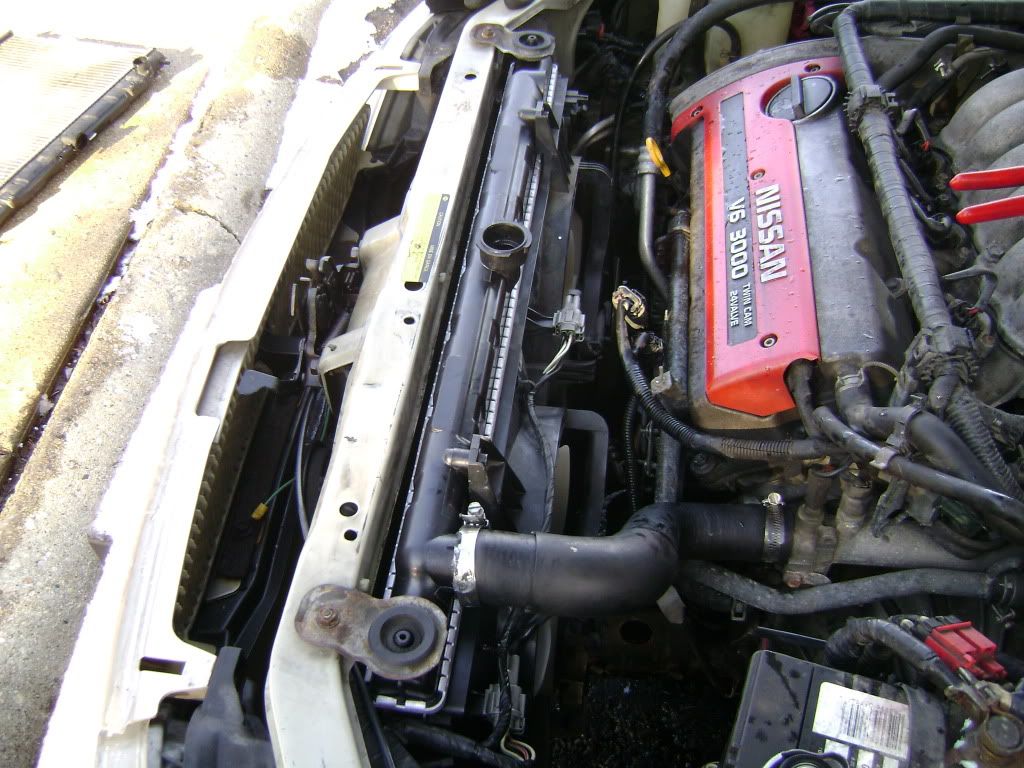
step 5. disconnect the lower radiator hose if you havent done so already as well as the overflow tube as well. then just pull the radiator out.
Installation
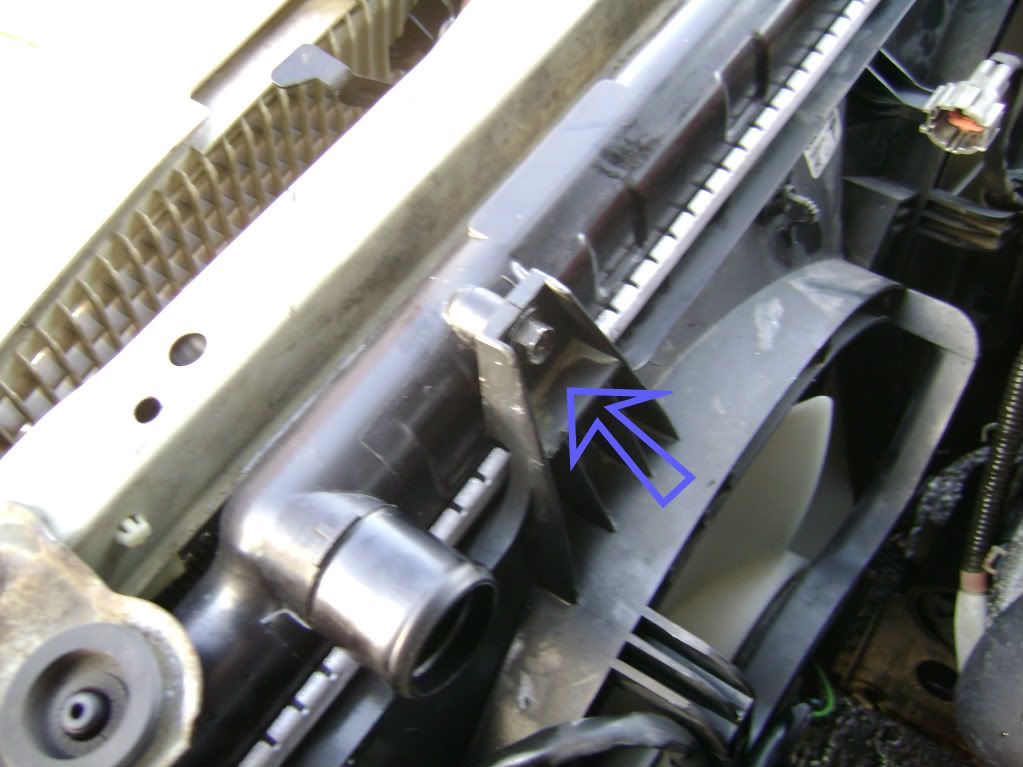
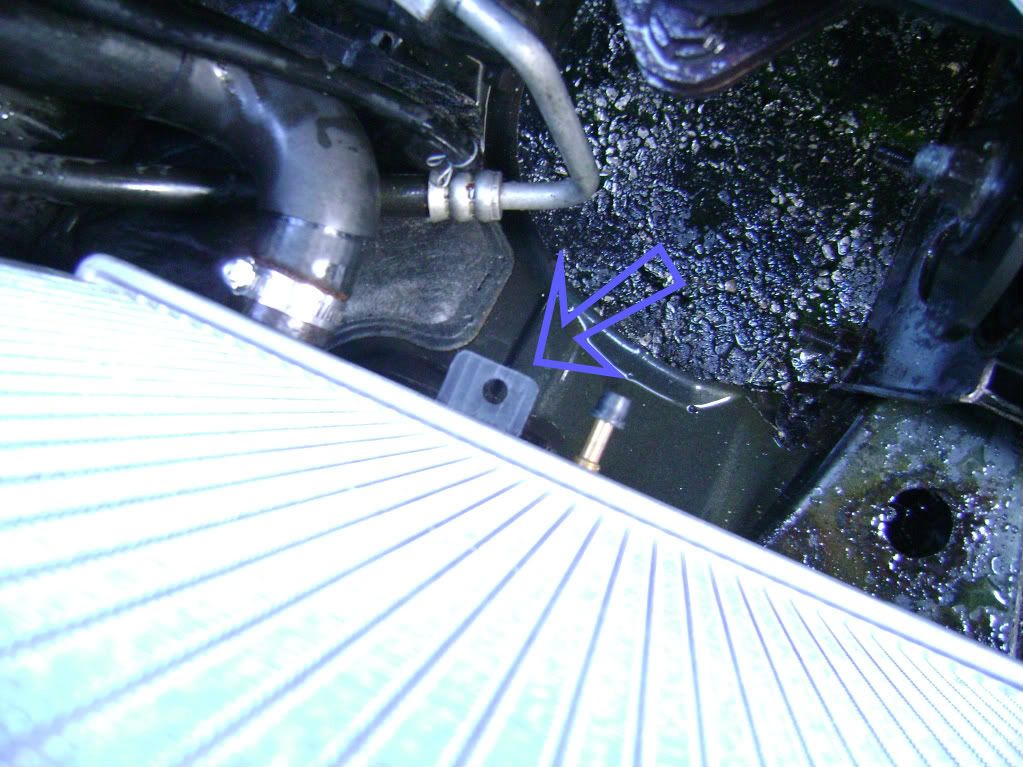
step 1. place radiator in car keeping note of the rubber bushings holding it in place at the bottom (they still might be on your old radiator, just take them off and reuse them)
Note; the right one in the pic is with no bushing and the left one in the pic is with the bushing in place
step 2. reconnect the lower radiator hose
step 3. reinstall radiator fans keeping note of the side plastic pieces and make sure that they are lined up with the holes that support it one both ends of the radiator
step 4. reconnect the fan connections and screw the fans into place
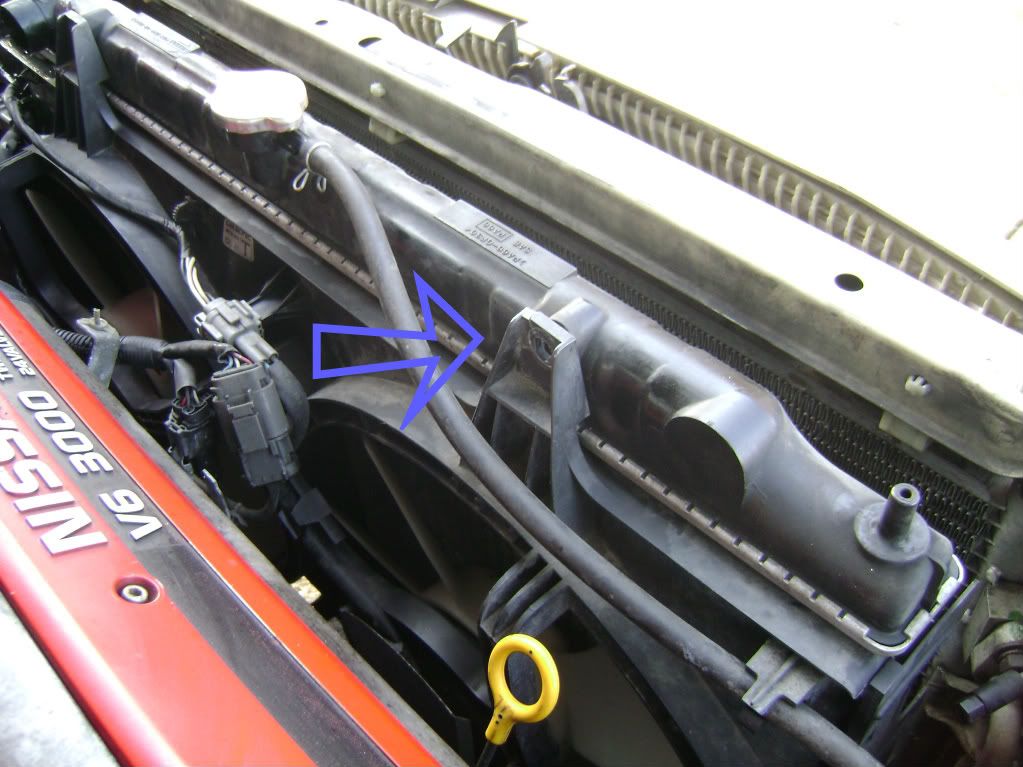
step 5. reinstall the upper radiator brackets and fill with 50/50 mix of the green coolant.
run your car to cycle the coolant threw the engine and make sure you have your heat on full blast to get the air bubbles out of the system...and presto!!!your finished
what tools you'll need are a 10mm socket, pair of pliers, and a bucket to drain your used coolant in.
step 1. drain the coolant from your radiator and remove the two bolts on the upper support that hold the radiator in place
step 2. disconnect the two connectors that run to your radiator fans
step 3. remove the two screws on either side securing the radiator fans to the radiator
step 4. pull out the radiator fans being carefull not to damage the side plastice pieces of the case (yess i know the driver side one on mine is broken from the last time i took it out)... you'll probly have to wiggle and shove things out of the way to get it out but no biggie
step 5. disconnect the lower radiator hose if you havent done so already as well as the overflow tube as well. then just pull the radiator out.
Installation
step 1. place radiator in car keeping note of the rubber bushings holding it in place at the bottom (they still might be on your old radiator, just take them off and reuse them)
Note; the right one in the pic is with no bushing and the left one in the pic is with the bushing in place
step 2. reconnect the lower radiator hose
step 3. reinstall radiator fans keeping note of the side plastic pieces and make sure that they are lined up with the holes that support it one both ends of the radiator
step 4. reconnect the fan connections and screw the fans into place
step 5. reinstall the upper radiator brackets and fill with 50/50 mix of the green coolant.
run your car to cycle the coolant threw the engine and make sure you have your heat on full blast to get the air bubbles out of the system...and presto!!!your finished
 01-29-2012, 06:33 PM
#4
Senior Member


Join Date: Sep 2010
Location: Jacksonville, FL
Posts: 10,349
Yup, the front core support and radiator are basically the same. The VQ30 engine carried over into the 5th gen, but had a different UIM for an increase in power. It was eventually replaced in 02 with the VQ35.
01-29-2012, 06:59 PM
#5
yeah i knew the engine got carried over, but i wouldnt have looked in the core replacement for replaceing the radiator, didnt think it needed to be removed to replace the core support


 01-30-2012, 11:50 AM
#9
Senior Member

Join Date: Nov 2010
Location: Powder Springs, GA
Posts: 400
Good writeup. A couple of additional comments:
- I found it just as easy to take the radiator out and put it back in with the fans in place, so I dismounted/mounted them on the radiator outside the vehicle.
- if the main hoses are the same age as the radiator, replace them also.
- This is also a good opportunity to replace the thermostat, since the coolant is drained and the hoses are off. Helps to upbolt and move the horn out of the way when working on the thermostat.
All in all, a pretty easy DIY job in the Maxima world.

 01-30-2012, 04:00 PM
#12
Member

Join Date: Oct 2010
Location: Aurora
Posts: 122
Don't forget to wirewheel and paint the two metal pieces with the grommets that hold the top of your radiator. While your at it, do the same to that switch plate on the right side. Think it deactivates the airbag sensors but I am only speculating...
01-30-2012, 06:34 PM
#13
well i realize that i could have done it a bit easier/better, but being my first "how to" thread im happy with it, now in a month or two ill have a "rebuilding the vq30de" how to thread with torque specs and everything and maby ill throw in a how to remove and install the vq30de as well after that well see how it goes
01-30-2012, 06:38 PM
#14
yeah cleaning them up and painting them would help quite a bit with the rust, but im replacing the core support so i wasnt to worried about it cause it'll be taken care of then
01-30-2012, 06:44 PM
#15

 01-31-2012, 12:20 PM
#19
Member

Join Date: Jan 2004
Location: Ottawa, Canada
Posts: 104
Kuhn_man,
is your car auto or manual? I remember when I changed the radiator on my Honda Accord, the lower section of the rad was used to cool off the transmission fluid, which involved removing another 2 hoses and adding up atf afterwords. So I am wondering if it is not the same case here in the auto trans.
is your car auto or manual? I remember when I changed the radiator on my Honda Accord, the lower section of the rad was used to cool off the transmission fluid, which involved removing another 2 hoses and adding up atf afterwords. So I am wondering if it is not the same case here in the auto trans.
 01-31-2012, 09:02 PM
#21
Kuhn_man,
is your car auto or manual? I remember when I changed the radiator on my Honda Accord, the lower section of the rad was used to cool off the transmission fluid, which involved removing another 2 hoses and adding up atf afterwords. So I am wondering if it is not the same case here in the auto trans.
is your car auto or manual? I remember when I changed the radiator on my Honda Accord, the lower section of the rad was used to cool off the transmission fluid, which involved removing another 2 hoses and adding up atf afterwords. So I am wondering if it is not the same case here in the auto trans.
02-04-2012, 02:48 AM
#22
Actually, I think I just youtubed it a while back. Regardless, I'm an extreme novice when it comes to mechanical work, and I replaced my radiator with this write-up in 45 minutes. So thanks, haha.
02-04-2012, 03:01 PM
#23
 .
.


Thread
Thread Starter
Forum
Replies
Last Post
kirkhilles
5th Generation Maxima (2000-2003)
2
08-08-2015 10:53 AM
MikesChevelle
5th Generation Maxima (2000-2003)
4
08-06-2015 11:36 AM