Extreme Enginebay Detailing (56K Warning)
 10-07-2007, 08:45 PM
#1
Extreme Enginebay Detailing (56K Warning)
For those that do not know... I am doing a 3.5 swap.
While I am doing this, there are about 10,000 things to "do while you are in there."
SO I decided to overhaul the engine bay. I'm not great at keeping a work log of pictures, cause I am too busy actually working. But here is a general idea of what I have been up to over the last month.
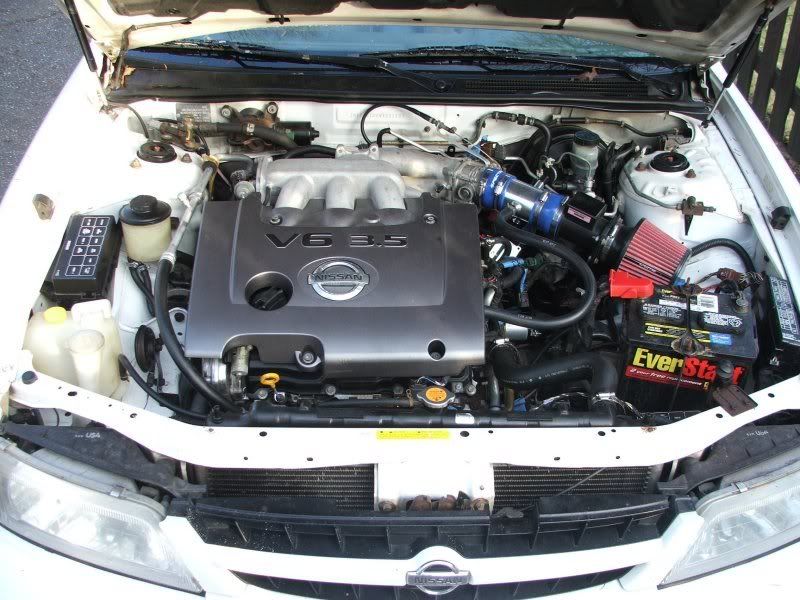
Here is a shot of the engine bay right before I pulled the engine out:
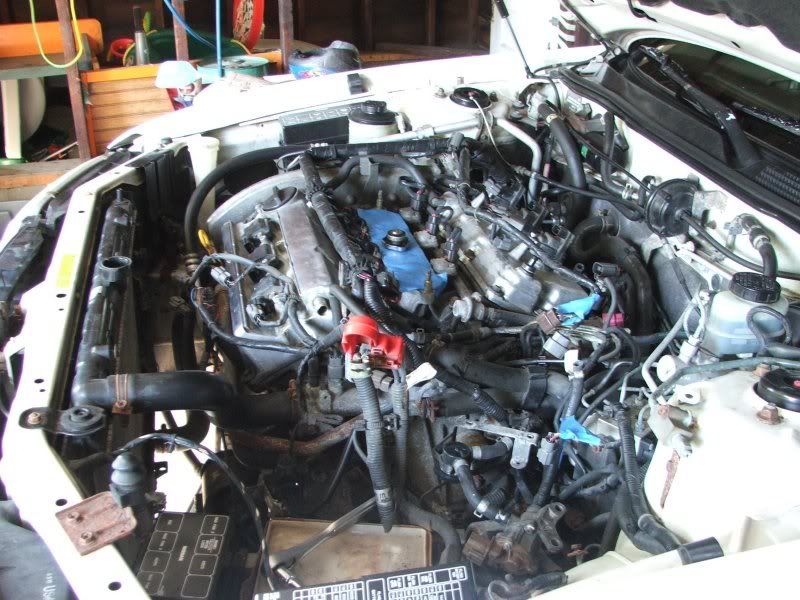
So, umm, not tooo bad--until you pull the engine. Here is the driver side fender:

Right. Now you see the 10 years of Ohio hell I have been through. Here is the passenger side:
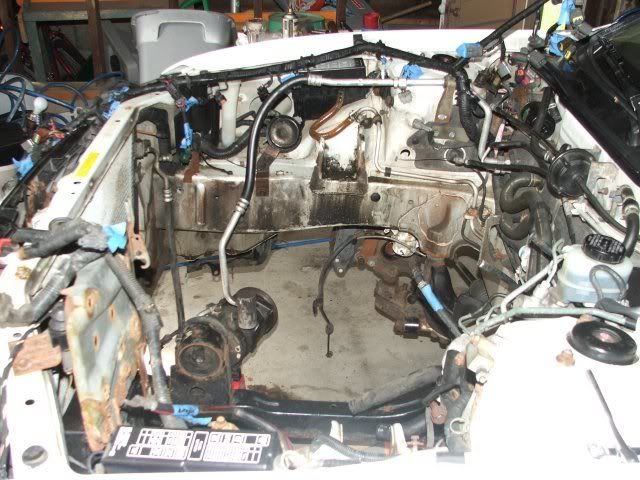
Now I had my work cut out for me. I pulled off as many accessories as I could. Sanded from 80 to 120 to 240 grit, primer'd and painted. It's just rattle-can paint, since this is the engine bay and mostly covered.
Below is the same drivers and passenger fenders, after the paint job:
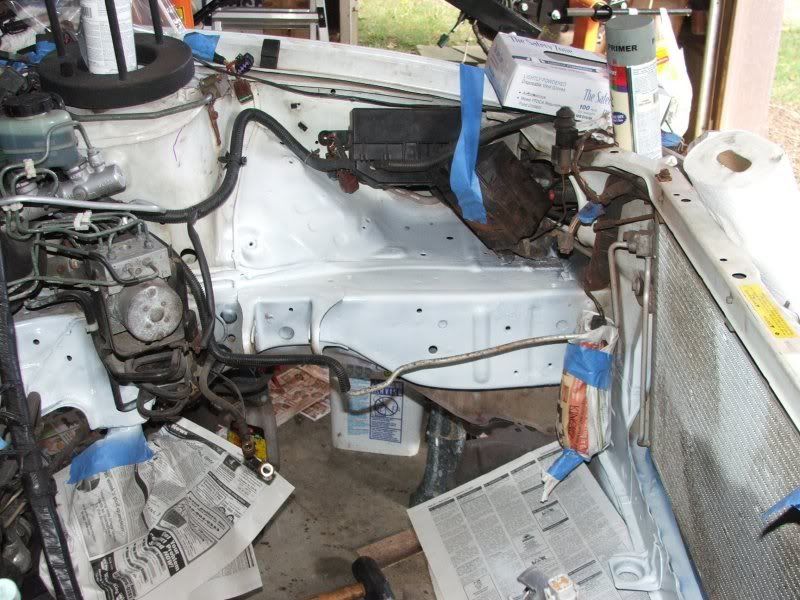
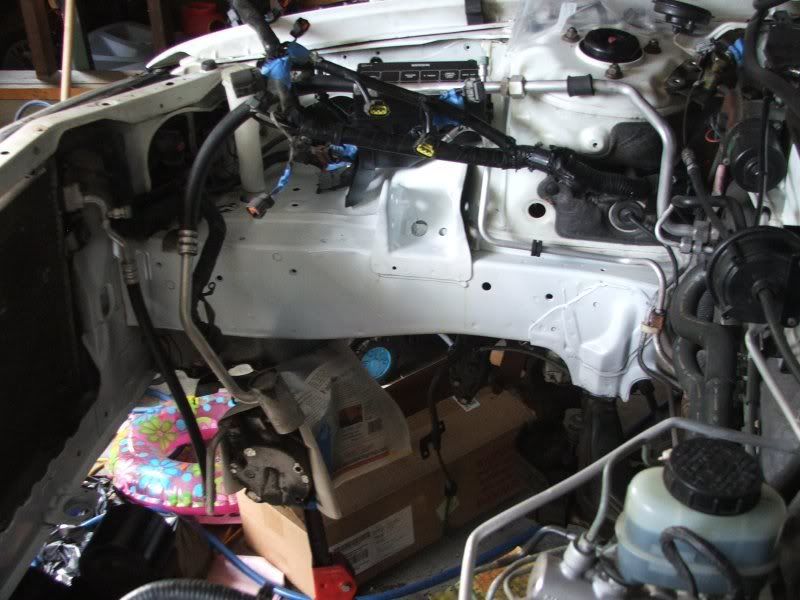
Big difference. I am glad I snapped some pics and also glad I took the time.
While I am doing this, there are about 10,000 things to "do while you are in there."
SO I decided to overhaul the engine bay. I'm not great at keeping a work log of pictures, cause I am too busy actually working. But here is a general idea of what I have been up to over the last month.
Here is a shot of the engine bay right before I pulled the engine out:
So, umm, not tooo bad--until you pull the engine. Here is the driver side fender:
Right. Now you see the 10 years of Ohio hell I have been through. Here is the passenger side:
Now I had my work cut out for me. I pulled off as many accessories as I could. Sanded from 80 to 120 to 240 grit, primer'd and painted. It's just rattle-can paint, since this is the engine bay and mostly covered.
Below is the same drivers and passenger fenders, after the paint job:
Big difference. I am glad I snapped some pics and also glad I took the time.
 10-07-2007, 08:46 PM
#2
I was also bothered by how the brake, A/C and PS lines corroded up. This is a sample of what they ALL looked like before some polishing with 2000 grit sandpaper:
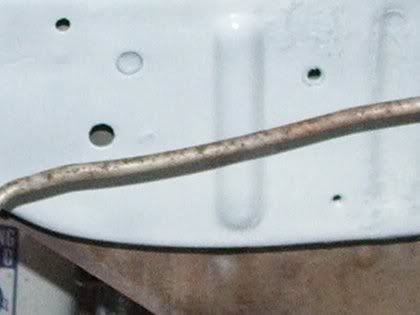
And after the sanding (and I mean light sanding) and polishing:

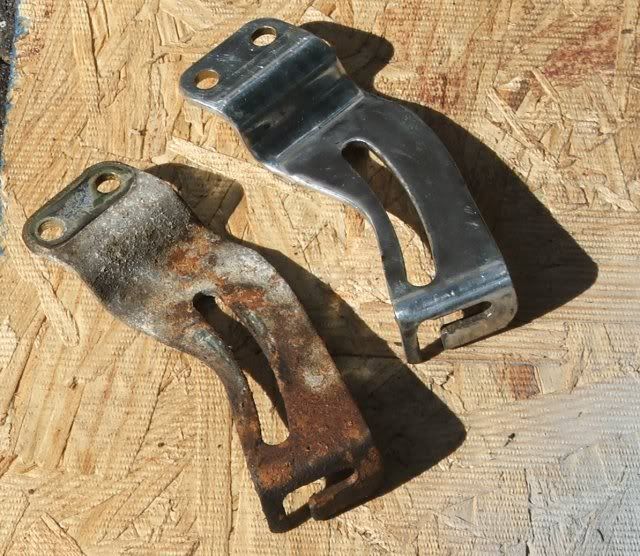
I also cleaned up some brackets. Anything that wasn't too far gone, I just polished up. Like the Power Steering adjuster bracket. Here is a before and after:
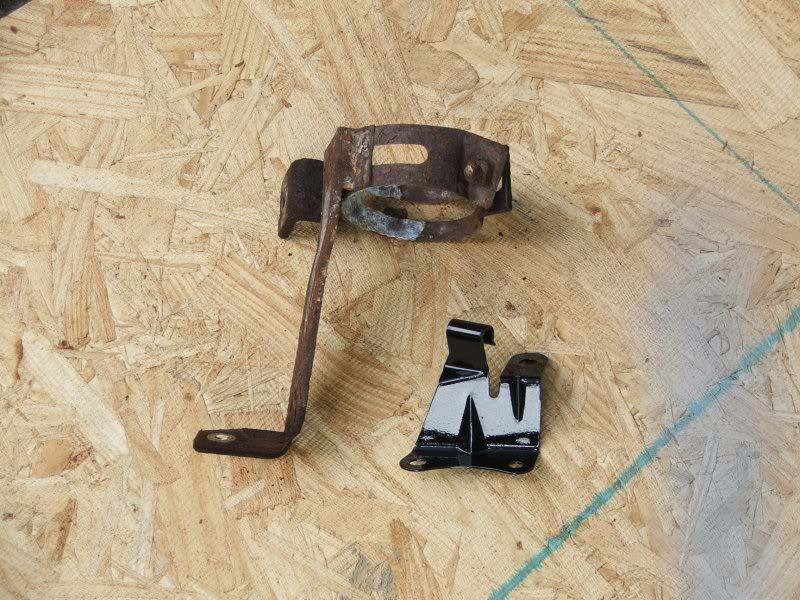
Anything that need to be sanded or blaster was sanded to bare metal, primered and painted a gloss black. Here's an example of an untreated bracket and a finished bracket:
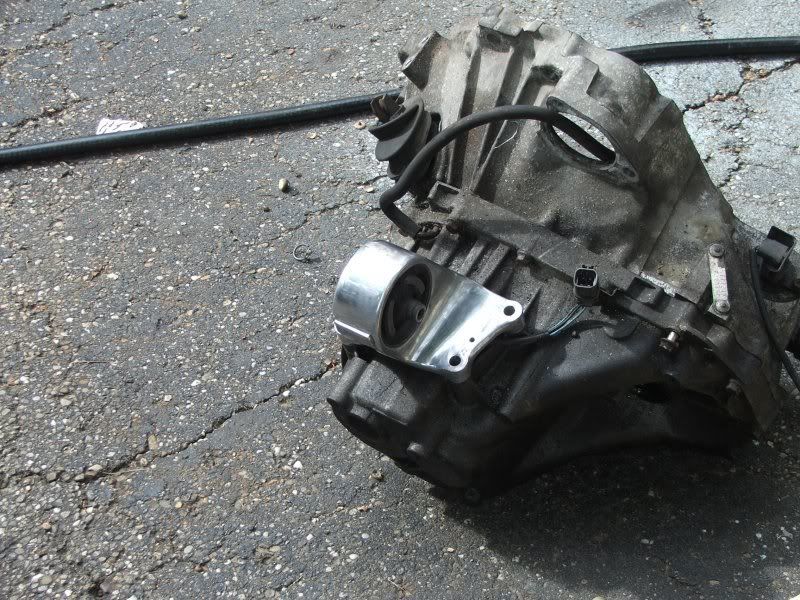
Nealoc once said "a transmission case so clean you could eat off it." SO I took that as inspiration. I dont have finished pics, but here is the transmission mount on top of the transmission. So, it will give you a good before and after. It's all done with the polisher:
And after the sanding (and I mean light sanding) and polishing:
I also cleaned up some brackets. Anything that wasn't too far gone, I just polished up. Like the Power Steering adjuster bracket. Here is a before and after:
Anything that need to be sanded or blaster was sanded to bare metal, primered and painted a gloss black. Here's an example of an untreated bracket and a finished bracket:
Nealoc once said "a transmission case so clean you could eat off it." SO I took that as inspiration. I dont have finished pics, but here is the transmission mount on top of the transmission. So, it will give you a good before and after. It's all done with the polisher:
Last edited by SNOMAX; 10-07-2007 at 08:54 PM. Reason: added more pics
10-07-2007, 08:47 PM
#3
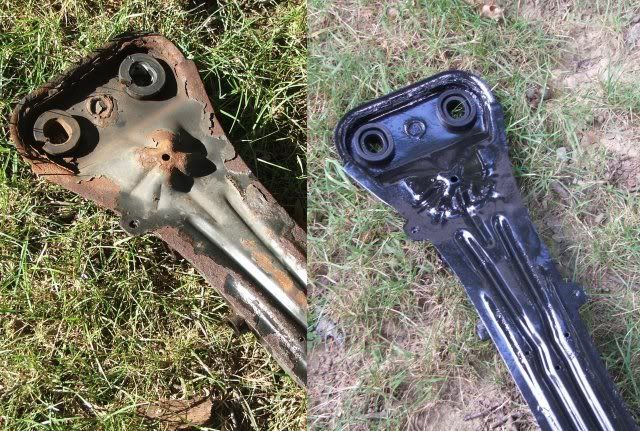
I pulled the engine mounts and cross member. Here's a pic of the X-member:
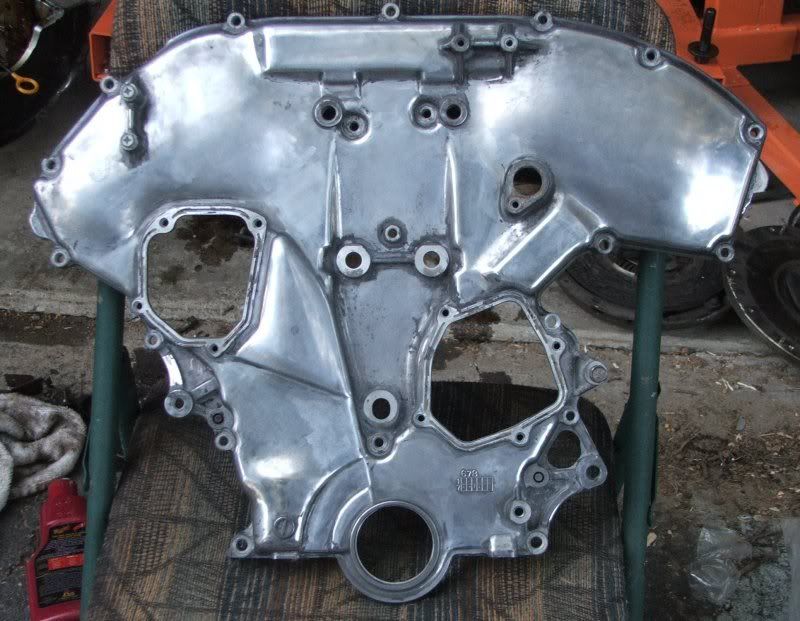
While I was doing the swap I needed to cleanup the timing case cover due to a P/S leak. Here is a before pic:

Here is an after:
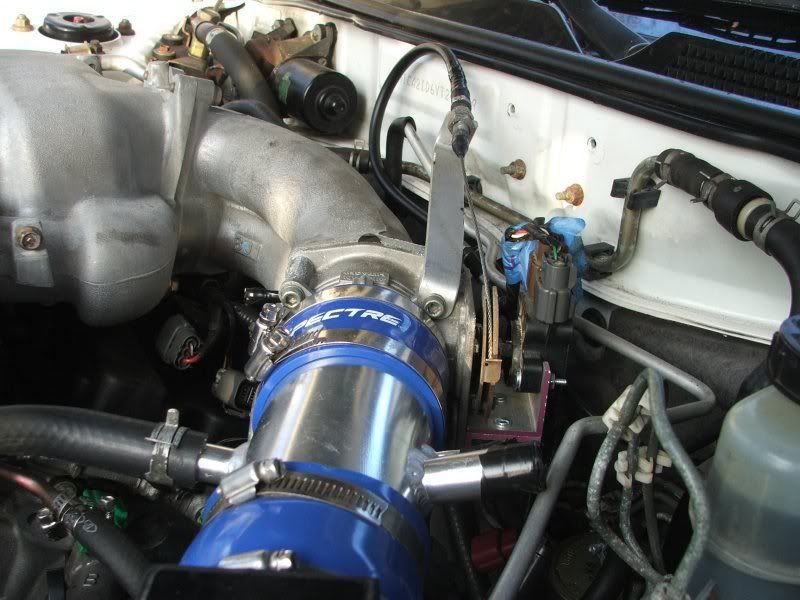
And here it is, polished and waxed installed on the engine:
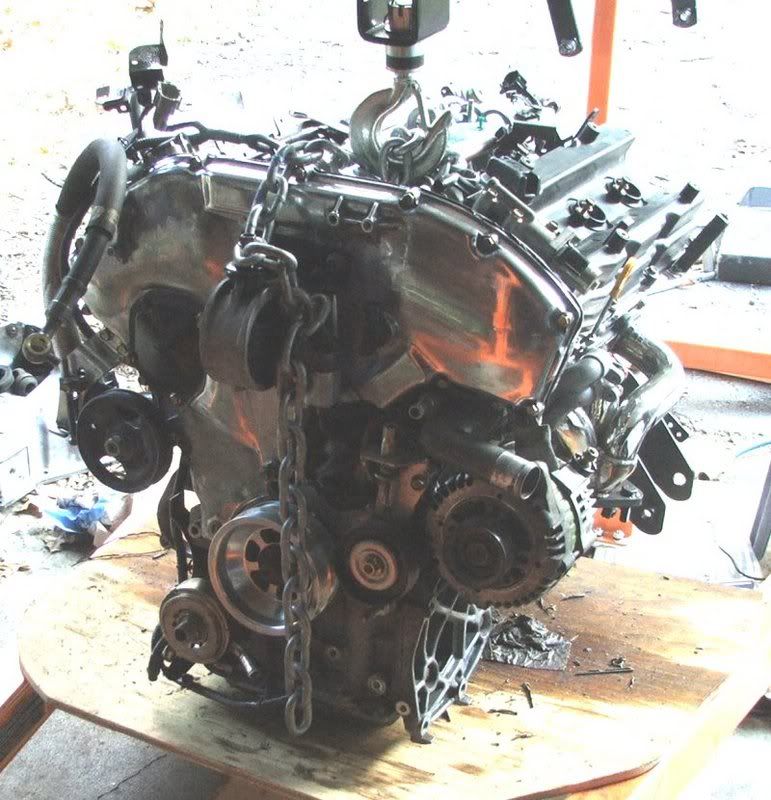
After a few more odds & ends, this will be going in:

When I am done with the whole swap, I will post up the finished engine bay.
While I was doing the swap I needed to cleanup the timing case cover due to a P/S leak. Here is a before pic:
Here is an after:
And here it is, polished and waxed installed on the engine:
After a few more odds & ends, this will be going in:
When I am done with the whole swap, I will post up the finished engine bay.
Last edited by SNOMAX; 10-07-2007 at 09:00 PM. Reason: more pics, why else??
10-07-2007, 08:54 PM
#4
Senior Member

Join Date: Feb 2005
Location: Bartlett, IL
Posts: 3,595
ill be waiting bourne identity
10-07-2007, 08:57 PM
#5
Guest
Posts: n/a
i like threads like this that you can actually learn something from or it's very intertaining because it's something cool. keep up the good work SNOOOOOOOOOOOOO

 10-07-2007, 09:10 PM
#8
Here are my two helpers:
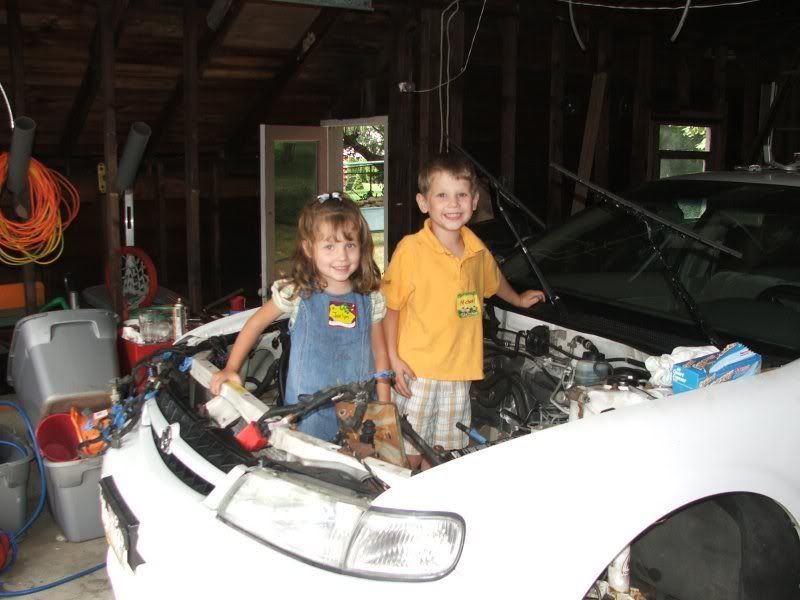
If you look closely on the children, you will notice I labeled them. Like any thorough tear-down, that is so I know where they go when I put them back in.
If you look closely on the children, you will notice I labeled them. Like any thorough tear-down, that is so I know where they go when I put them back in.
10-07-2007, 09:17 PM
#9

LOL. You have beiutiful children. Gotta keep the family car a family affair lol. Great work.
10-07-2007, 09:28 PM
#10
Senior Member

Join Date: Mar 2005
Posts: 625
great detailing. make sure you post pics of the bay After you install the motor. im sure its gonna look sweet
10-07-2007, 09:39 PM
#11

Wow, that looks like a lot of work but the results look great! Great props in doing all this cleaning by hand and sanding as well. Furthest I took when I cleaned my engine bay was a can or two of brake part cleaner.
Can't wait til you post the final results.
Can't wait til you post the final results.
10-07-2007, 10:11 PM
#12
Senior Member

Join Date: Nov 2006
Posts: 2,391
Great work man, Excellent thread, LOVELY KIDS man hahaha i like the fact you are organized and label the kids hahha.
like g4nismo said - FINALLY not a BS thread about souping up cars, asking where to put the air freshener (up ur @$$), hide spare keys (up ur @$$) or where to put stickers (up ur @$$)
Keep up the great work, and take more pics !!!!
like g4nismo said - FINALLY not a BS thread about souping up cars, asking where to put the air freshener (up ur @$$), hide spare keys (up ur @$$) or where to put stickers (up ur @$$)
Keep up the great work, and take more pics !!!!

 10-08-2007, 05:24 AM
#18
Your work is on par with those MKIV Supra guys that go all-out even for their street cars. Good work, I wish my engine bay looked half this nice! Admittedly, those with white paint seem to get screwed over with the engine bay. Seems like it always shows the worst on white 
10-08-2007, 07:05 AM
#19

Looking great! I too wanted to do something similar when I had my engine out, but got way to lazy. It's a lot of work and something only an owner would really appreciate. Instead I cleaned the fire wall and stopped there.
Last edited by 97SMG; 10-08-2007 at 10:03 AM.


 10-08-2007, 09:53 AM
#22

not sure that this thread is as educational as everyone says, but it is interesting. great attention to detail. i wouldn't be able to resist chroming and powder coating EVERYTHING if i had my engine out. i was planning on having my engine rebuilt...
10-08-2007, 11:07 AM
#23


Nice work! I am probably going to take off some of the exposed brackets that are rusted and repaint them after I put my MEVI in....to clean it up a little bit.
Also, when polishing the P/S lines, just use 2000 grit sandpaper and what kind of polish? Haha youre motivating me to go all out now....
Also, when polishing the P/S lines, just use 2000 grit sandpaper and what kind of polish? Haha youre motivating me to go all out now....
 10-08-2007, 12:04 PM
#25

hell yeah, thats awesome. when i had my motor out I put a wire brush drill tip to everything I could but there was just sooooooo much to do like you said.
I need to get a sandblaster!! that tranny mount looks awesome.
im inspired.
I need to get a sandblaster!! that tranny mount looks awesome.
im inspired.


 10-08-2007, 02:02 PM
#29
outstanding......i plan on following suit when i pull my engine to replace my exhaust studs  just can't wait until my son is old enough to help!
this kind of 'deep cleaning' actually increases powertrain, and electrical system longevity.
mad props!
just can't wait until my son is old enough to help!this kind of 'deep cleaning' actually increases powertrain, and electrical system longevity.
mad props!
 10-08-2007, 02:13 PM
#31
Nice work but I have some tips. Dont leave any metal bare or it will corrode. The block and tranny get all ugly and scaly quick. Either clear coat it or paint it silver. Last year I spent a week straight from 4-10pm detailing my old SER's engine bay and engine. I painted everything but the distributer.
It went from this when I picked it up

To this with a month of work off and on:

And finally when I really went to town:

It went from this when I picked it up
To this with a month of work off and on:
And finally when I really went to town:

 to every part of that. Good job, except for the part were you insult the rattle can, it's all in the prep.
10-08-2007, 04:26 PM
to every part of that. Good job, except for the part were you insult the rattle can, it's all in the prep.
10-08-2007, 04:26 PM
#34

Your work is on par with those MKIV Supra guys that go all-out even for their street cars. Good work, I wish my engine bay looked half this nice! Admittedly, those with white paint seem to get screwed over with the engine bay. Seems like it always shows the worst on white
To the OP: VERY nice man! I wish (1) I had the time for that, and (2) I had the patience. Enjoy it man!
10-08-2007, 07:55 PM
#36
Attetention to detail! VERY nice job! I really like how "since you were in there" ... lol I really like the pic of the kids. Reminds me of working on my dads 55' Bell Aire Chevy as a kid. 
Keep up the good work and keep us posted!!!
Keep up the good work and keep us posted!!!

 10-08-2007, 10:27 PM
#39
Cheesing away...

Join Date: Jan 2003
Location: Dallas, Tx
Posts: 1,613
looks great, can't wait for the final pics
01-09-2008, 09:25 PM
#40
Well the swap is all done. Here is the pic of everything in place:
A pic of some of my new engine grounding. Thanks to Irish for the inspiration:
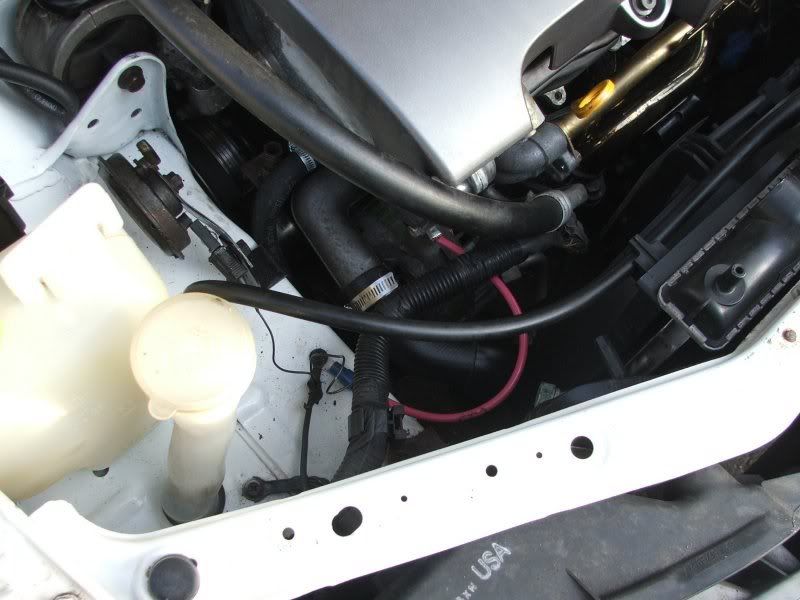
And finally just a pic of coolant lines and headers:
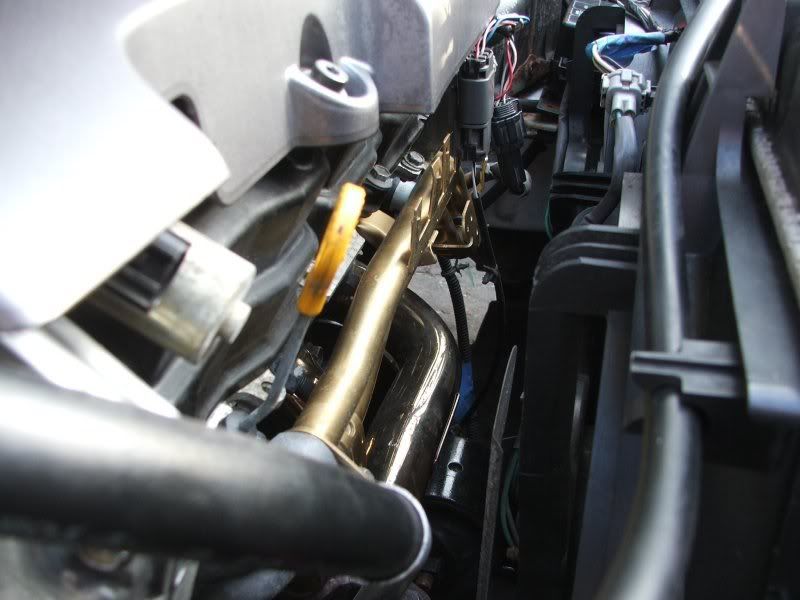
Here is a pic of my ghetto fabb'd throttle body:
Now... the cost of my swap was $2236. That includes an engine hoist and engine stand. Without those it would be just over 2 grand.
It took me 3 months, working <very> part time on it. Or about 100 hours total. Keep in mind I was refurb'ing quite a bit of stuff in the engine bay, so not all that time was spent purely on the swap. I could probably do the swap in 2 days now.
I also did the swap completely alone. Meaning no help with the engine, lifting, cleaning, etc. I don't really suggest doing it that way :/ But it is possible.
I am not super-mechanically inclined, and wiring is not my strong suit, but all the information I needed was in the stickies of the All Motor section. I also needed some odds and ends and searched to find bits of information. That and having the parts in front of me helped a lot.
The biggest challenge (besides removing axles) was fabricating the throttle body. I found setting the timing pretty easy. I got it spot on the first try, but I didn't like the fact that the slack was all on the wrong side of the tensioner and was worried about skipping teeth. So I redid it and made sure all slack was taken up by the tensioner.
Next biggest challenge was the soldering. I did the injector connectors (thanks gtr rider), crank sensor and 02 sensors from the 3.5--they were lower mileage... by 110,000 miles.
I still have a lot of projects left to do. But the car runs now, so I can tackle them as I have time and one weekend at a time.
A pic of some of my new engine grounding. Thanks to Irish for the inspiration:
And finally just a pic of coolant lines and headers:
Here is a pic of my ghetto fabb'd throttle body:
Now... the cost of my swap was $2236. That includes an engine hoist and engine stand. Without those it would be just over 2 grand.
It took me 3 months, working <very> part time on it. Or about 100 hours total. Keep in mind I was refurb'ing quite a bit of stuff in the engine bay, so not all that time was spent purely on the swap. I could probably do the swap in 2 days now.
I also did the swap completely alone. Meaning no help with the engine, lifting, cleaning, etc. I don't really suggest doing it that way :/ But it is possible.
I am not super-mechanically inclined, and wiring is not my strong suit, but all the information I needed was in the stickies of the All Motor section. I also needed some odds and ends and searched to find bits of information. That and having the parts in front of me helped a lot.
The biggest challenge (besides removing axles) was fabricating the throttle body. I found setting the timing pretty easy. I got it spot on the first try, but I didn't like the fact that the slack was all on the wrong side of the tensioner and was worried about skipping teeth. So I redid it and made sure all slack was taken up by the tensioner.
Next biggest challenge was the soldering. I did the injector connectors (thanks gtr rider), crank sensor and 02 sensors from the 3.5--they were lower mileage... by 110,000 miles.
I still have a lot of projects left to do. But the car runs now, so I can tackle them as I have time and one weekend at a time.